This is a slight deviation from reefing, but it is related for all of you DIY electronics reefers out there. I stumbled across this video recently and it is AWESOME! It shows you how to make a modular design for a snap-fit case. You can change a few variables and it automatically resizes and adjusts to the new variables.
Stand Fit and Finish
Out of order and as promised, here are the details on the final steps getting the stand put together. I’ve yet to finish the doors, so that will come in a subsequent post. They will be finished the same as the rest of the tank and unless I wind up doing something CRAZY, they’ll look the same as the drawing. Now then, onto the fun…
When we left off I had just finished putting the top and bottom bases on the frame. I was able to get the frame squared again after the assembly work racked it by about 1/4″. Phew! At this point the only thing to do is start the finishing.
My previous stand was made of veneered MDF. If you don’t already know, MDF and water are a BAD combination. The MDF swells pretty severely when wet and becomes very unstable. Since this stand is solid pine that shouldn’t be an issue, but it is still good practice to seal it well.
I opted for a multi-step approach. First, I sealed the edges all around the bottom of the frame with silicone. I don’t expect any water to actually collect under here, but at least this will keep it from getting trapped in a joint. Next, the entire inside of the frame got two coats of Killz Latex paint. This is a stain blocker and primer and it helps provide a good layer for the next layer of finish to stick to. Killz will keep any sap in the wood from leaching out and making a dark spot too. After the Killz came three coats of Rustoleum Appliance Epoxy Paint. Unfortunately the paint needed 24 hours to dry between coats, so this held me up for quite a while.
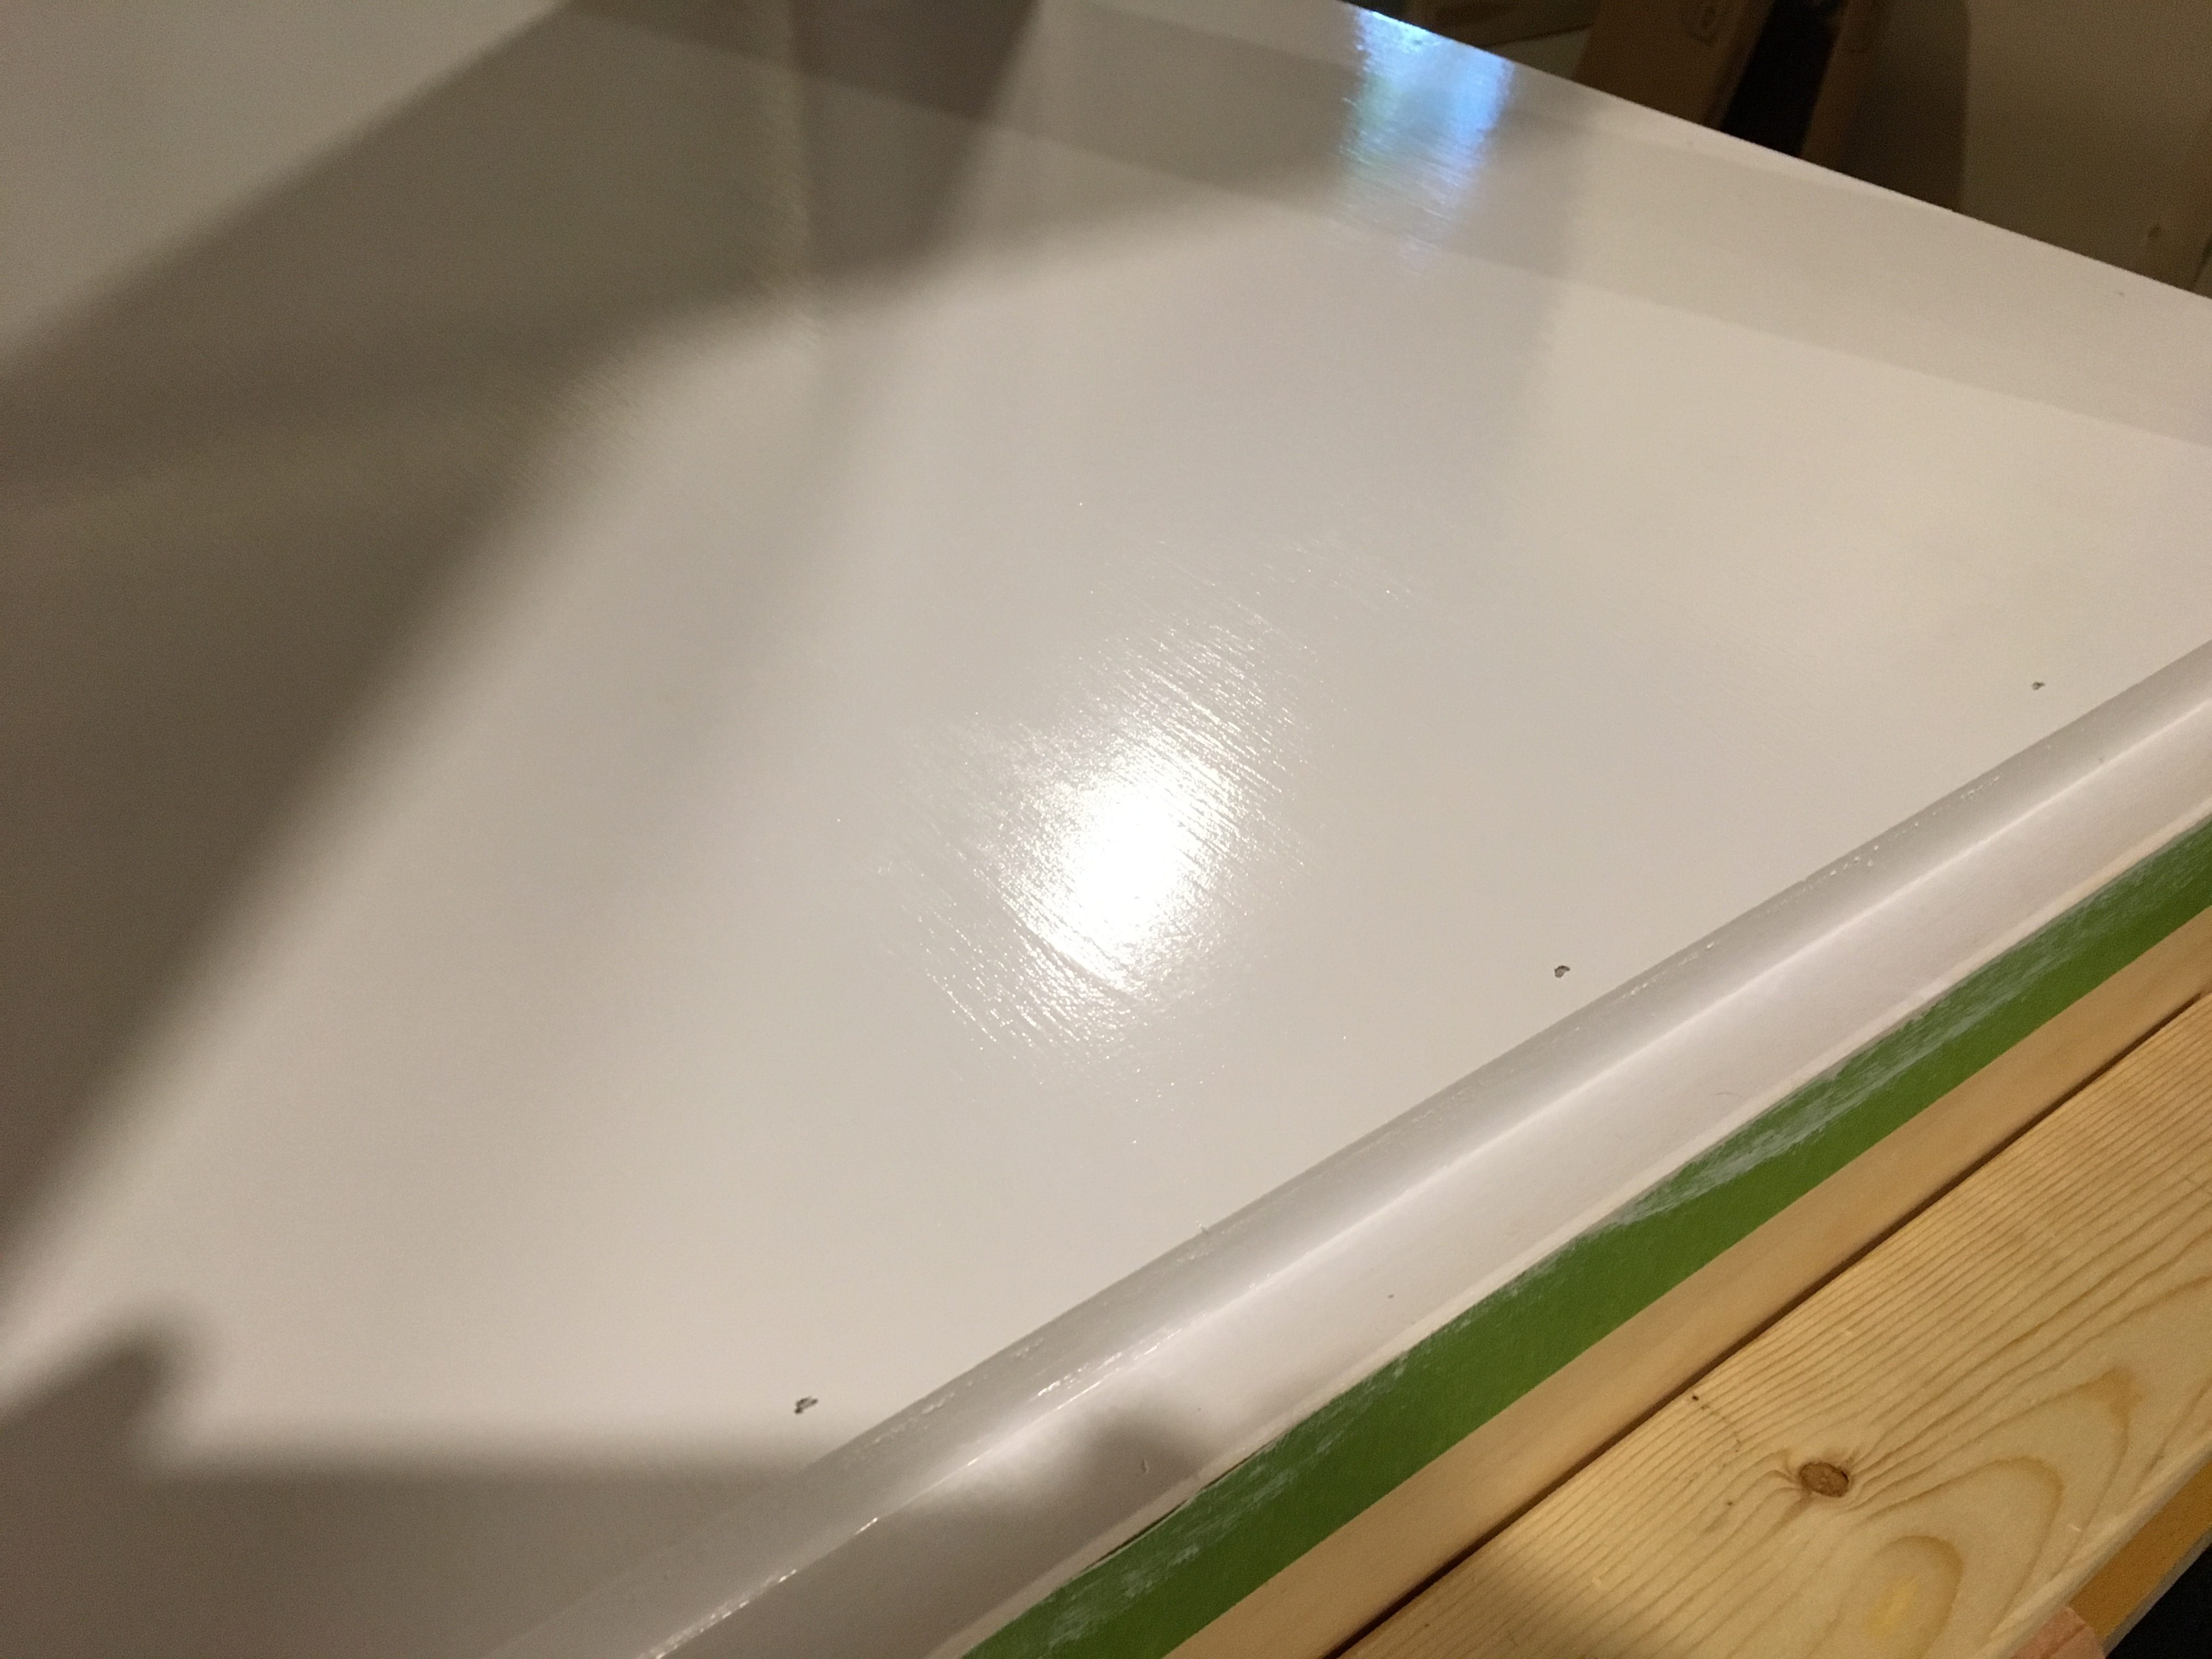
Expoxy Paint and Silicone Sealant for the Base and Inside of the FrameIf you’ve never used an epoxy paint there are two things to know about it: 1) it is hard as a rock when applied properly, and 2) it STINKS when you’re applying it so open a window or work outside. I went with three coats on the base just to make sure I wouldn’t damage the finish when sliding things around under there. Water beads up on the epoxy and protects the wood underneath. The frame itself only got one coat since they just need splash and humidity protection. Here’s how it came out:

Next up, it is time to stain the outside of the stand. I went with another Rustoleum product called Varethane. It is actually a surface treatment and not really a stain, but it comes in a nice antique whitewashed finish that matched the look I was looking for. I thought it would be a quick way to finish the stand, but it turned out I was in for quite a few coats. After one coat the color change was very subtle. You can see in this picture the difference between a scrap of unfinished pine and the stand with one coat of stain.
Subtle, right? There’s a balancing act between letting the stain sit longer to get a deeper finish and letting it sit too long and leaving splotches. I opted for the safer route of more coats. It took 5 coats to get to the look I wanted, but it came out awesome!
Now it is time to lock in that finish and protect it. Pine, if you don’t already know, is very soft so it very easily gets damaged from accidental bumps and scrapes. Also since the finish is actually a surface treatment, it needs to be protected so it doesn’t wear off. My initial plan was to use polyurethane as the sealant. It dries rock solid and provides great protection. I did one coat on the top and realized I made a big mistake… Polyurethane dries with a yellow tint! Crap! Luckily it was only on the top and you won’t see it once the tank is sitting there.
I switched to using polycrylic which dries completely clear. It’s actually easier to work with than polyurethane, so that turned out to be a blessing in disguise. I did three coats of the polycrilic all around. I used 220 grit sand paper between coats and 400 grit on the last one. The final product is silky smooth with a rock hard protective finish. Now that the messy work was done, it was time for the stand to move upstairs!
You can really tell the difference where the polyurethane went on top versus the polycrylic that went on the rest. Glad I caught that early! One nice surprise was just how light the stand is. It is 36″ x 36″ x 30″, so it is quite big and awkward to carry, but I easily got it up the basement steps by myself.
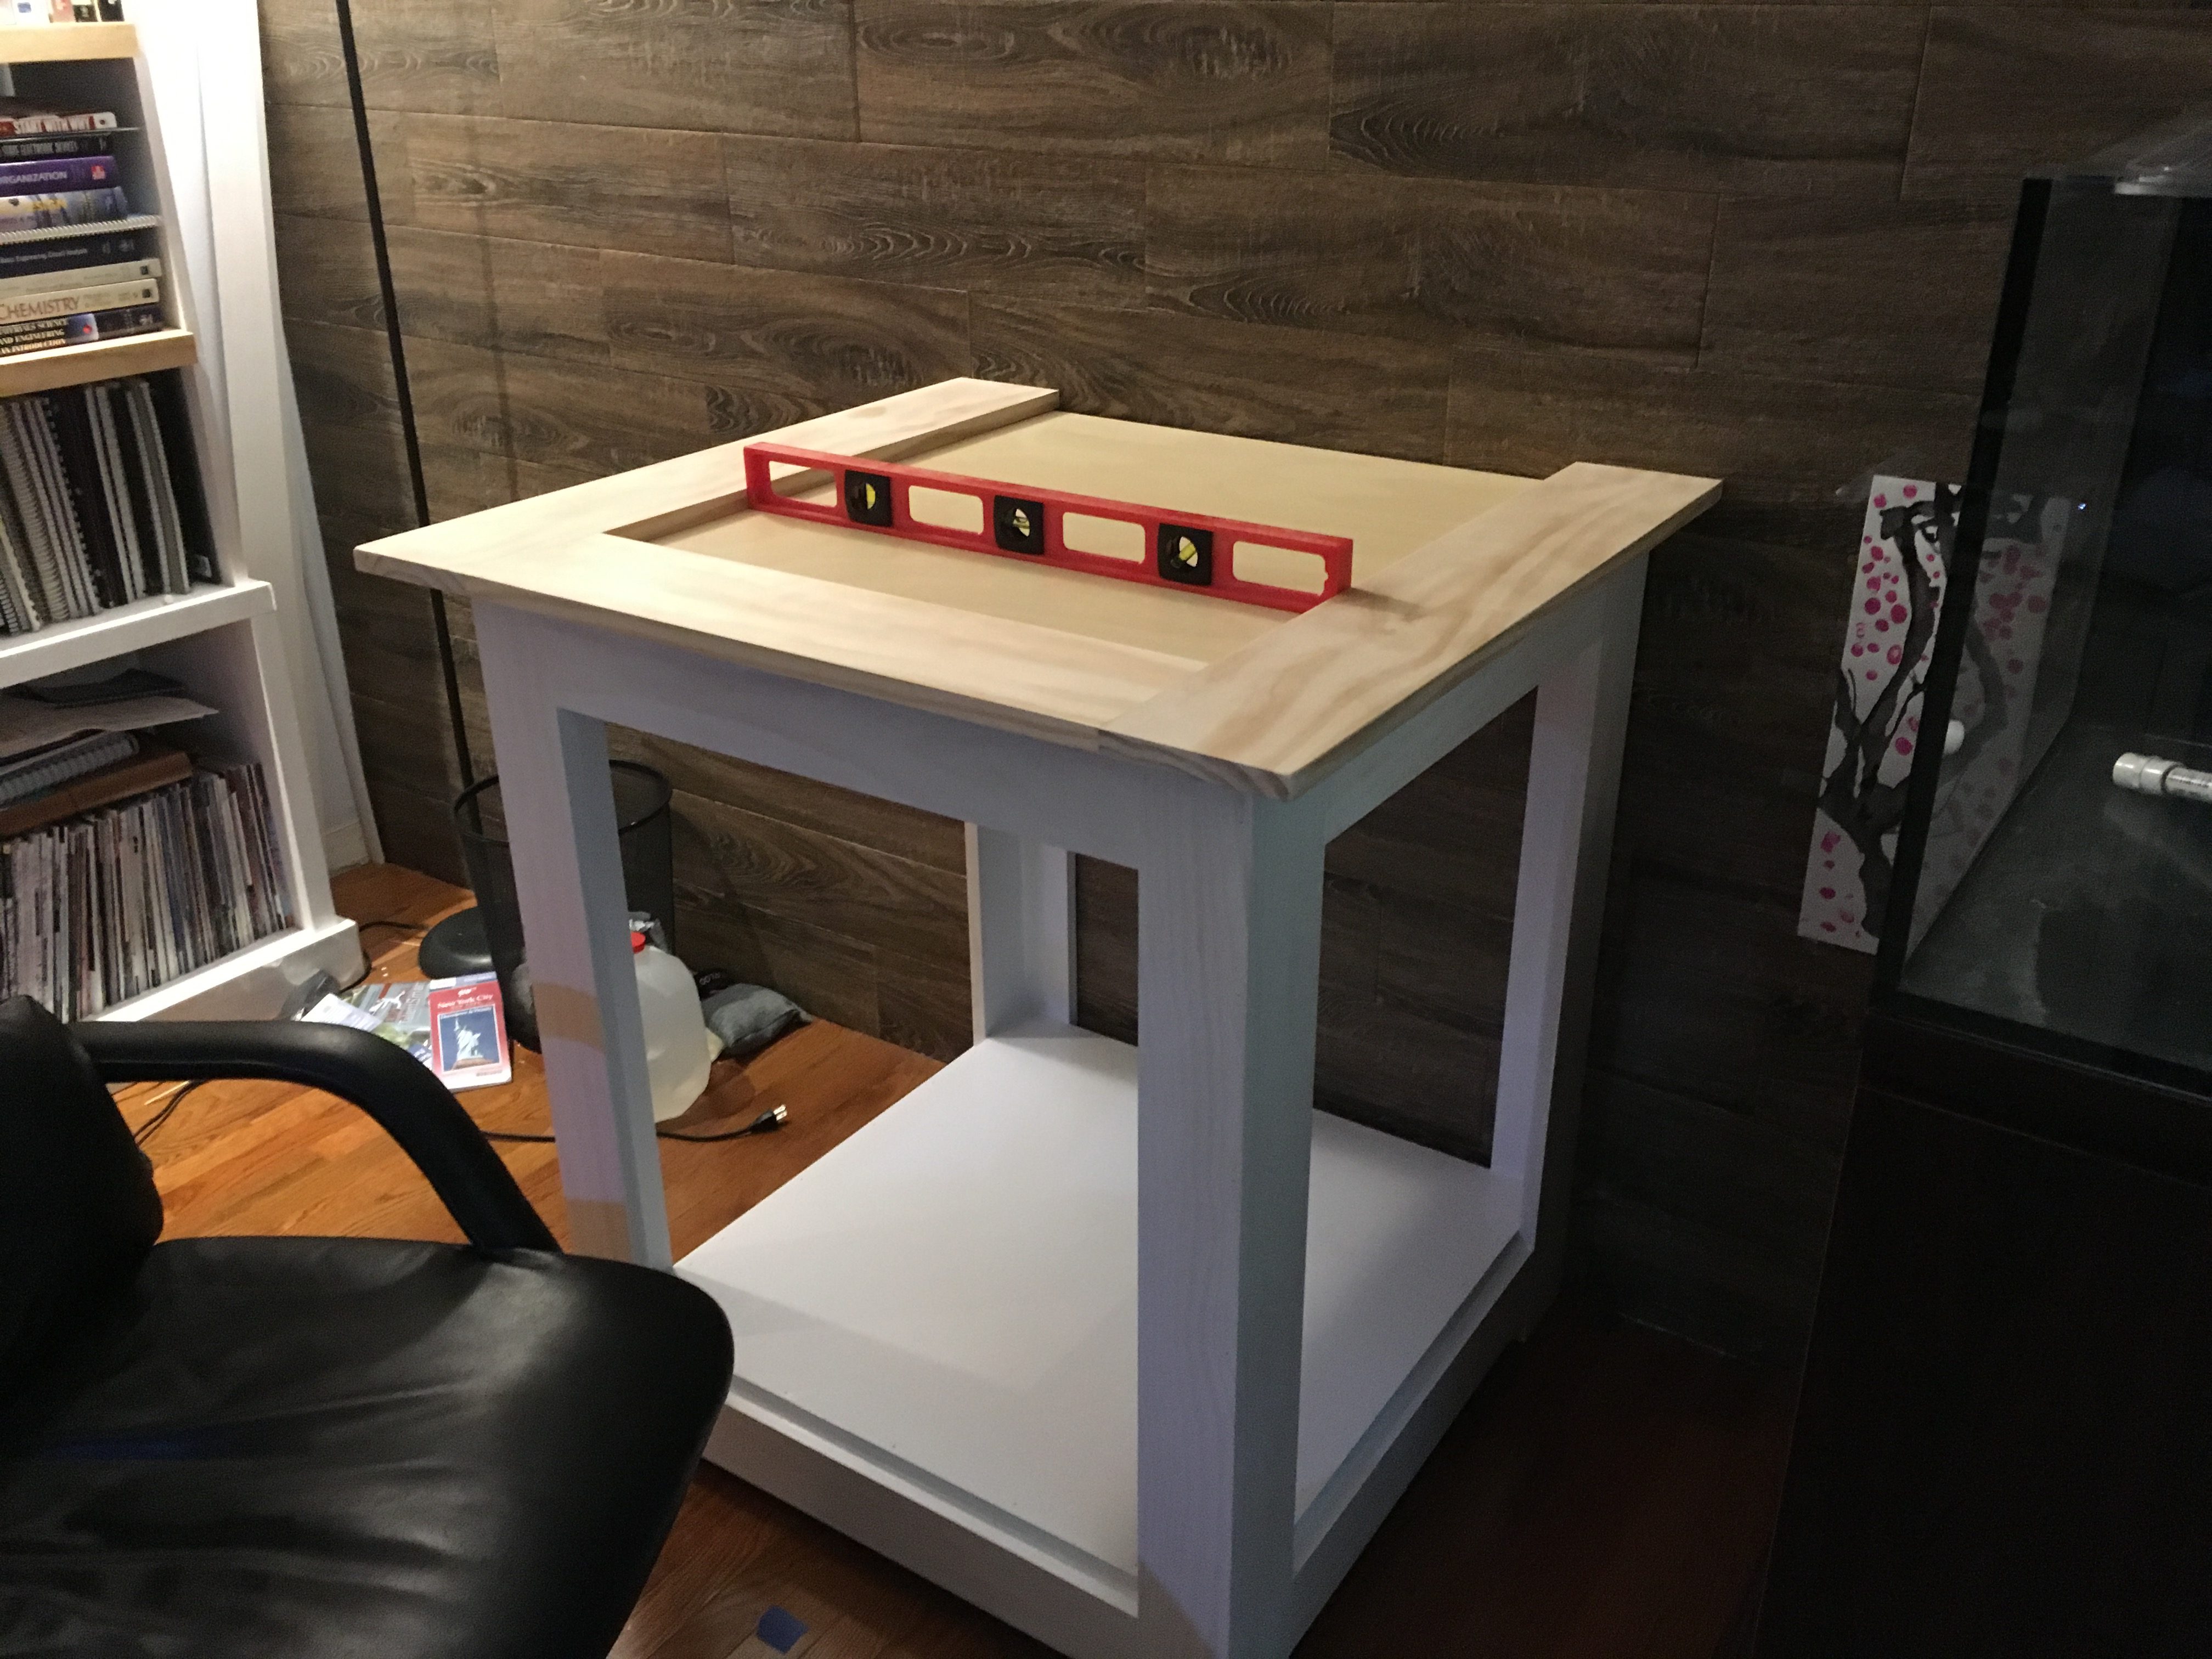
The moment of truth is to see if everything stayed level and survey says….
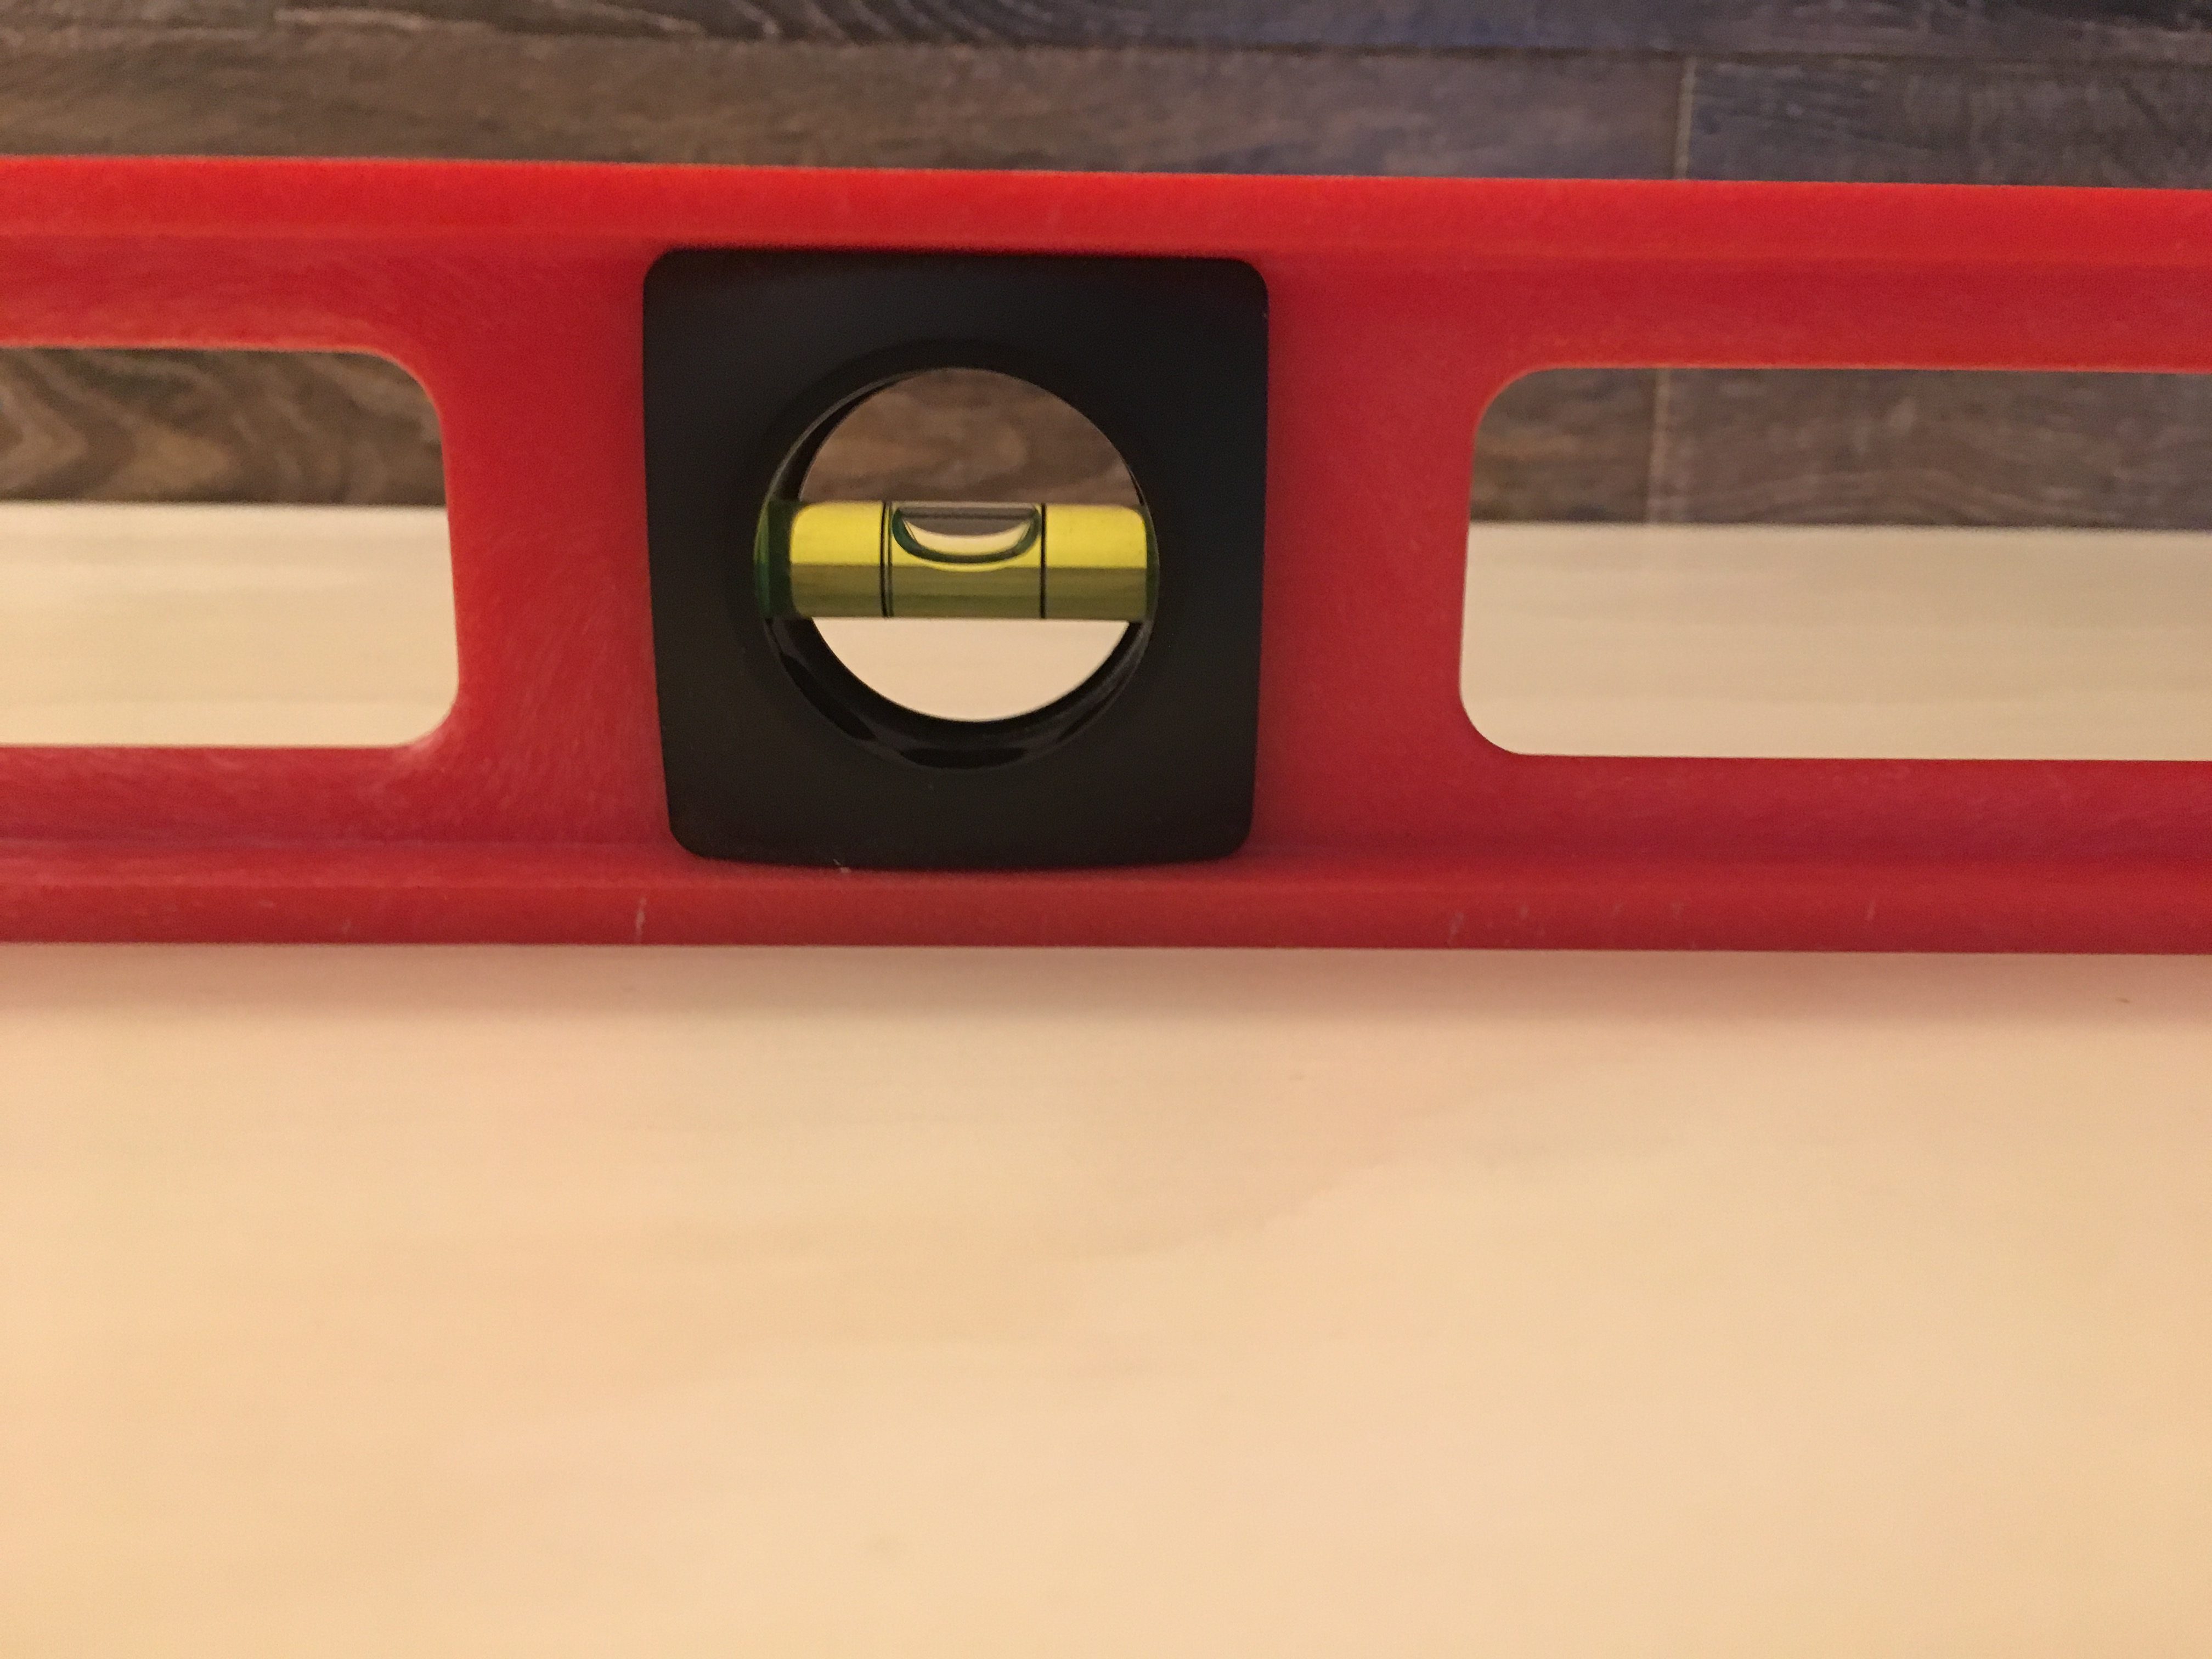
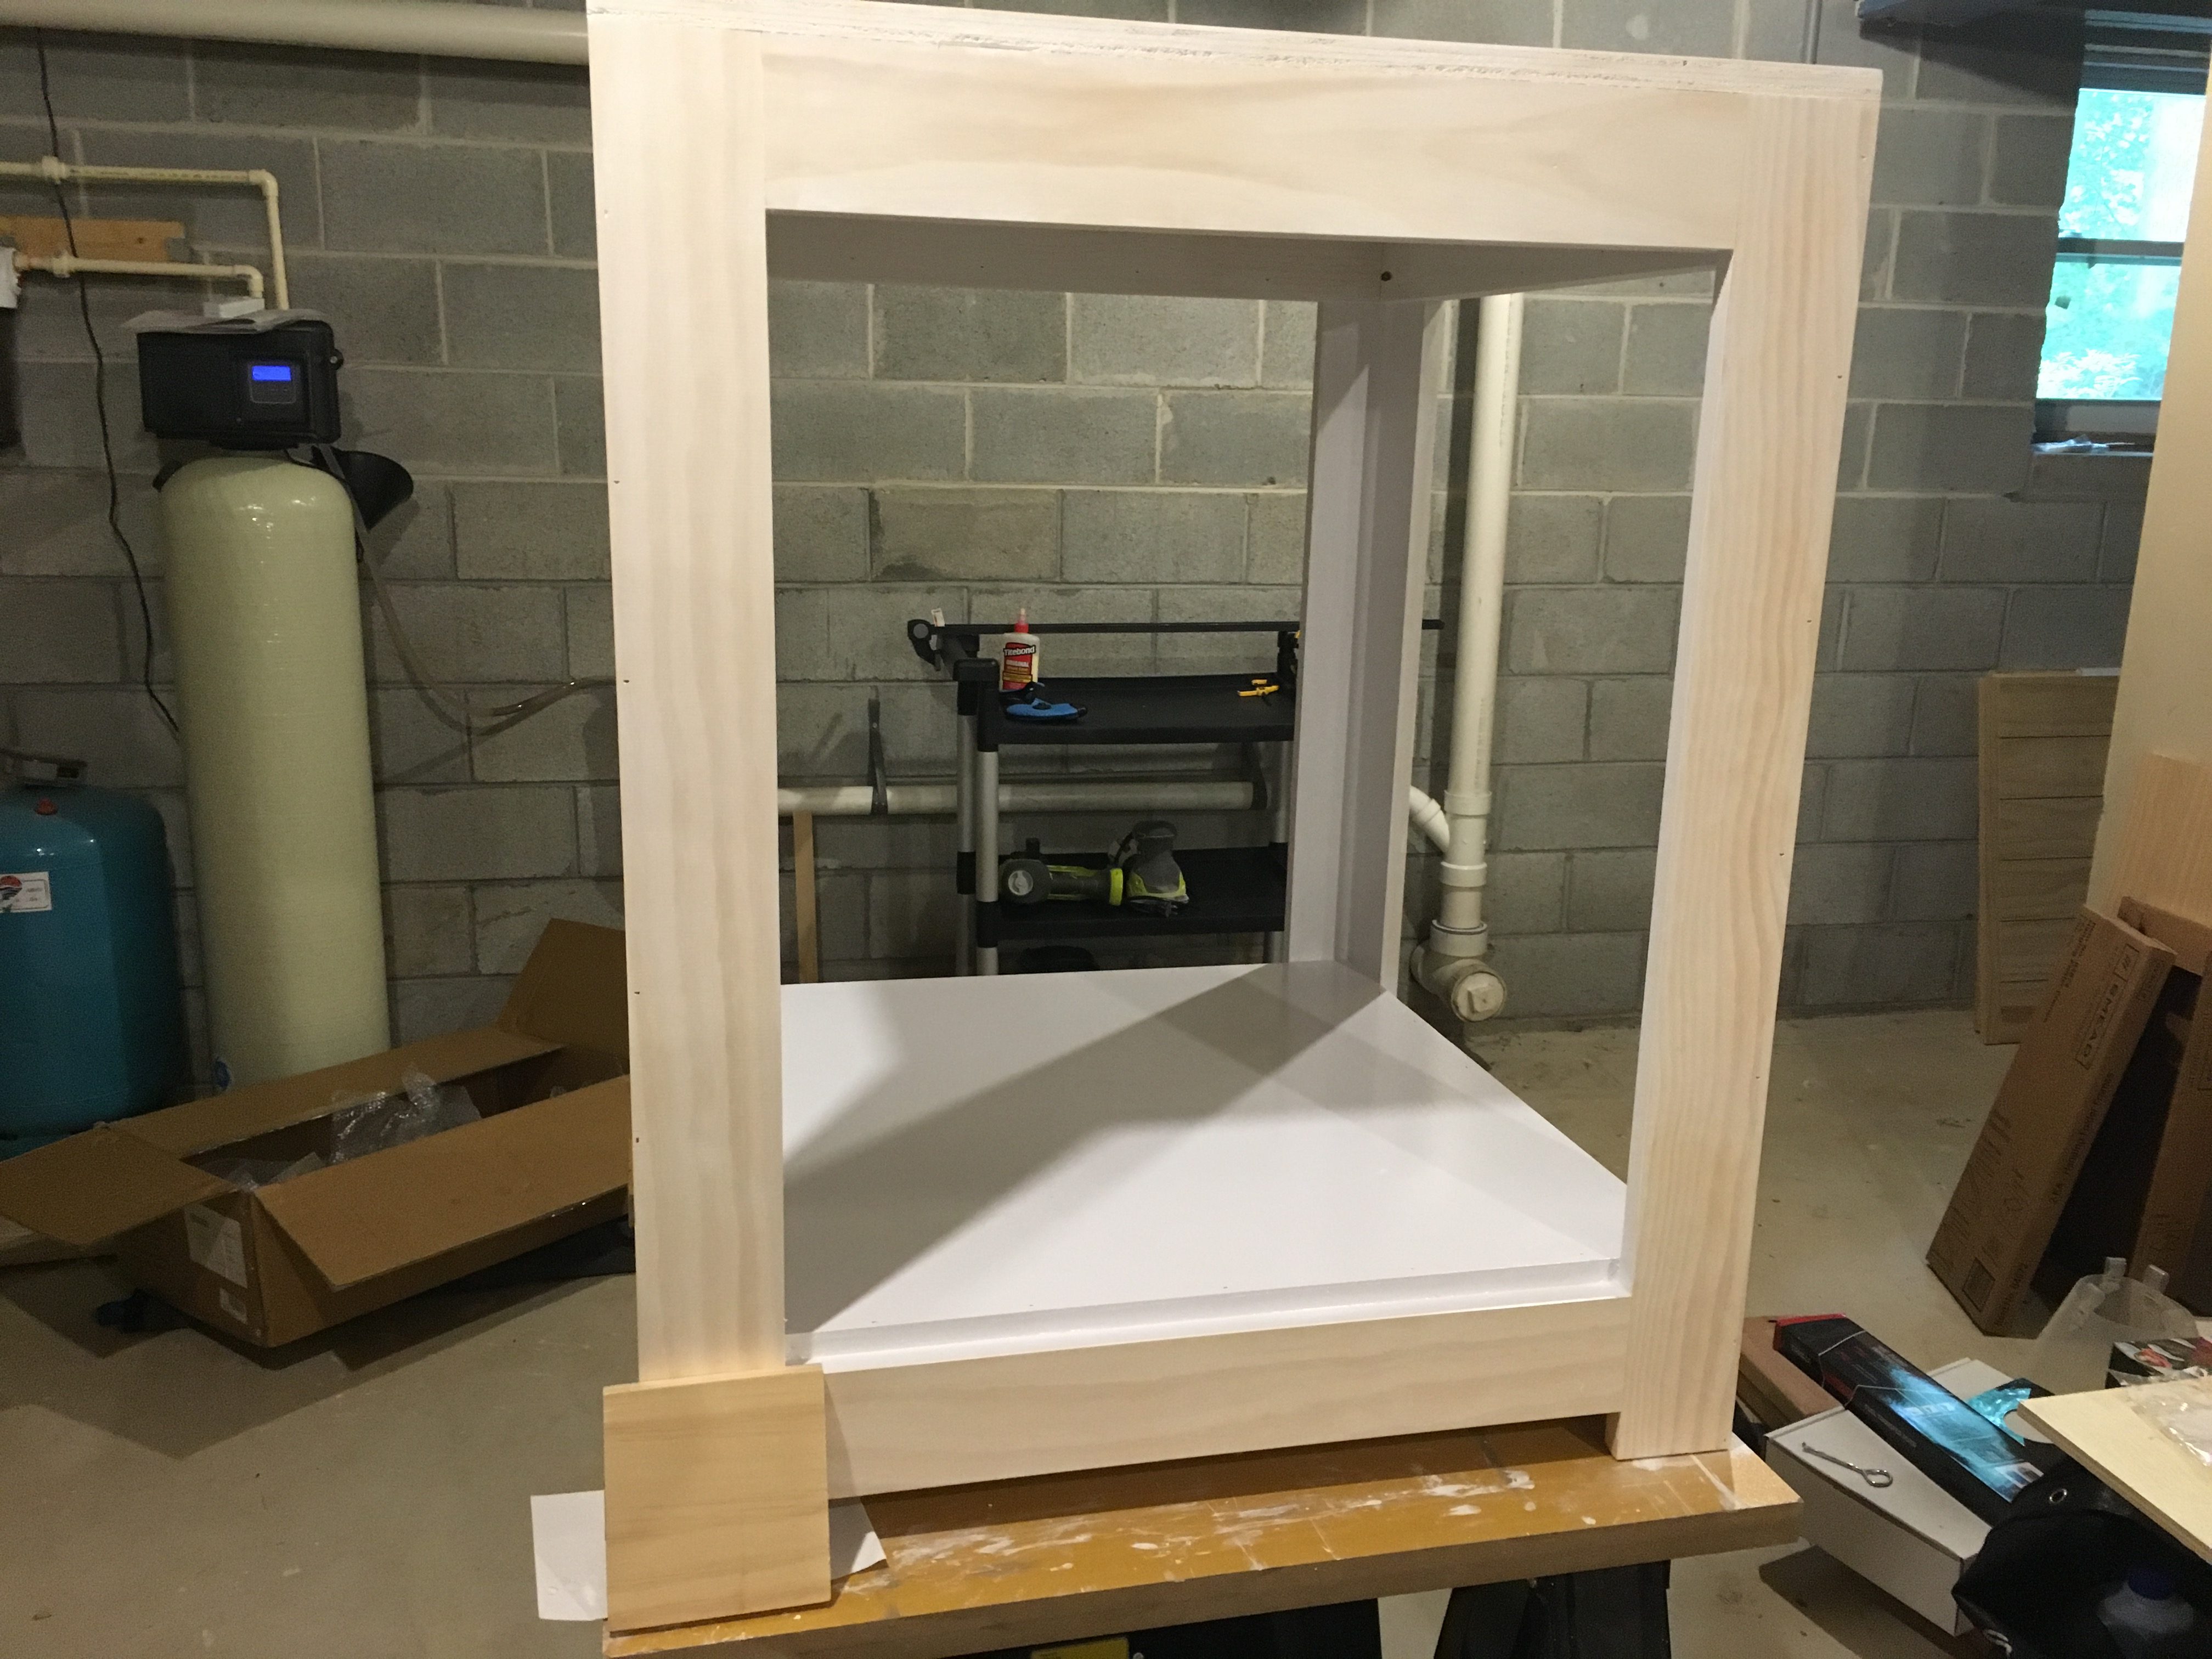
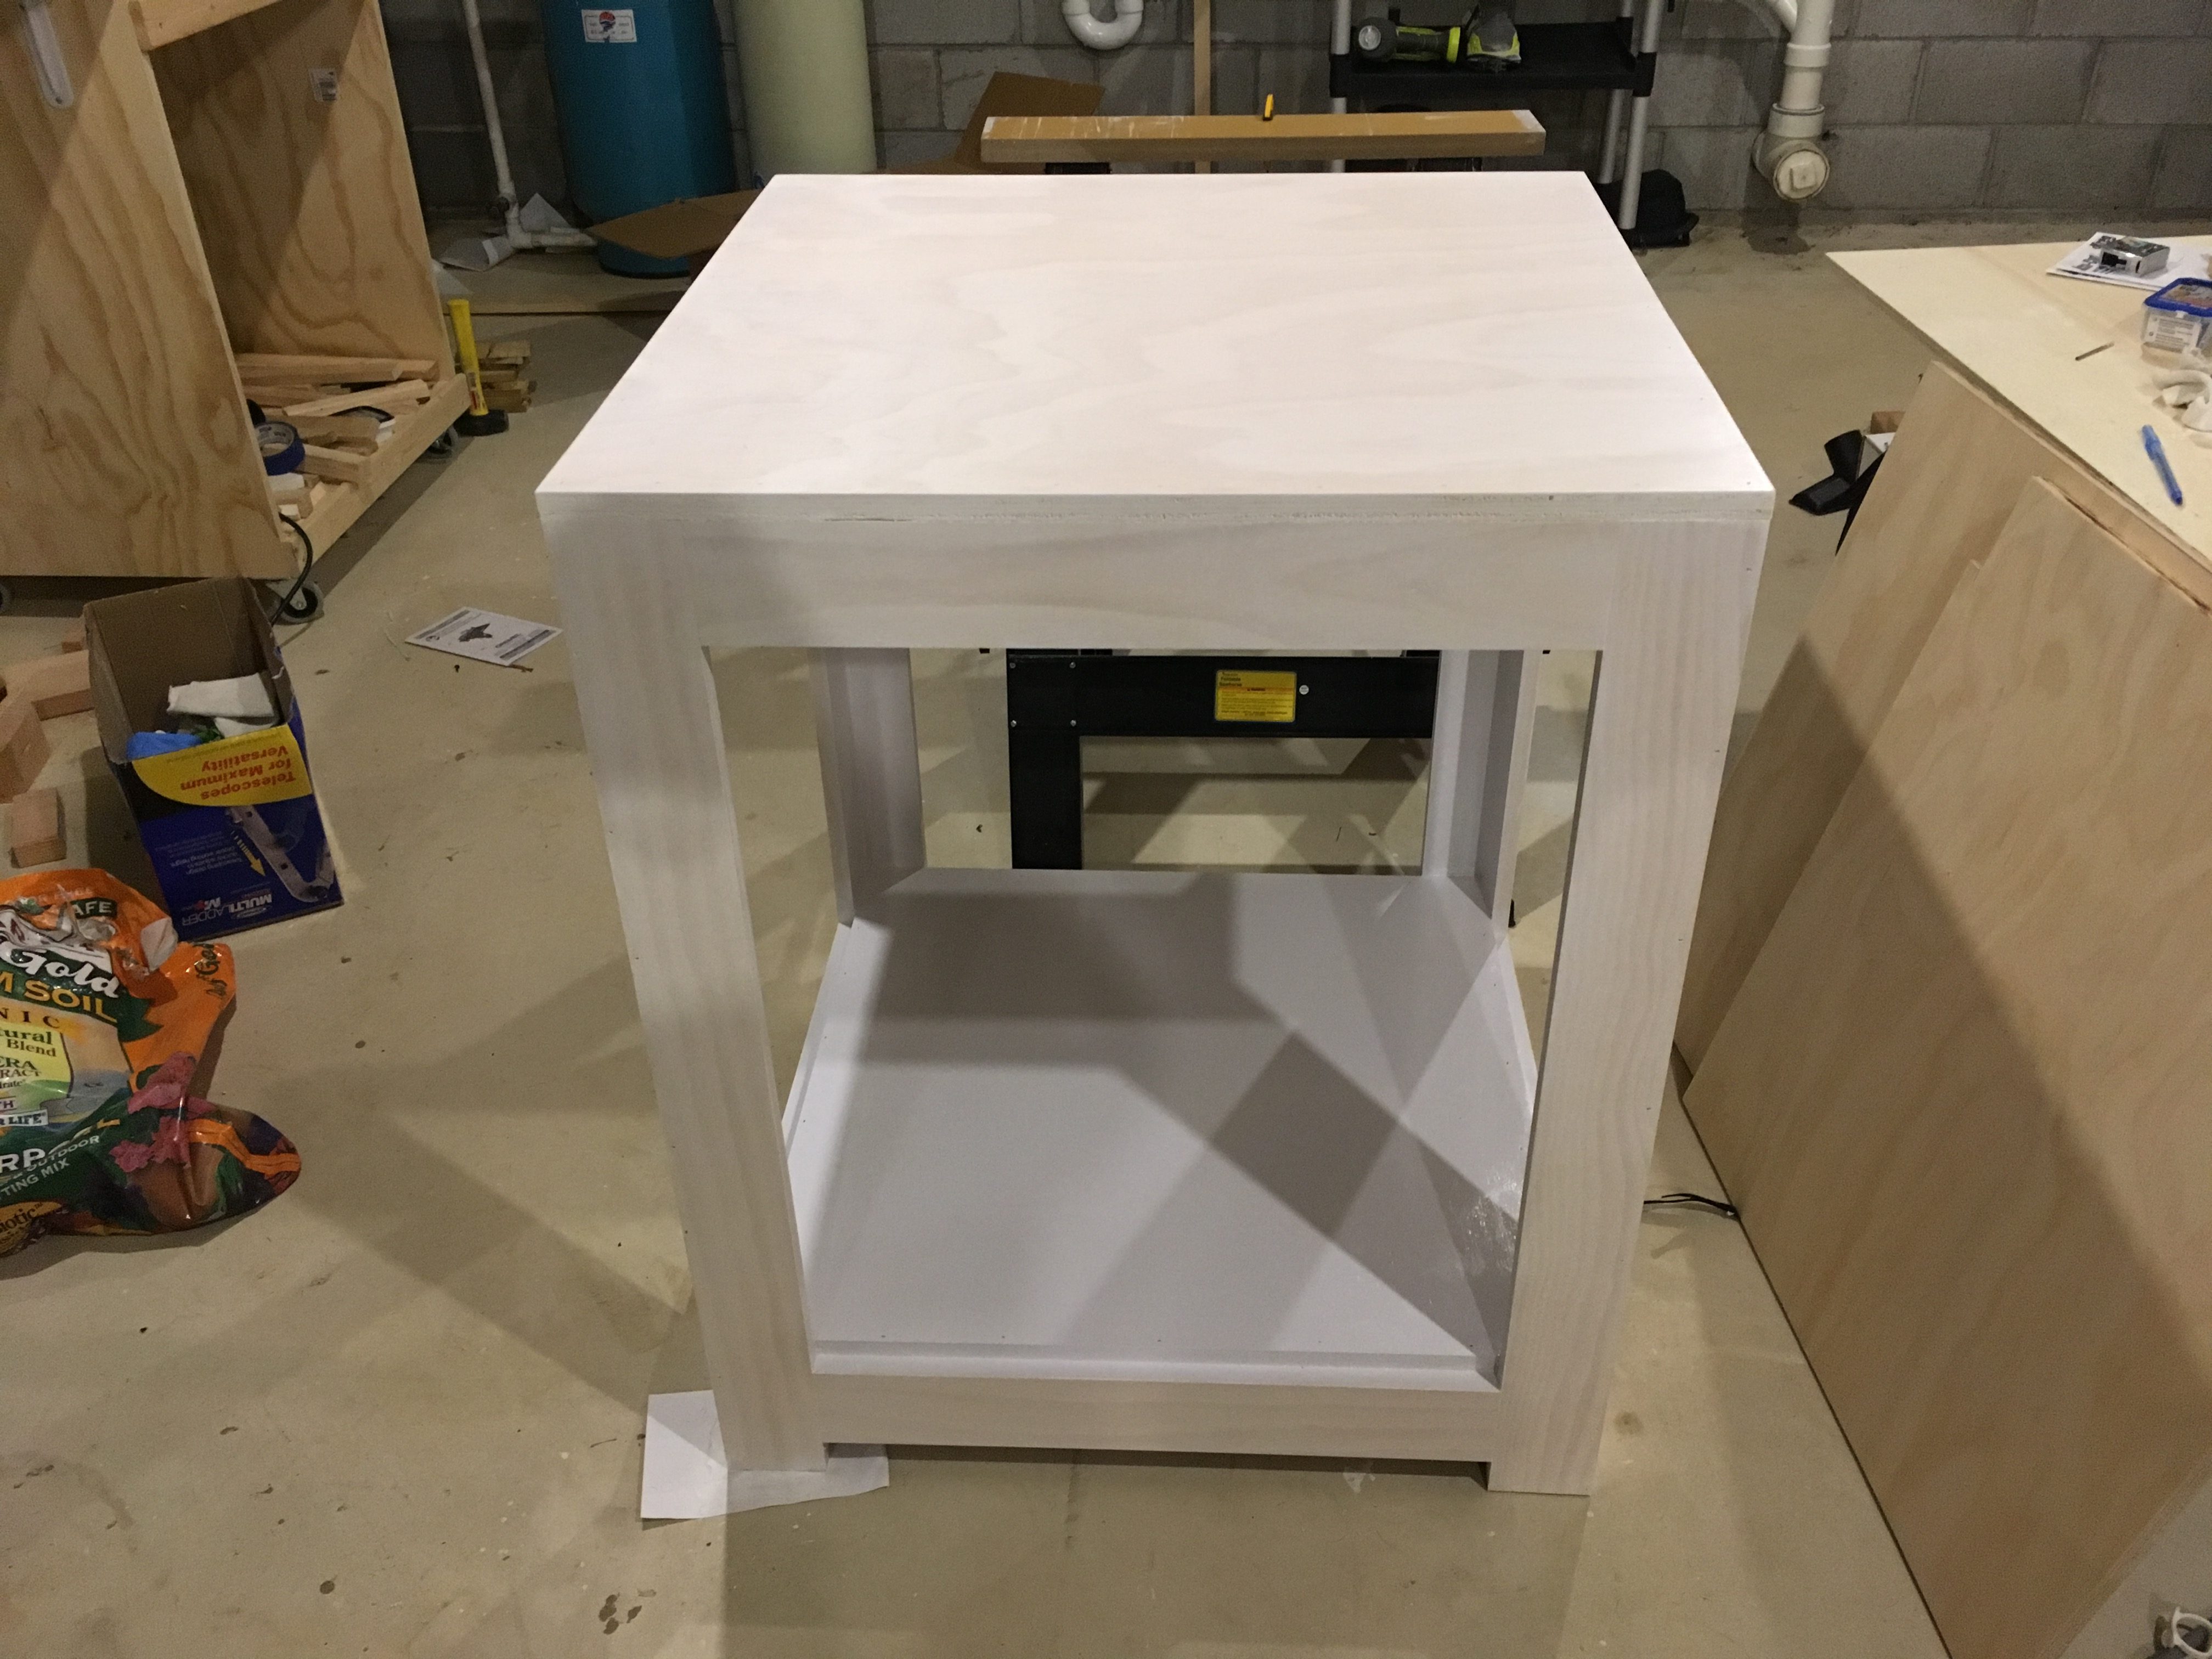
NAILED IT! Woot woot! Now the last bit of construction on the frame is to fit up the electronics section. A few pieces of plywood later (and several days because I did the same epoxy paint finish on this) and voila!
The last thing I’ll touch on in this post is the ledge for the top. It is just a simple butt joint for the three pieces of pine, but it really completes the look.
And I’ll leave you with this final picture. I couldn’t help myself and I had to slide the tank onto the stand and the front door clamped on to see how it would look. GLORIOUS!
Take a look at how things turned out (minus the doors) in this post. Look for my next post soon about the aquascape and mounting the light.
The Stand is Finished! (Almost)
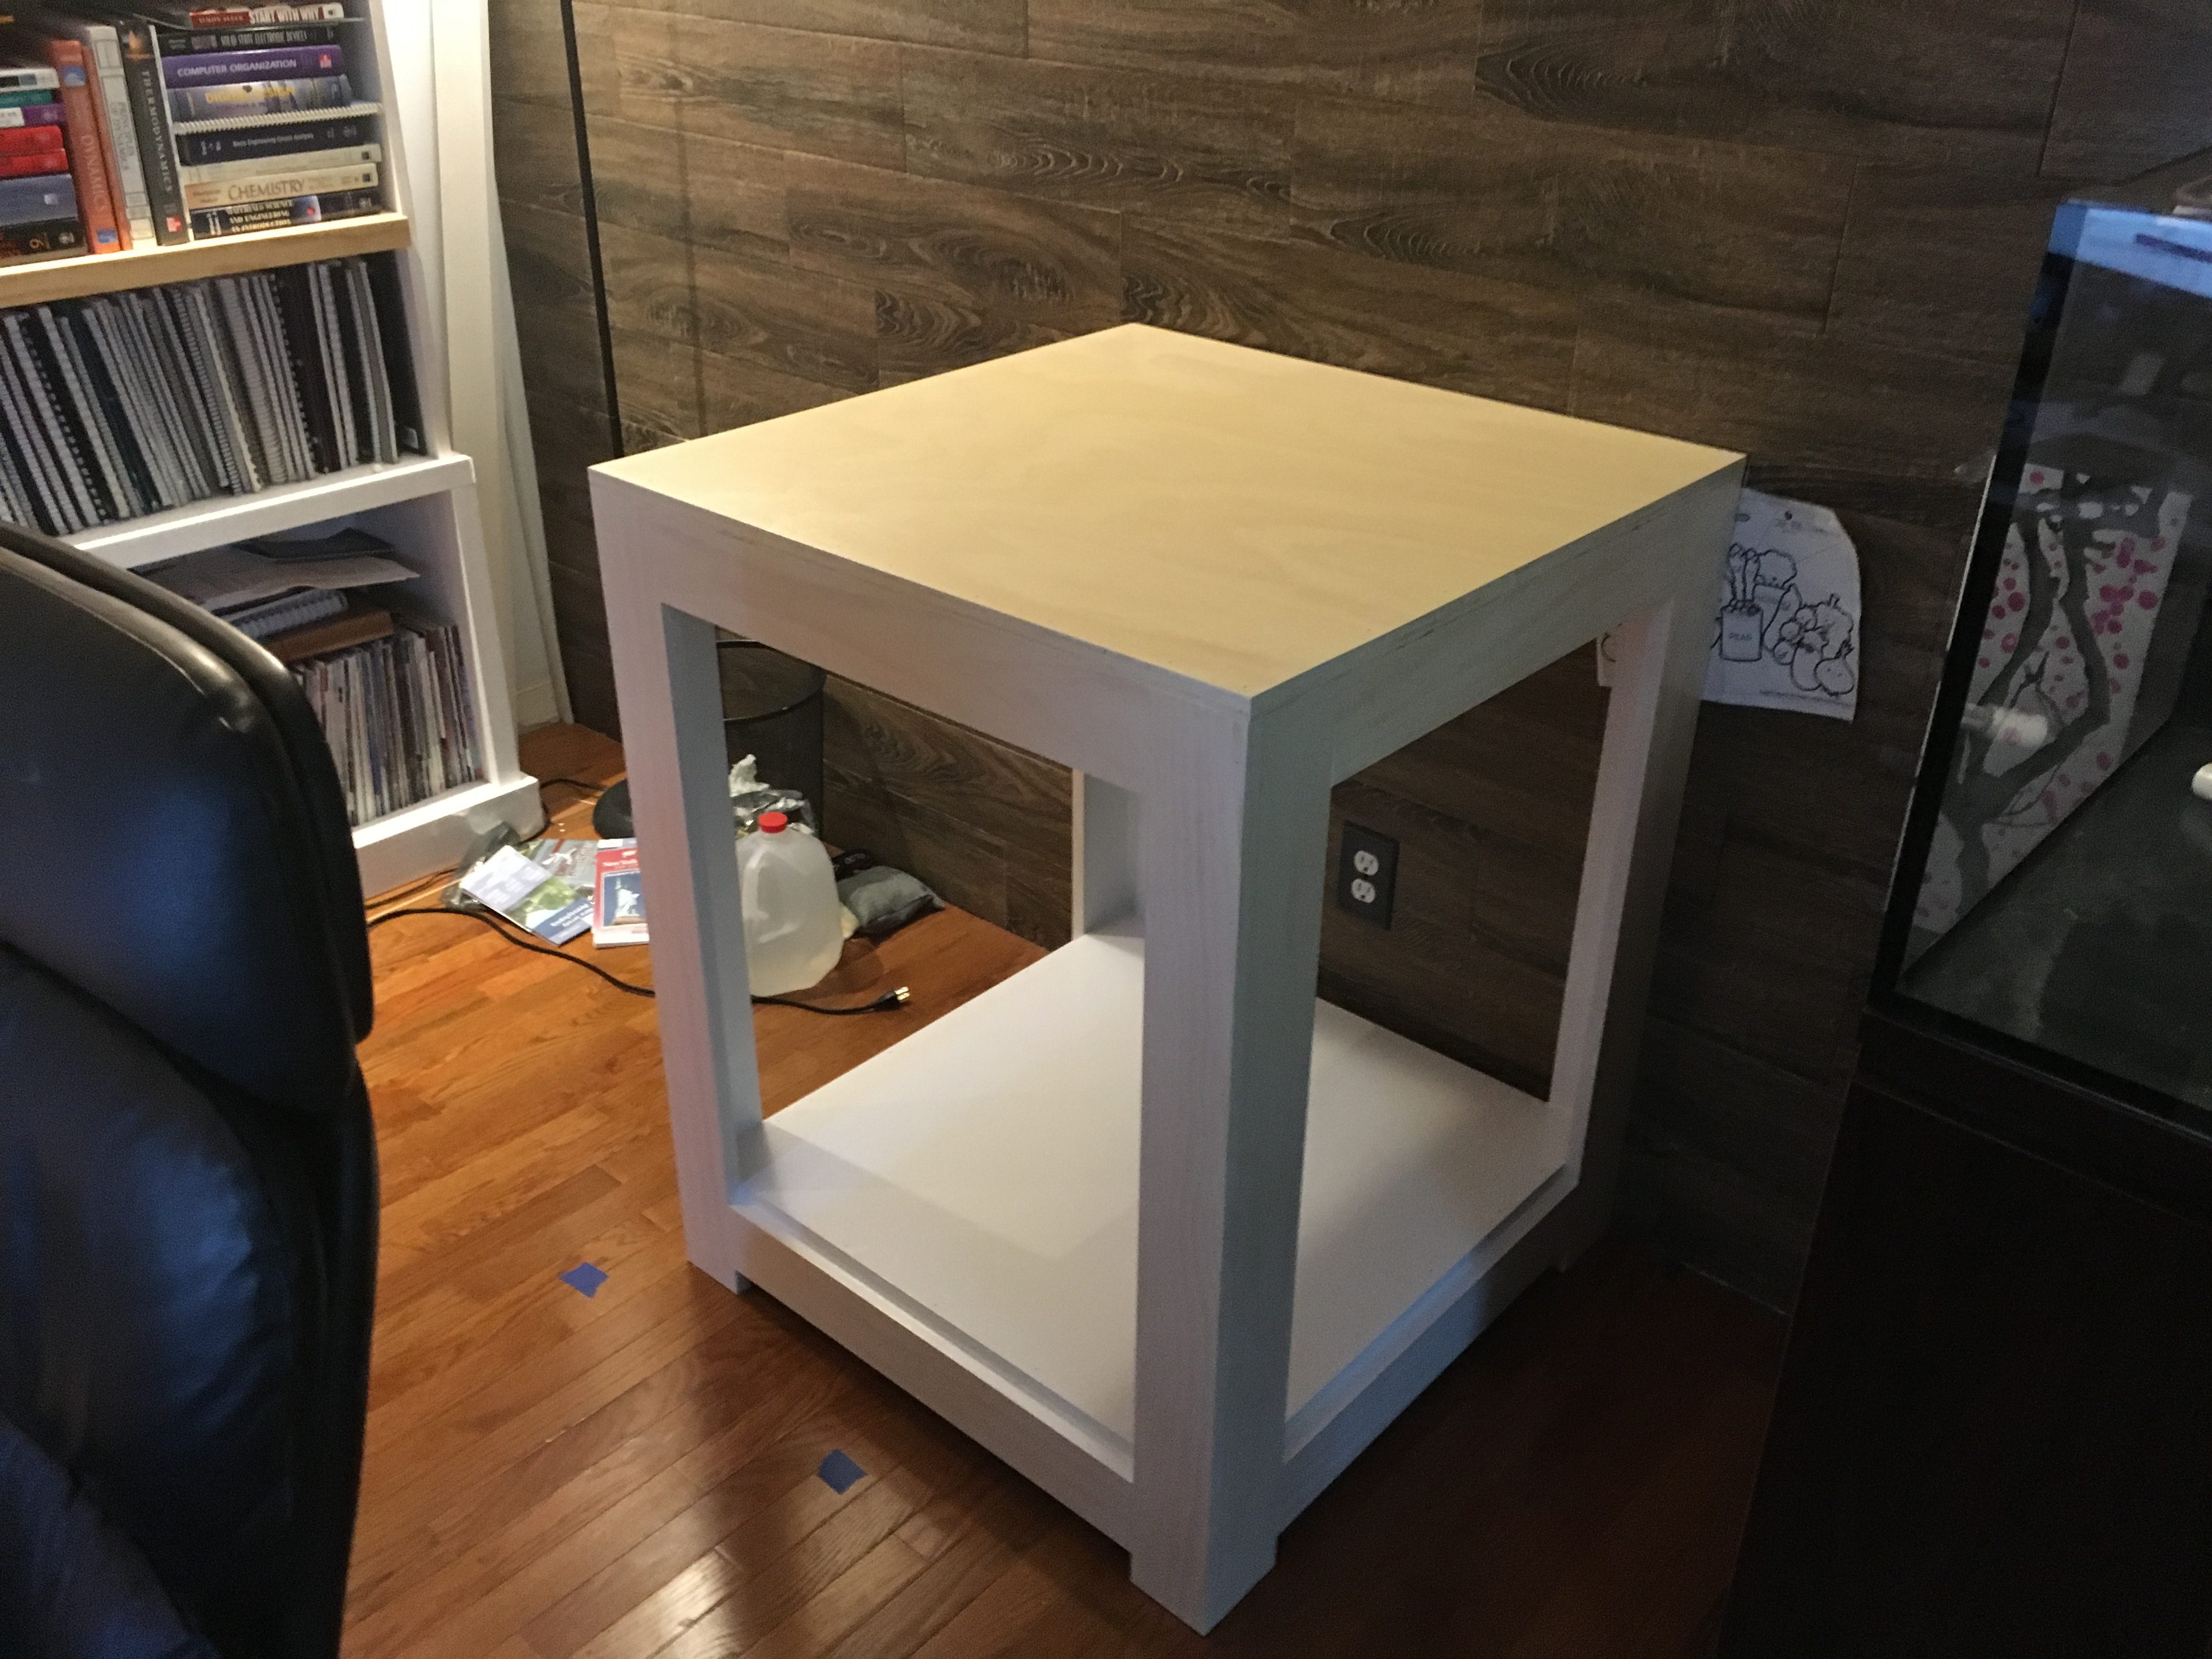
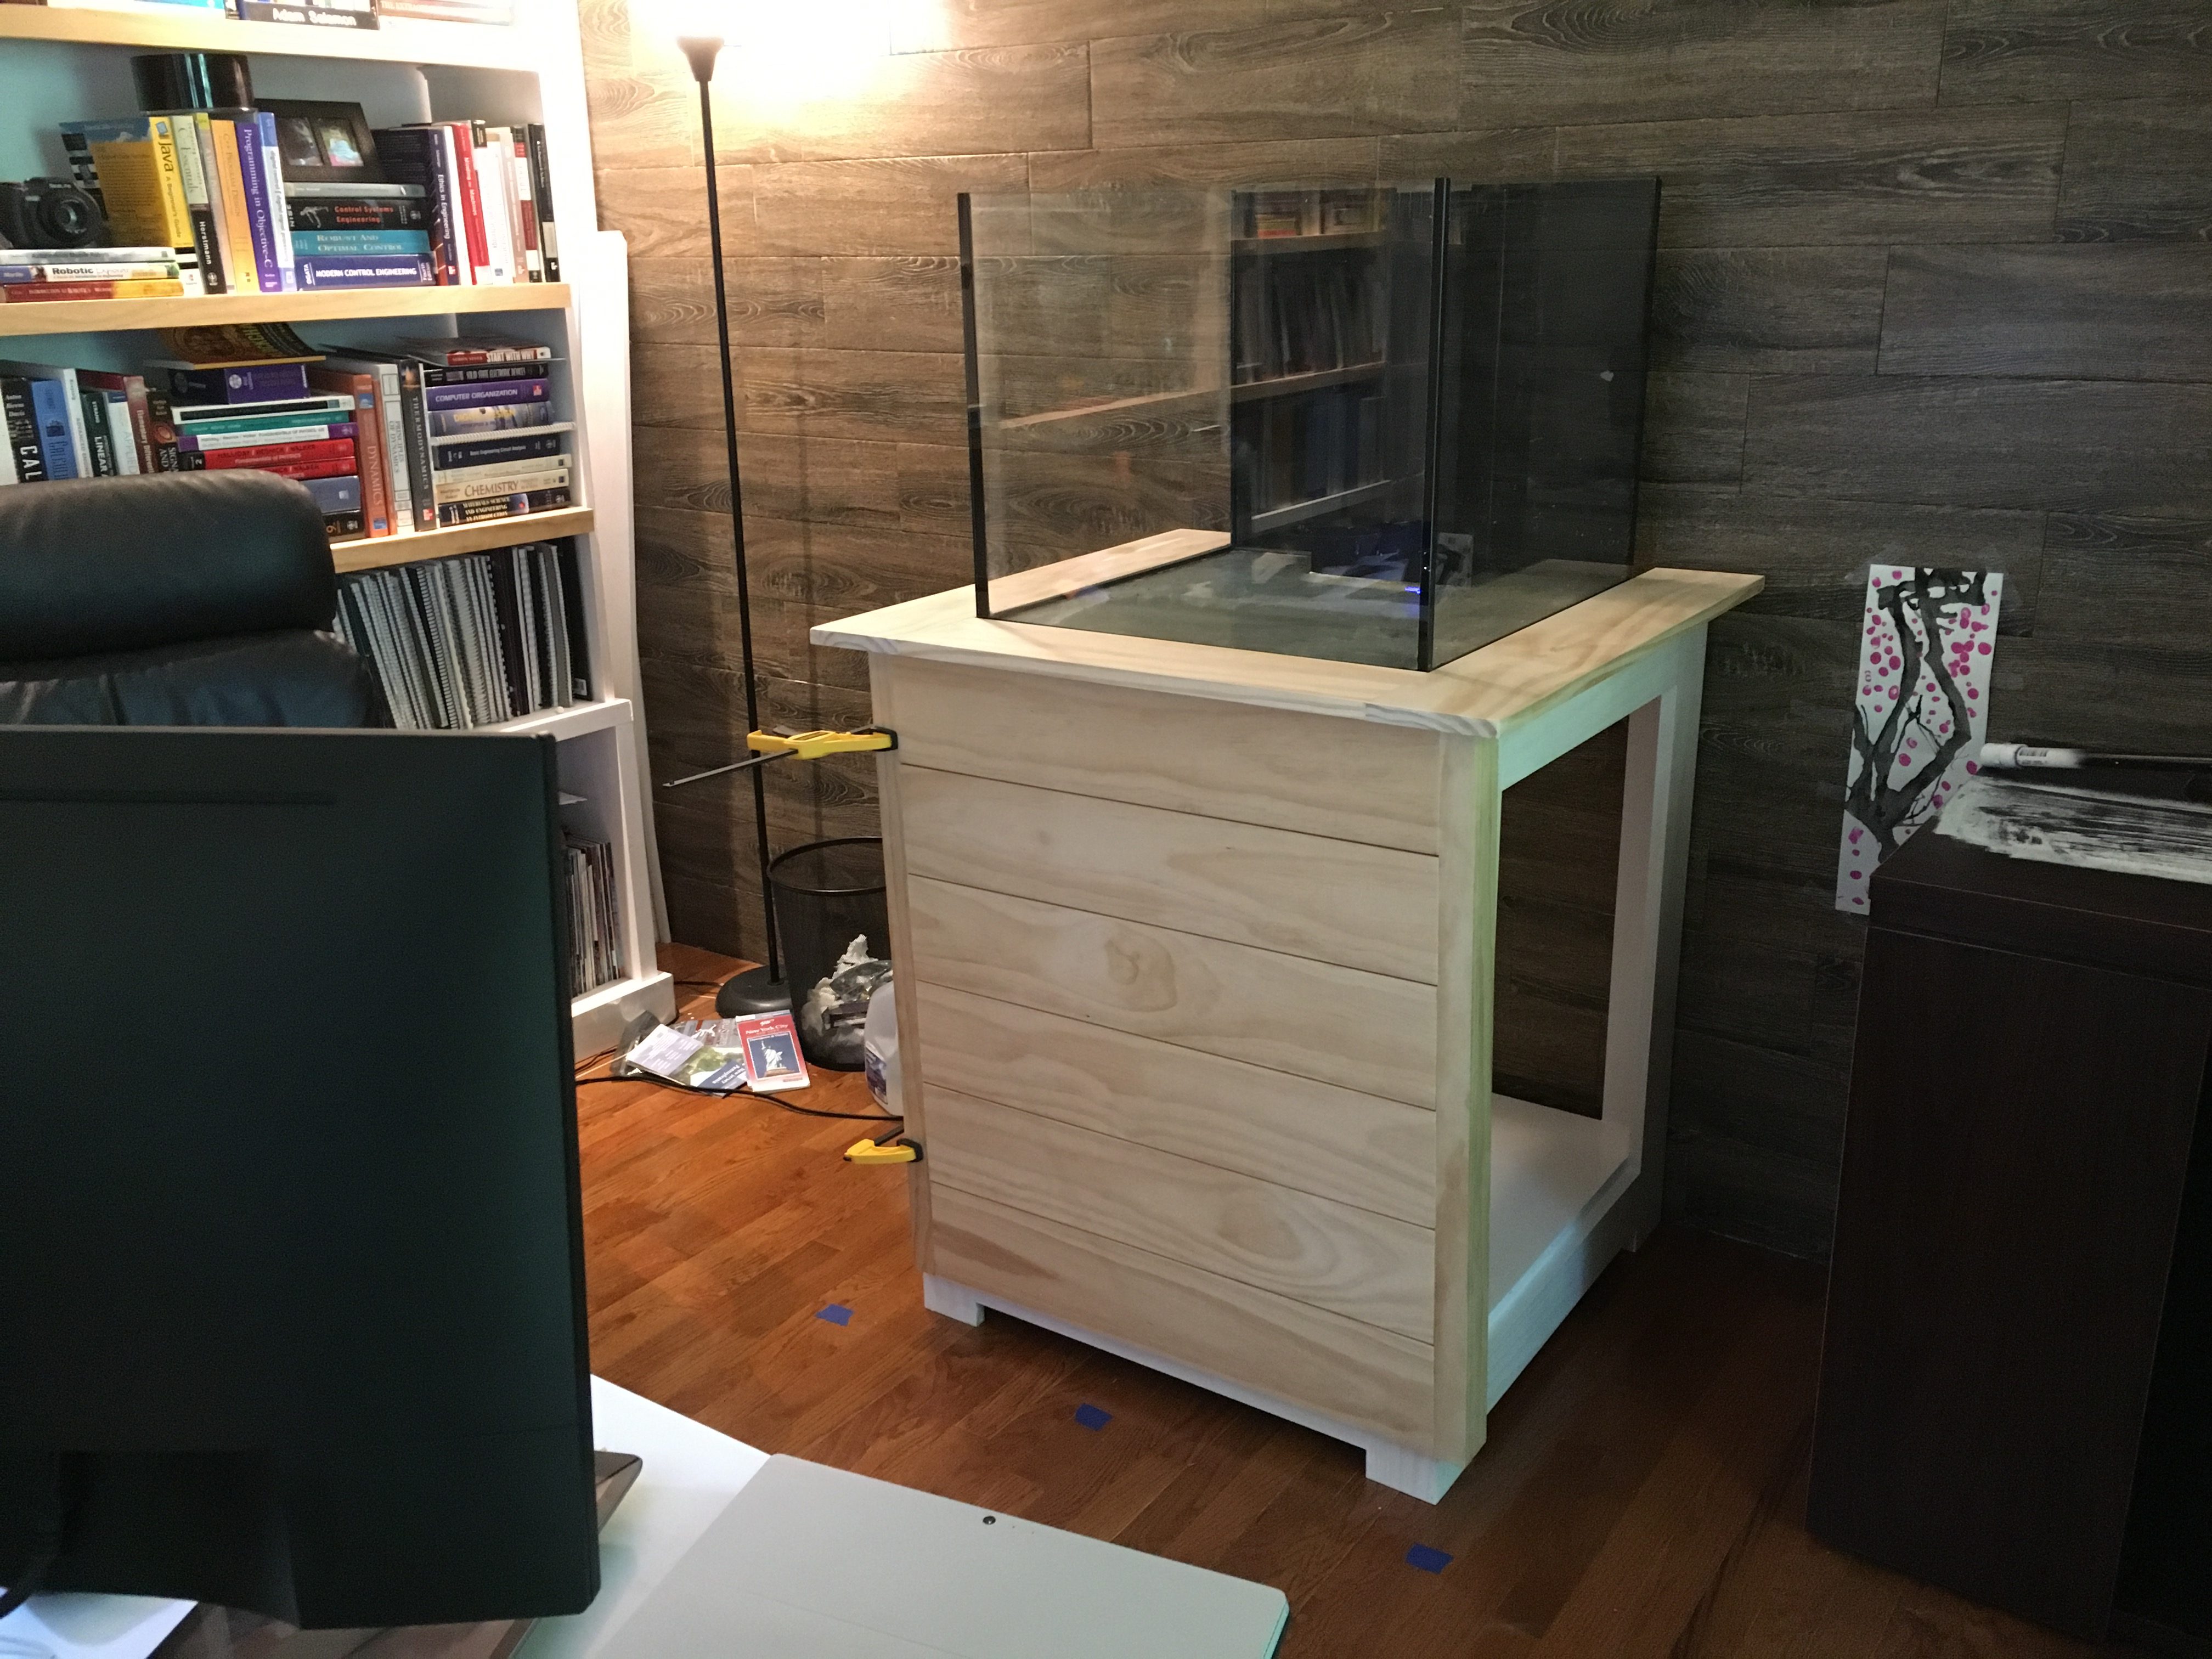
Ok, let’s face it… I’m terrible at getting back here to keep things updated. It’s been just over a month since my last update and I’m proud to say that as of 3 days ago the stand (minus the doors) is finished and the tank is back up and running! Woot woot! I’ll come back and talk about the last bits of construction work in another post, but you’d rather see the finished product now, right?!
Here’s the (almost) finished product!

I love the way it came out! The color matches the built-in bookshelves and my desk, there is a TON of space under the stand and the separate space for electronics is working out great! The height is perfect for when I’m sitting at my desk, which is immediately in front of the tank. It is a little tall for me to reach the bottom of the tank, but I can just reach it if I stand on my toes and stretch.
After getting the tank filled with NSW (a process that took me almost a week because I have high CO2 and I need to degass my RO water before the DI stage) I wound up having to swap out my return pump after realizing it was probably putting out maybe 200 gallons per house. Lucky for me, so many years in the hobby means I have tons of spare equipment in the basement. There is a QuietOne 4000 in there now temporarily with flexible hose. I’ll hard plumb that at some point. The biggest issue right now is if I have to disconnect it the process is VERY unpleasant.
Anyhow, let’s move on to the electronics…
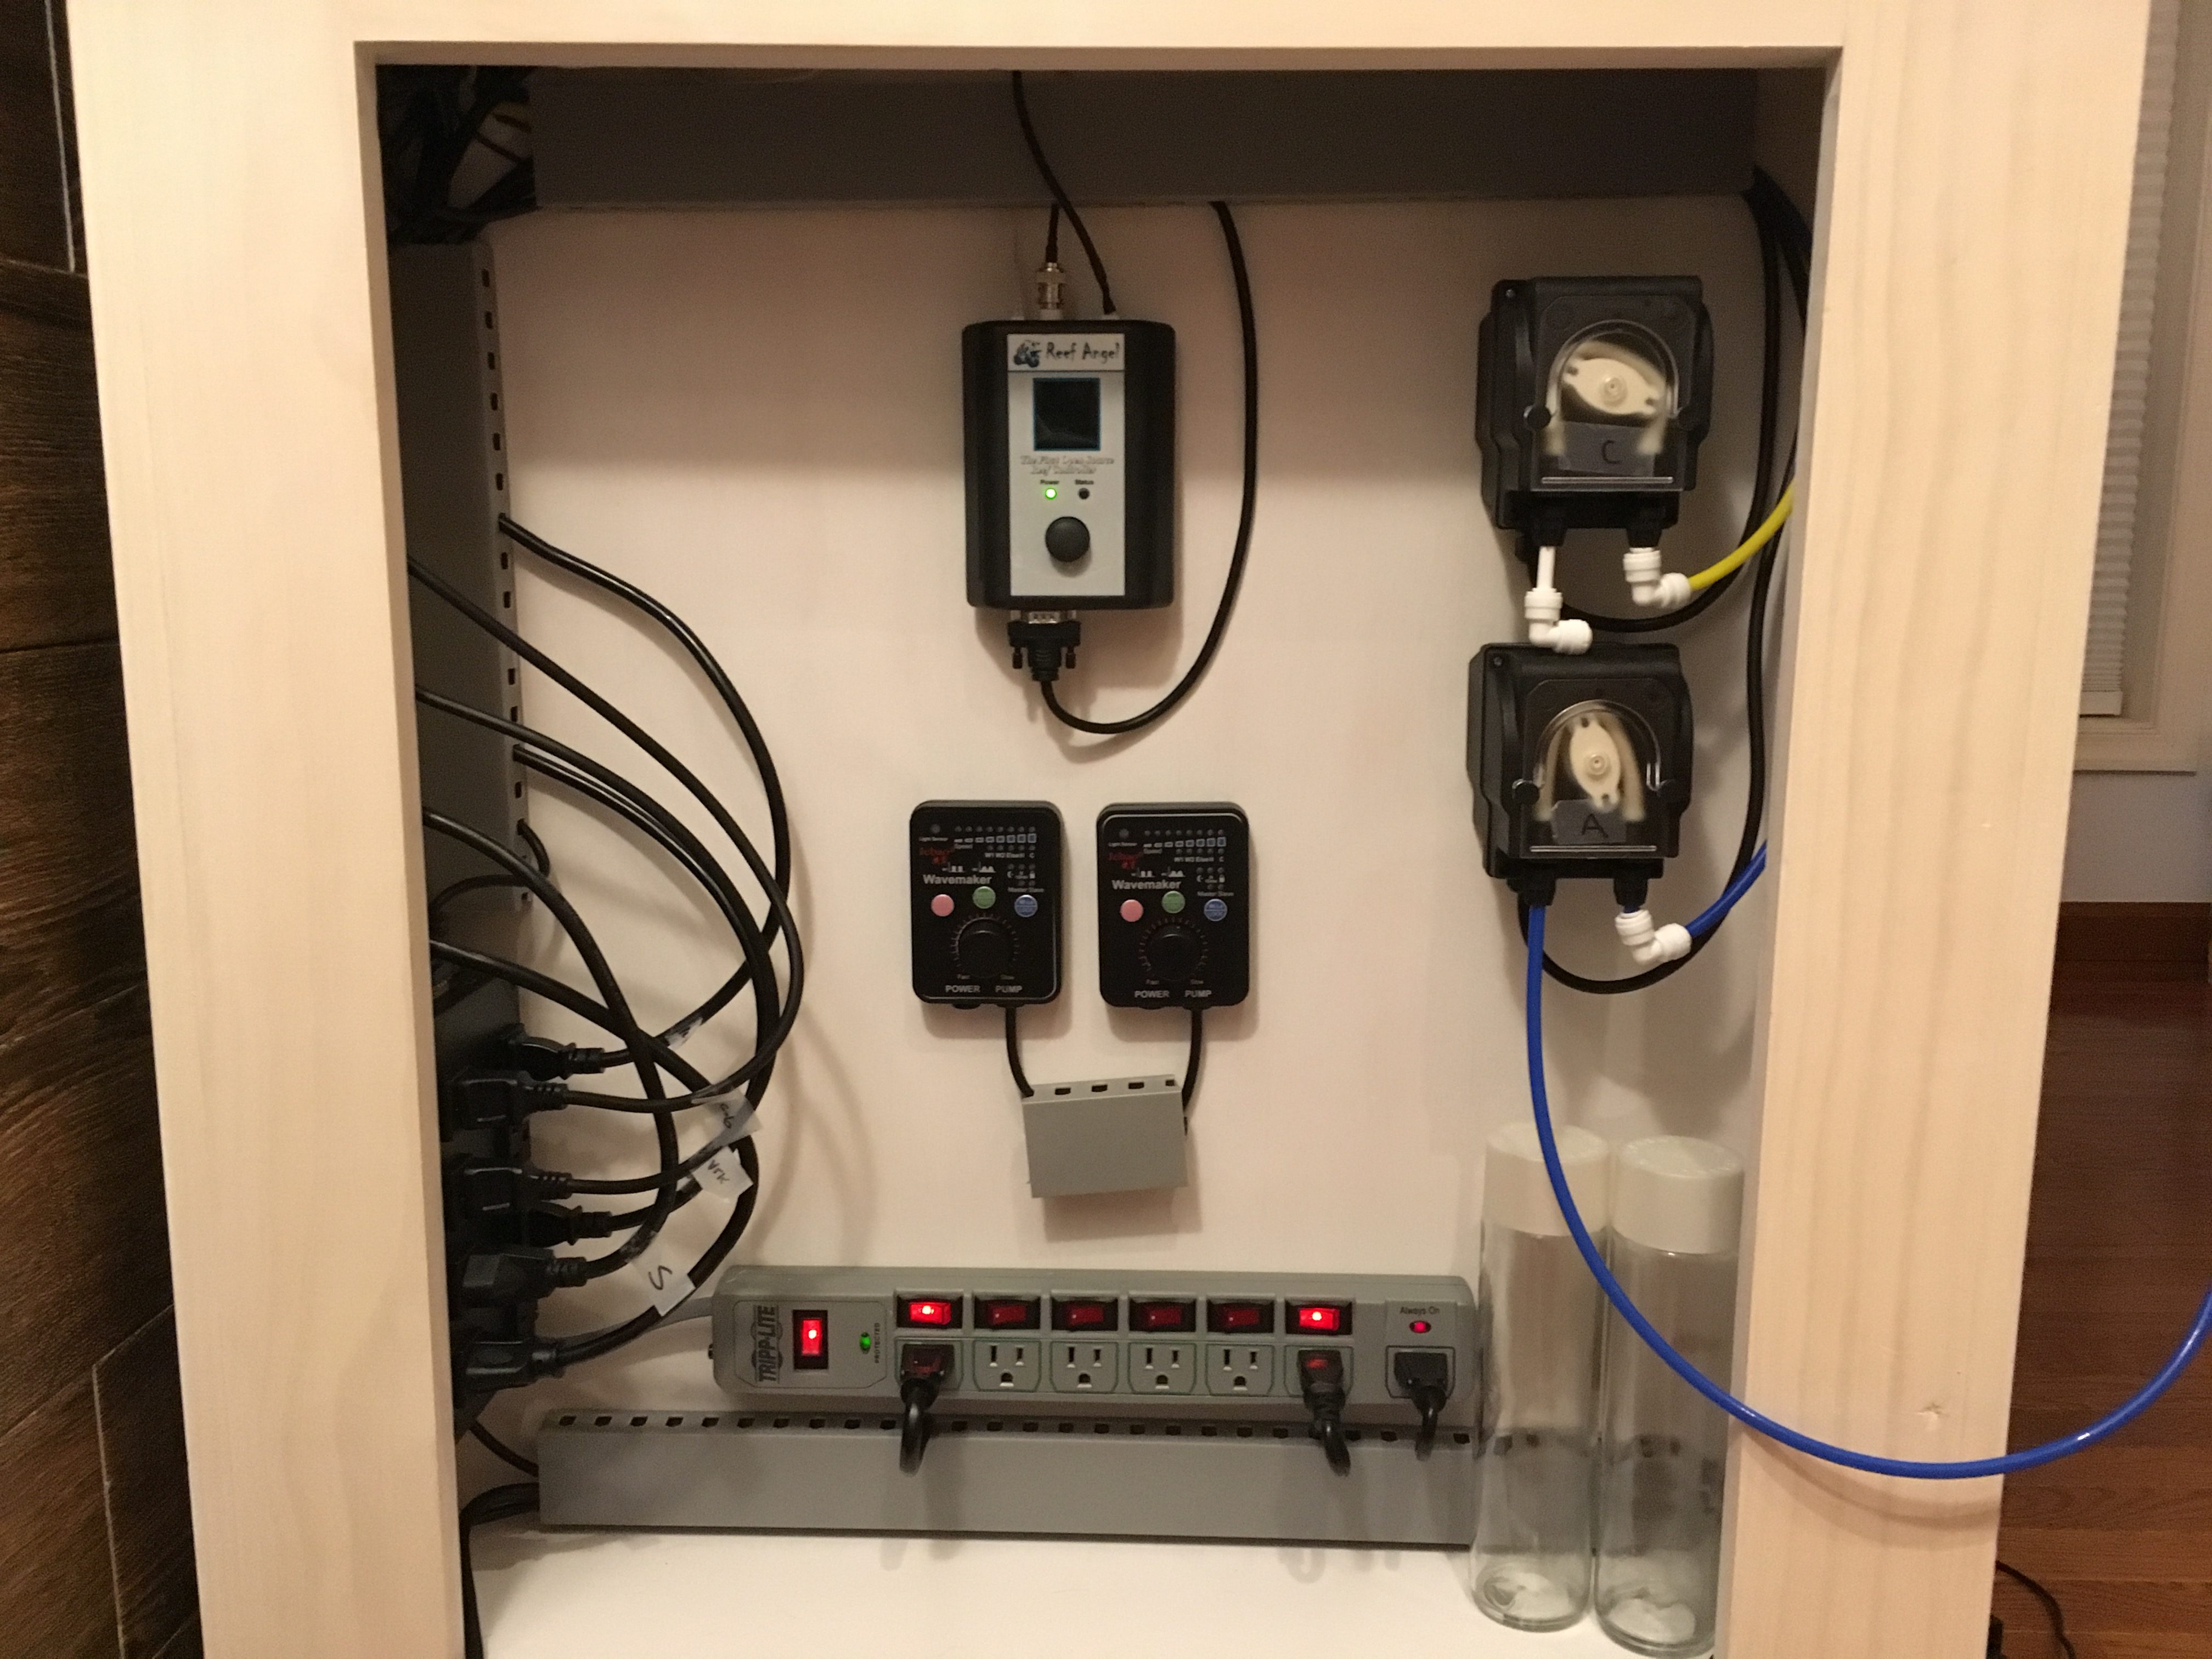
This is mostly boxed off from the wet side of the sump. I’m able to take this board out if I ever need to using just two screws. There’s a small opening at the top of about 1″ across the whole length. I’ll eventually cover it, but for now it is handy if I need to quickly drop a wire across. Currently my temperature probe runs up and over there because apparently my extension has gone bad.
I’d like to say I planned it, but as luck would have it there is just enough space for my Reef Angel’s power center to fit along the wall. It frees up a ton of space on the actual face of the electronics board so I can save it for something that I’d actually need to adjust.
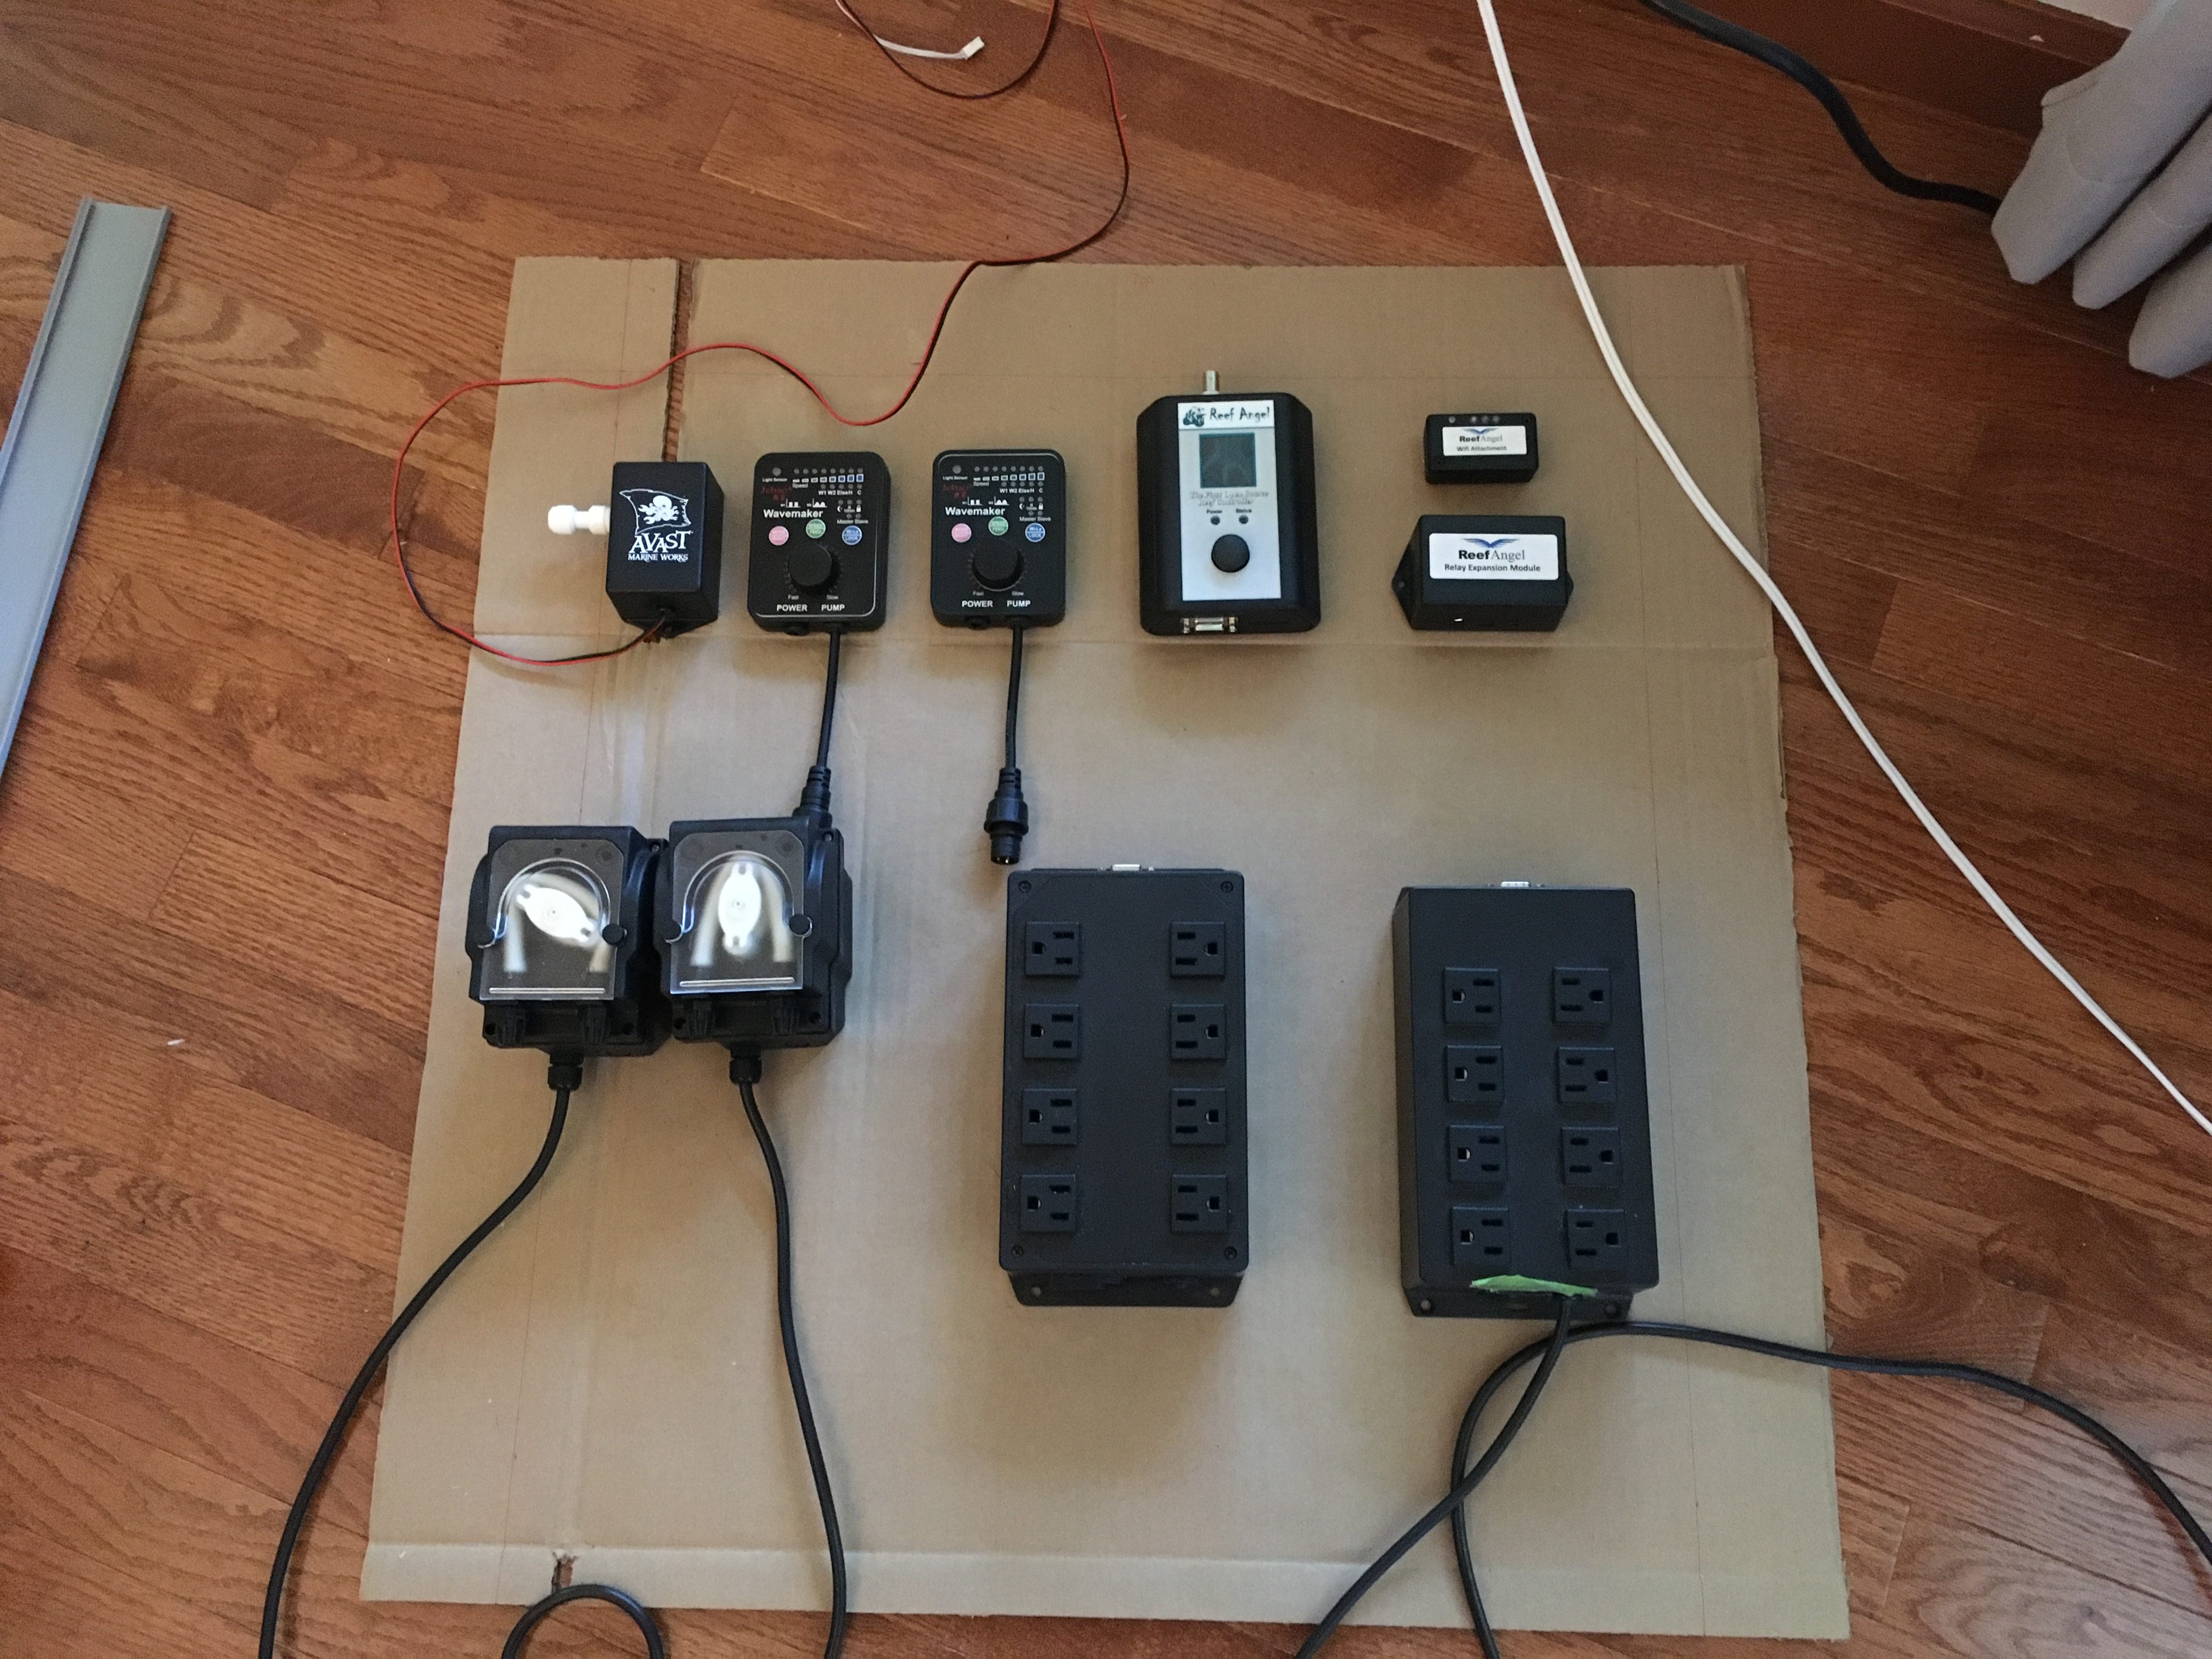
This layout isn’t perfect, but I think it came out cleanly. I initially was working on the layout using some cardboard cut to size with the edges of the stand marked off (see below). There was a lot I didn’t like about it. Overall though it just felt too blocky and there was very little room for anything new to be added. The major changes are: only using one power center and it is mounted on the left side and the Avast ATO sensor is mounted on the wet side. The ATO sensor is a totally sealed system and I never have to touch it so why take up space here?
On this build I opted to add a Tripp Lite power strip with switches for each individual outlet. There are plenty of devices that don’t need to be plugged into the Reef Angel and controlled, like the Radion and the sump light, so why take up the space? The power strip has a $25,000 warranty and it is an active surge protector. The Reef Angel plugs into the “always on” outlet for obvious reasons.
The last thing to mention are the two dosers. I put them on this side and opted to go with a pair of VOSS sparking water glass containers. They’re each about 1 liter and the fit perfectly in the corner of the electronics section. I don’t use much two-part so these should last a couple of weeks between refills. The dosers aren’t hooked up yet, so excuse the hanging connection there.
I ordered some waterproof and tear-proof labels that I’m going to print out to mark each of the outlets. That’ll make it a lot easier to figure out what is what when I need to hunt something down.
That’s all for now! Look for my out of order post coming up talking about the final bits of construction and finishing for the stand.
Getting back to work
Elbow is feeling better and it is high time to get back to work! I got most of this done before my injury, so I’m just catching up on the blog. The outer frame of the stand is just held together with glue and nails. That’s really not gonna cut it. I added a second inner frame that connects all of the pieces together more firmly. Then I put cross supports on the top and bottom to support the bases for the tank and sump.
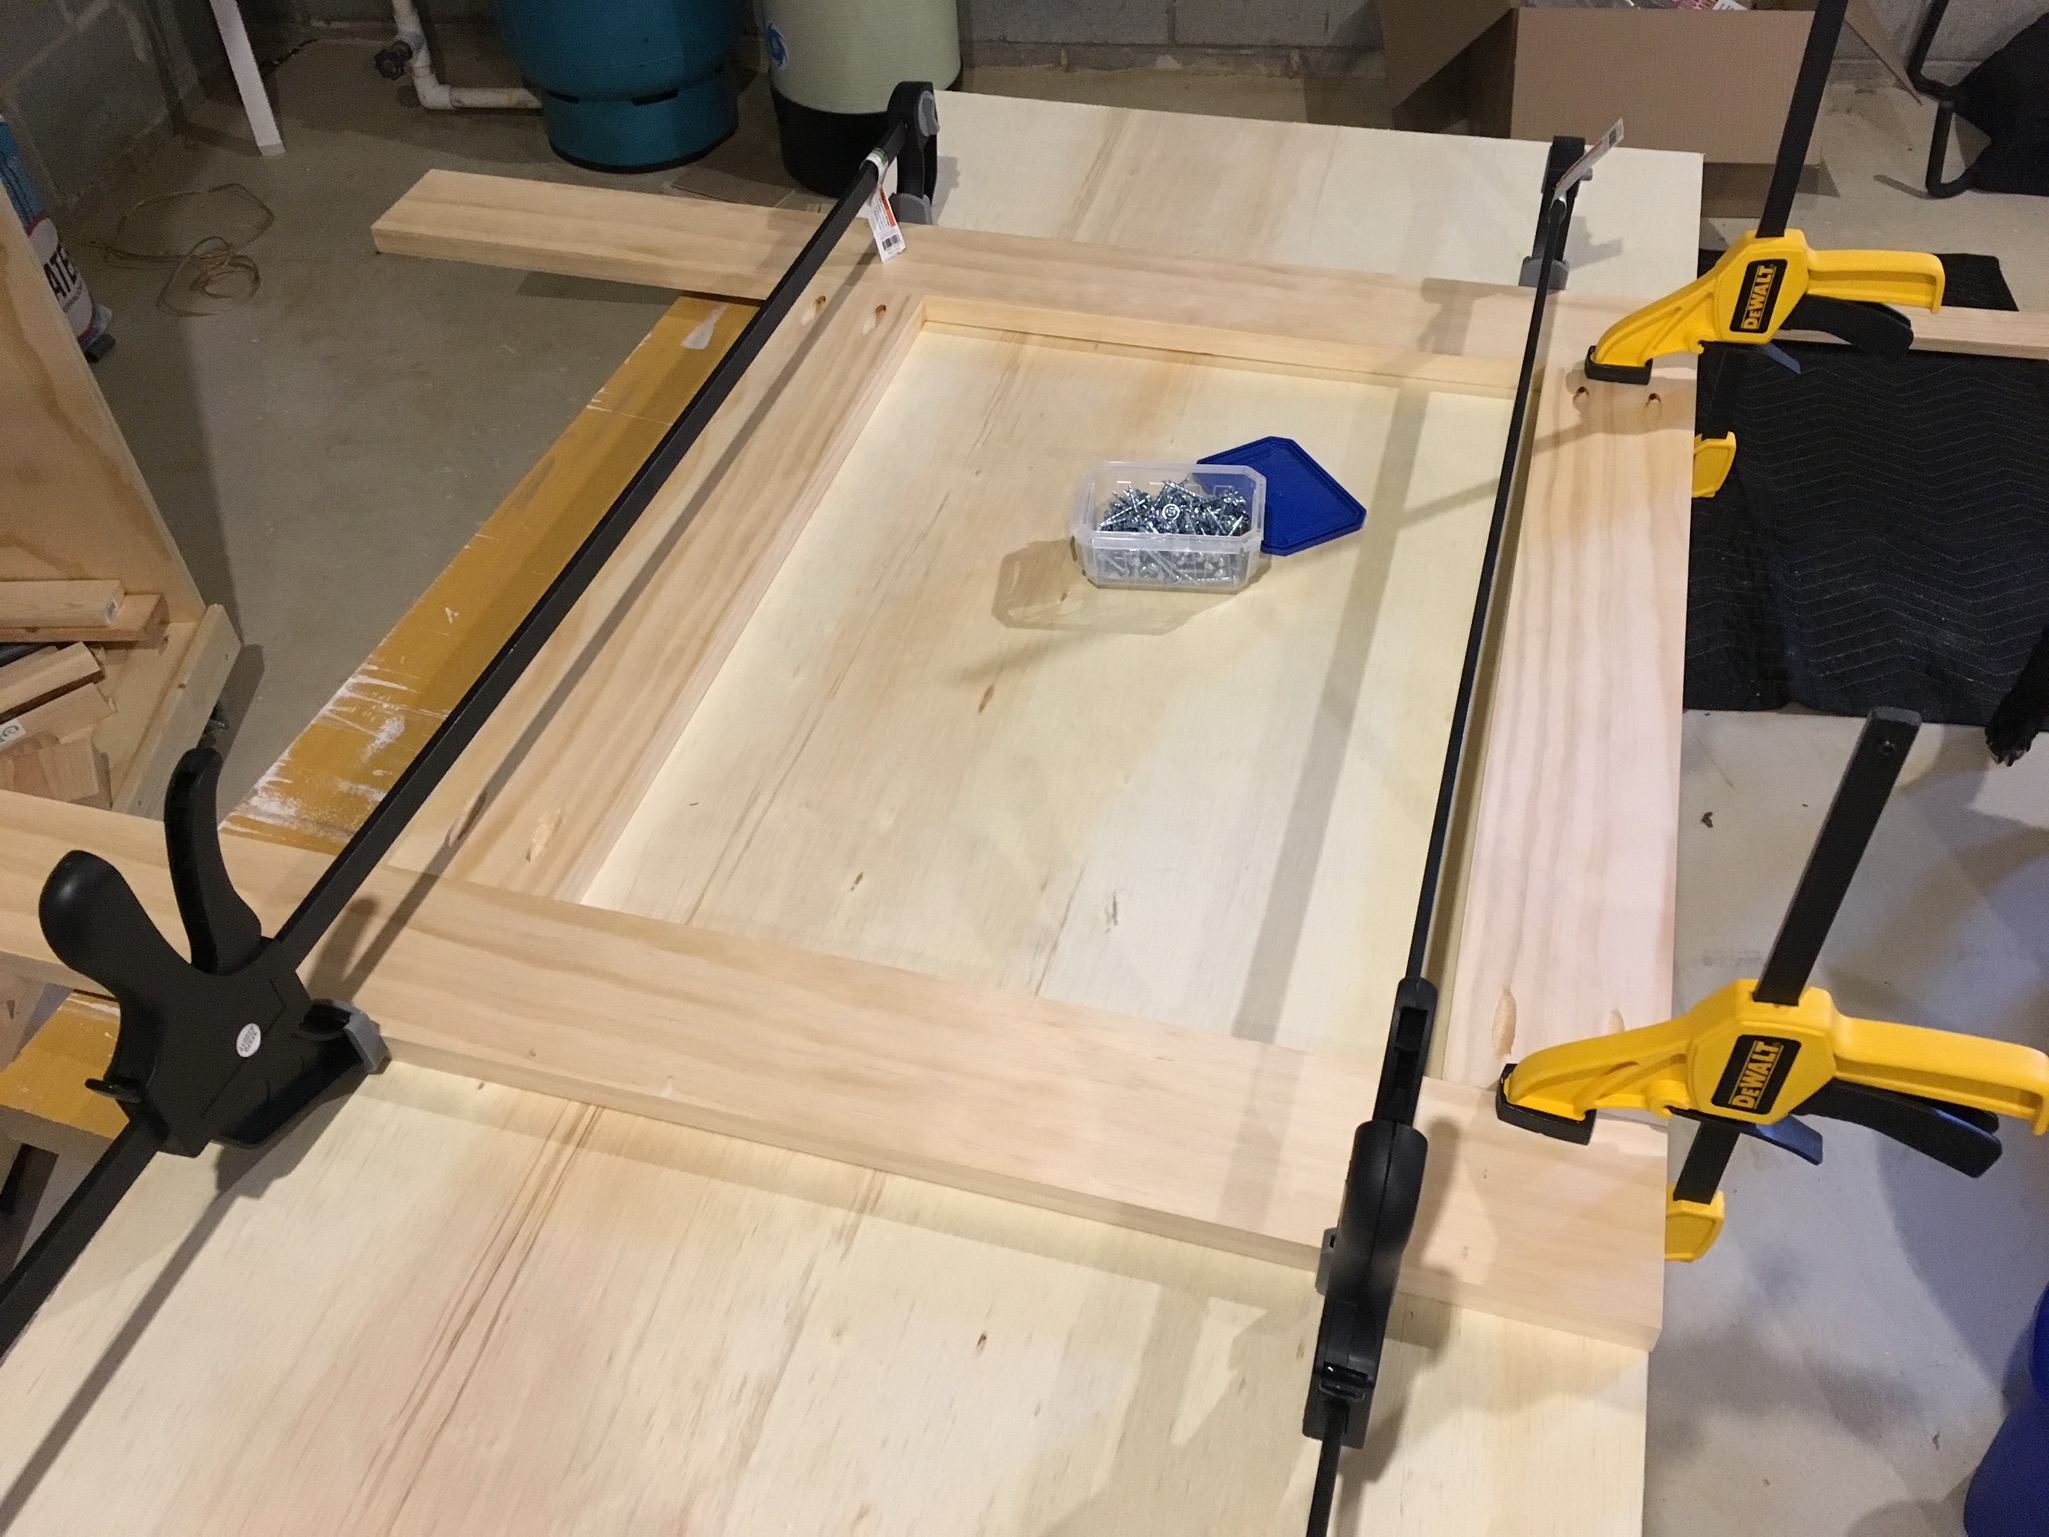
I wanted to see how the front door would look, so I went a little bit out of order and made that next. It is made out of 1×6 and 1×2 sides. I think it came out really nice. There is an 1/8″ gap between each horizontal board to allow for some air flow.
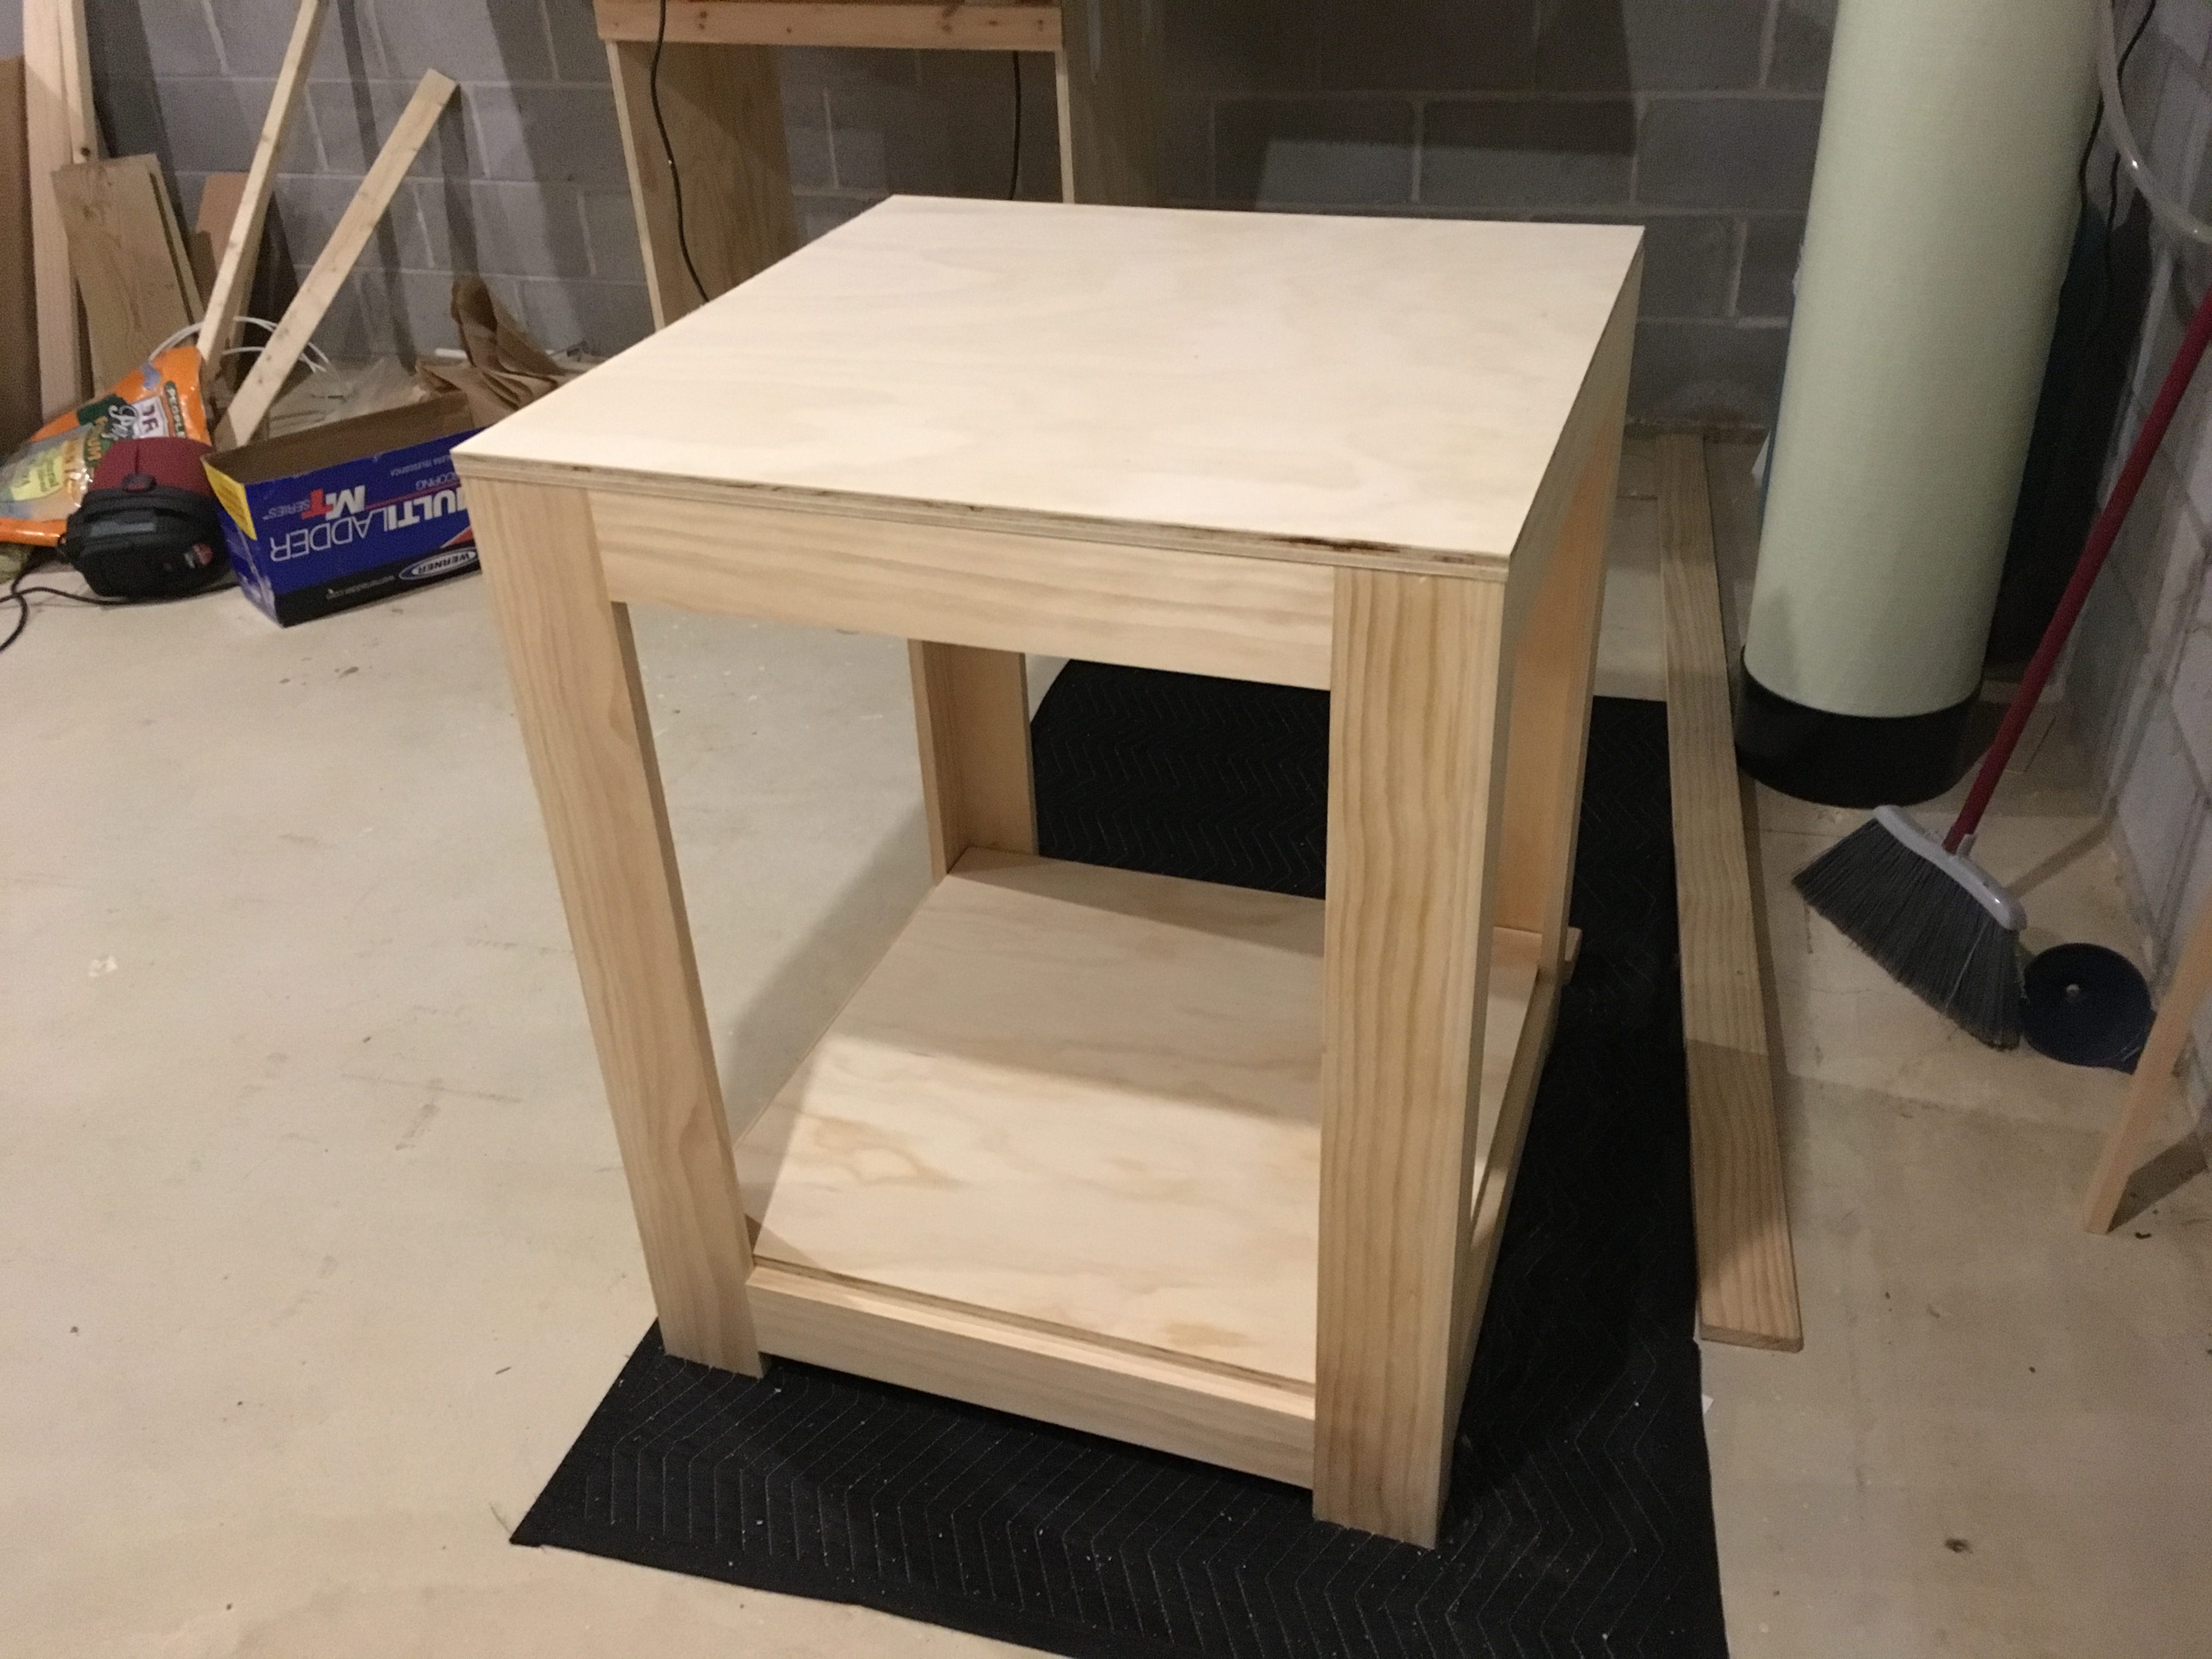
Next up are the bases for the sump and tank to sit on. These are just made out of 3/4″ pine plywood. I decided not to do cutouts for the frame in the sump so I would have a lip for a support on the door to sit on. The frame was racked by about 1/4″ which was really annoying, but thankfully easy to fix. I nailed the front edge of the base to the top of the stand and then clamped the other end to pull it straight. Popped in a few more nails and it was back to square 🙂
From here I’m going to paint the inside of the stand and then stain the outside so I can finally get the tank back on here and cycling. Once that’s all going I can finish building the doors and stain them separately.
More to follow…
Turning big pieces of wood into smaller pieces of wood…
With plans in hand, I took a trip to ye-old Home Depot to pick up my supplies. I needed to rent their truck, so I bought more than I needed and I also picked up some supplies for other projects. No I’m not using landscaping timbers in my build! It was hard to find enough 2×1 pine boards that were straight. I went through probably 50 to get the ones I needed.
I quickly got to work cutting everything down to size, starting with the frame boards themselves. I figured if I go a section at a time it will allow me to adjust my cuts for any imperfections along the way. I bought a new blade for my miter saw and whew does that make some smooth cuts!
Once the boards were all cut, it was on to the Kreg jig for pocket screws. I put a pair on each end of the cross supports. A little clamping and a few screws later and I had four frame sections done.
Things were going along really well and I was getting an hour or so in each day to get more together. After about a week or so I got the whole frame together, glued, and nailed together. There will be an inner frame to add rigidity and to hold everything together better.
You know how when things seem to be going well something has to go wrong, right? Well….

So yeah, I broke my elbow. Not doing this! You remember those landscaping timbers from earlier in the post? Those were for a new swing set we got for our kids. I needed to level off a large space for it to be installed. I rented one of these bad boys to do the hard work…

It really worked well. Throws you around a bit, but it was a lot of fun. I rented a second bucket for it so I could move a ton of mulch around to get more bang for my rental buck. I changed out the bucket and went to get back on to start moving mulch around and….. I tripped and fell on my concrete driveway. OUCH!
Long story short, fractured my radius at the elbow and I’ll be immobilized for 2 weeks and then another 6 before I can really do anything with it. Looks like I’m gonna have to hit pause for a while.
DIY Stand (Planning Stage)
When breaking down my tank for a reboot, I discovered that my stand had pretty sever water damage and needed to be replaced. Originally I just wanted to paint the stand white to match the rest of the room. Since that was no longer an option, I decided to build one myself. I have 6 weeks to get this done, so it is going to be a lot of little bits of work between work and dinner most nights.
The nice thing about starting over is that I can design it the way I want it, not the way it came. I would love to have a “dry” compartment for electronics and a larger sump area that can fit my top off and dosing containers. I did some digging and found a few design elements that I liked and then I jumped into SketchUp to draw it all out.
Here’s what I came up with:
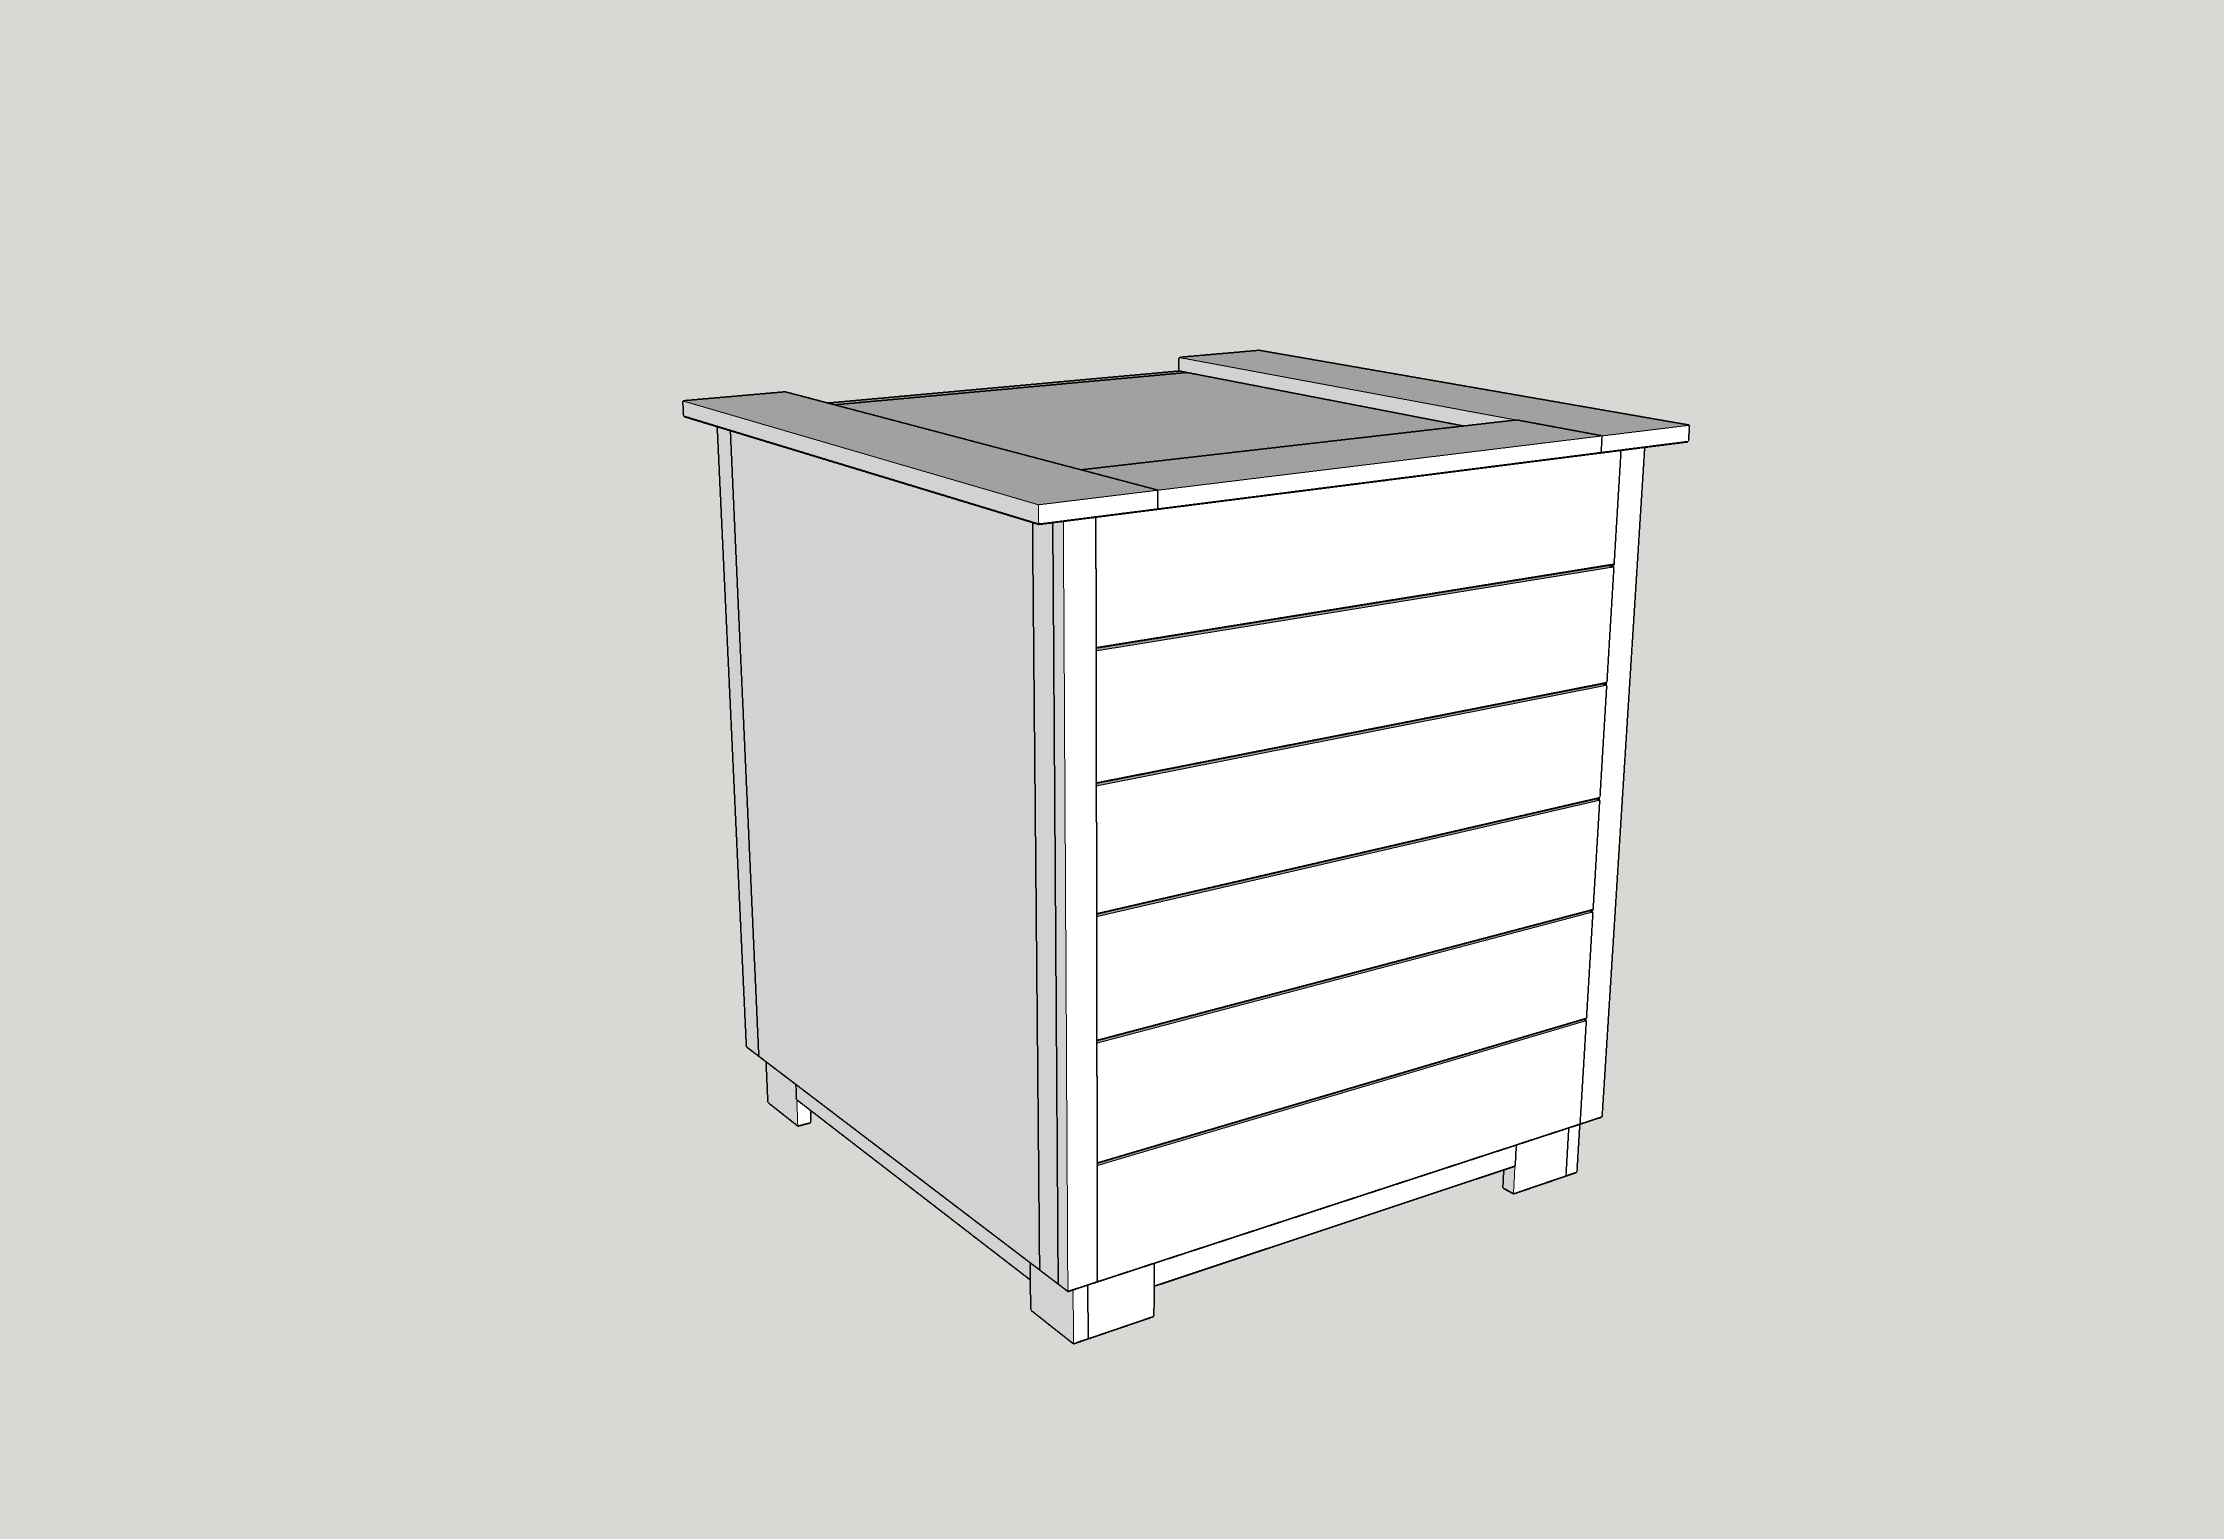
The tank is 24×24″ but this stand is 36×33″ (including the shelf on the top). The extra space allows me to create the shelf, a nice thing to have to put things down on while working, and to create the extra space inside that I need for the electronics and equipment.
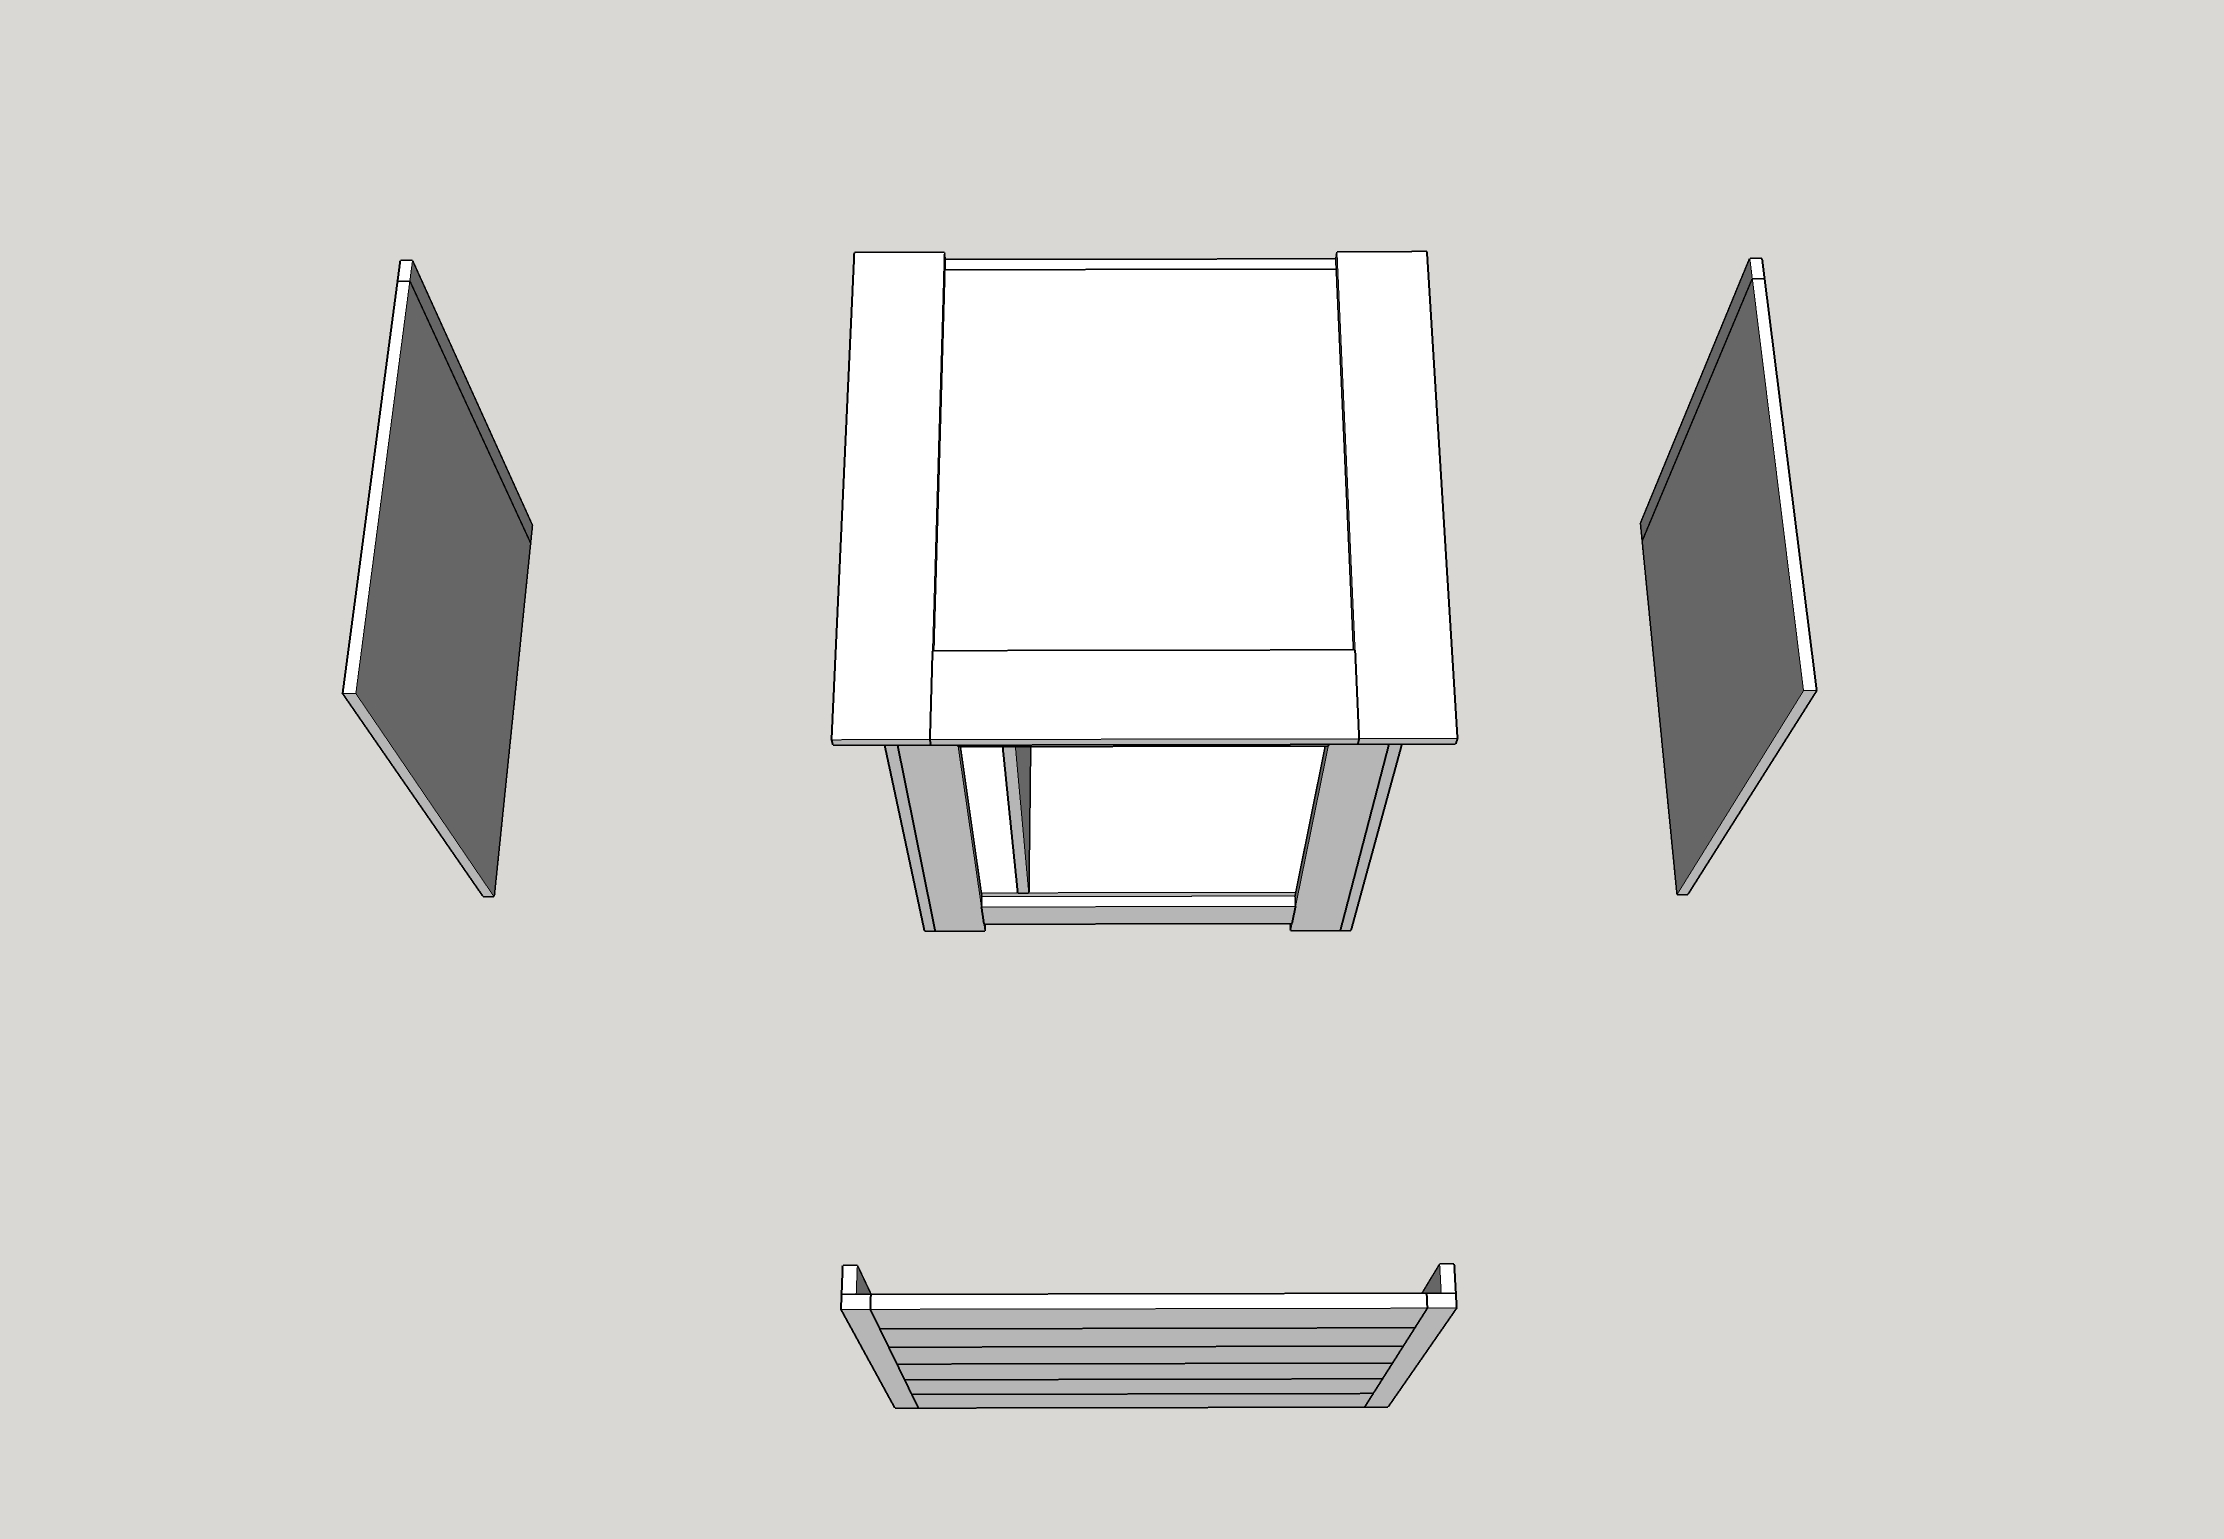
To maximize the interior space and my access to it, I’ve designed the doors to take up the entire face of three sides. The doors will be the skin when installed. They’ll all be held on with magnets so I can get them out of the way while working. That’s another thing about my current stand that bothers me. I have to twist and work around the doors.
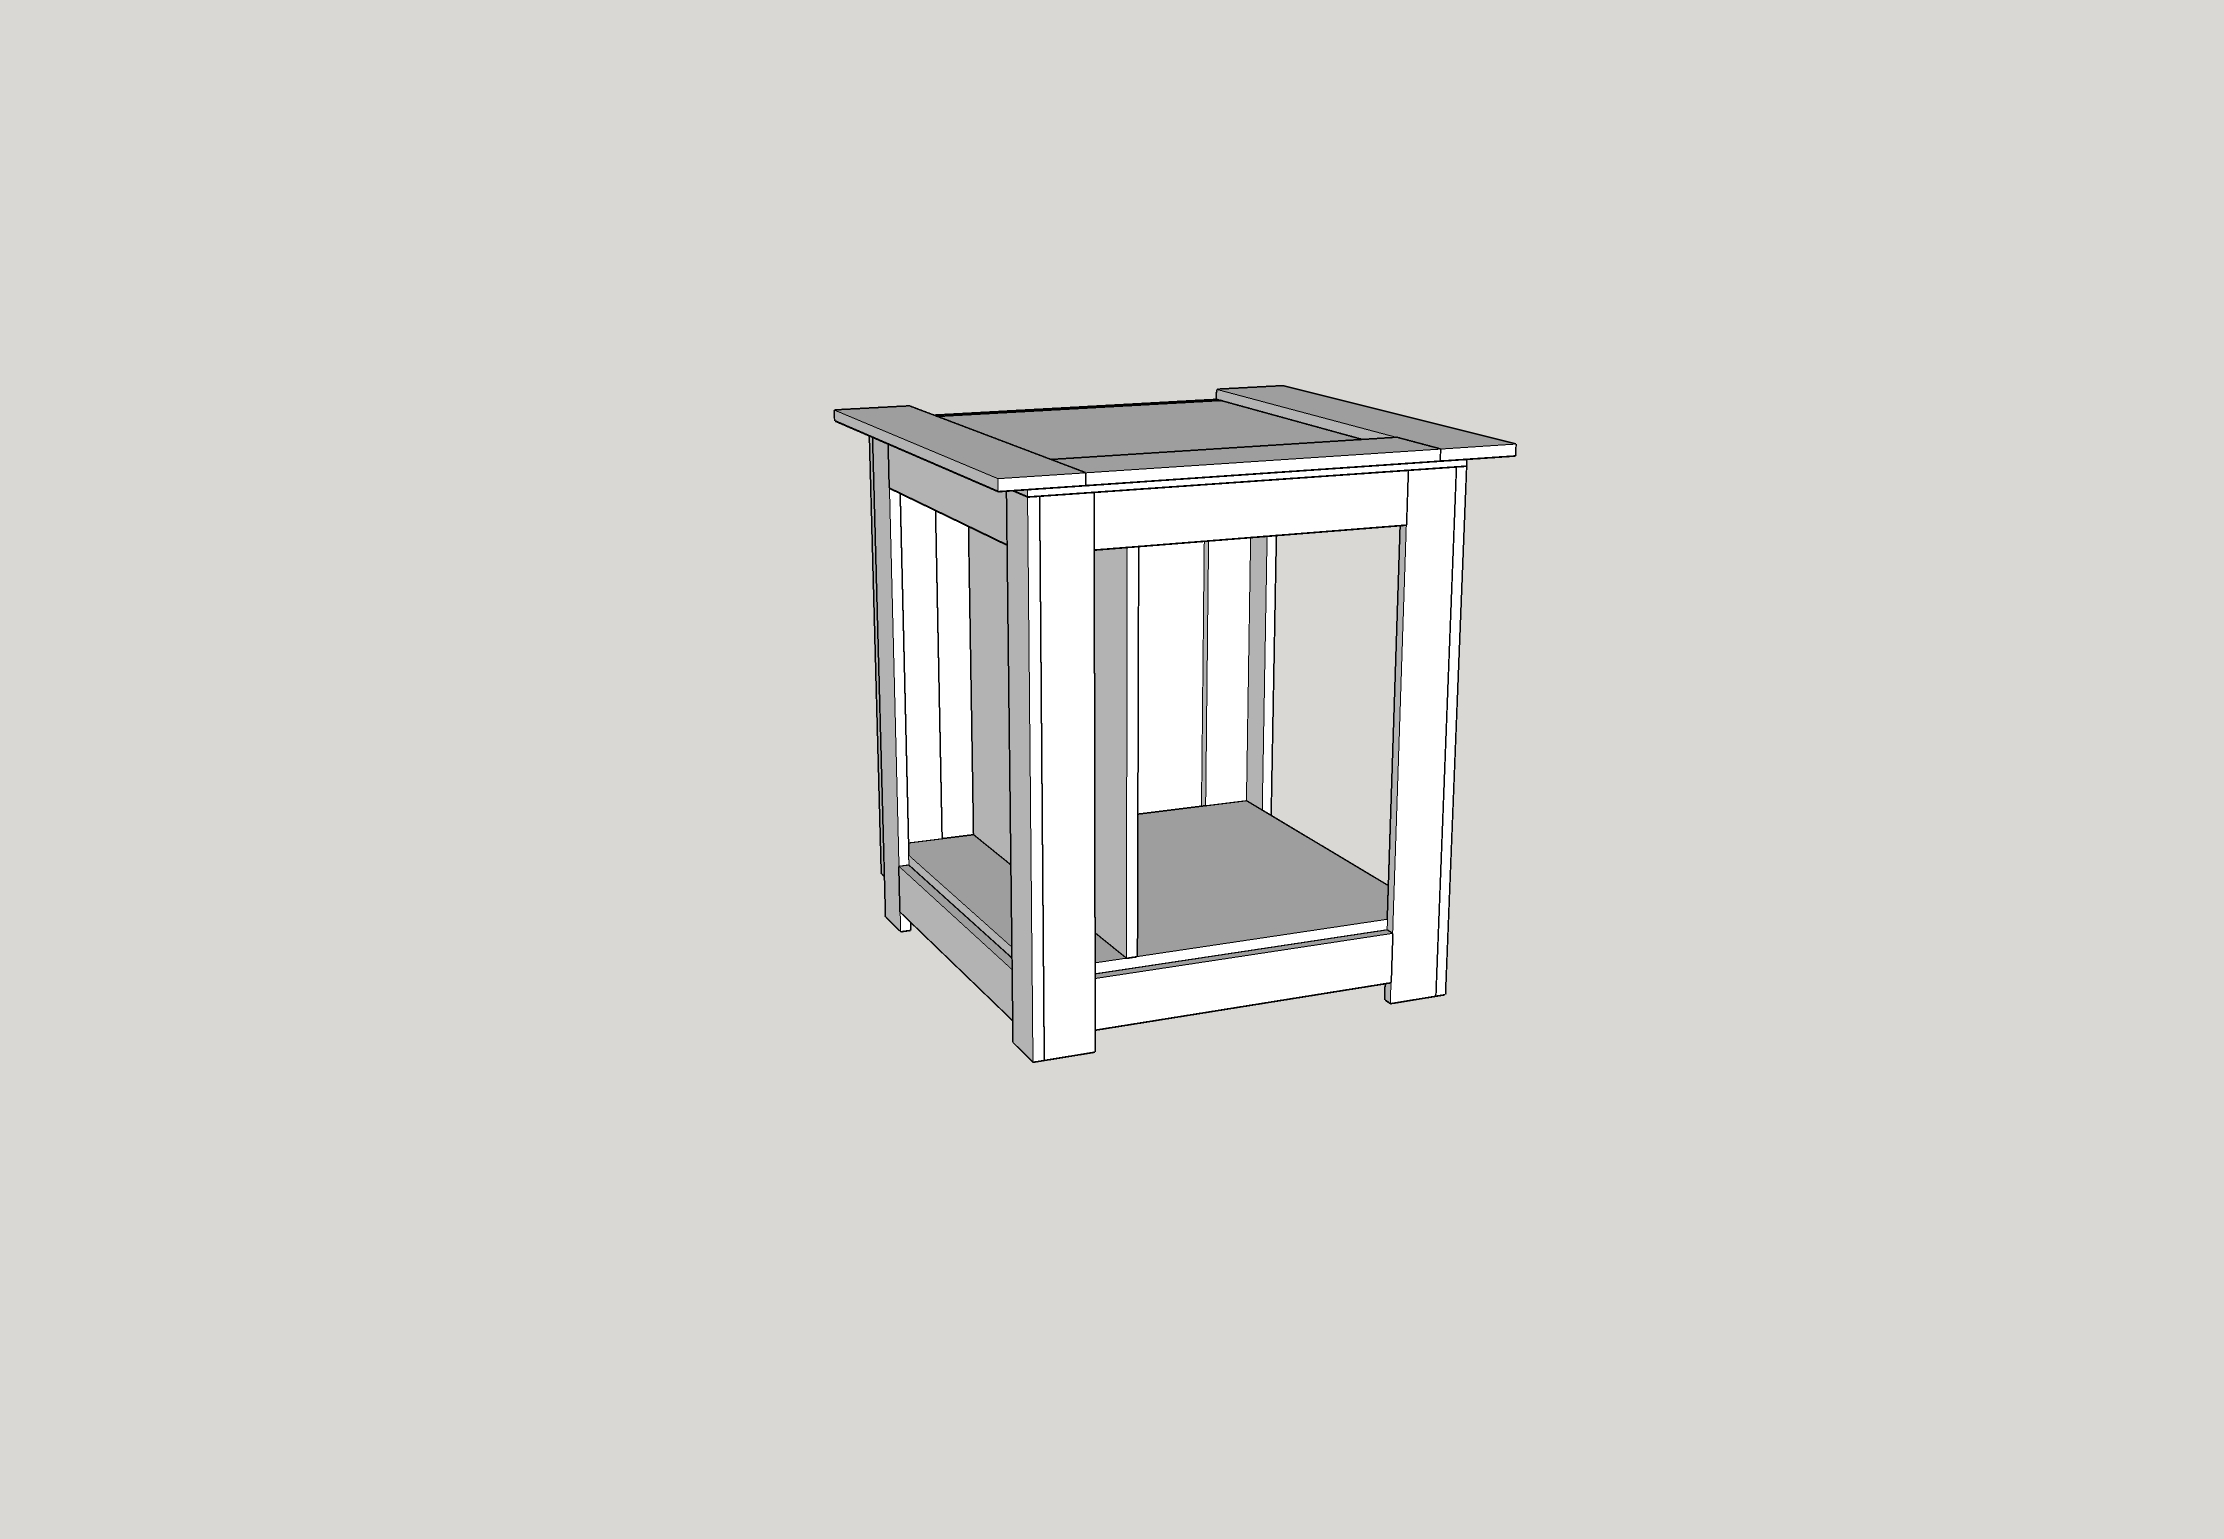
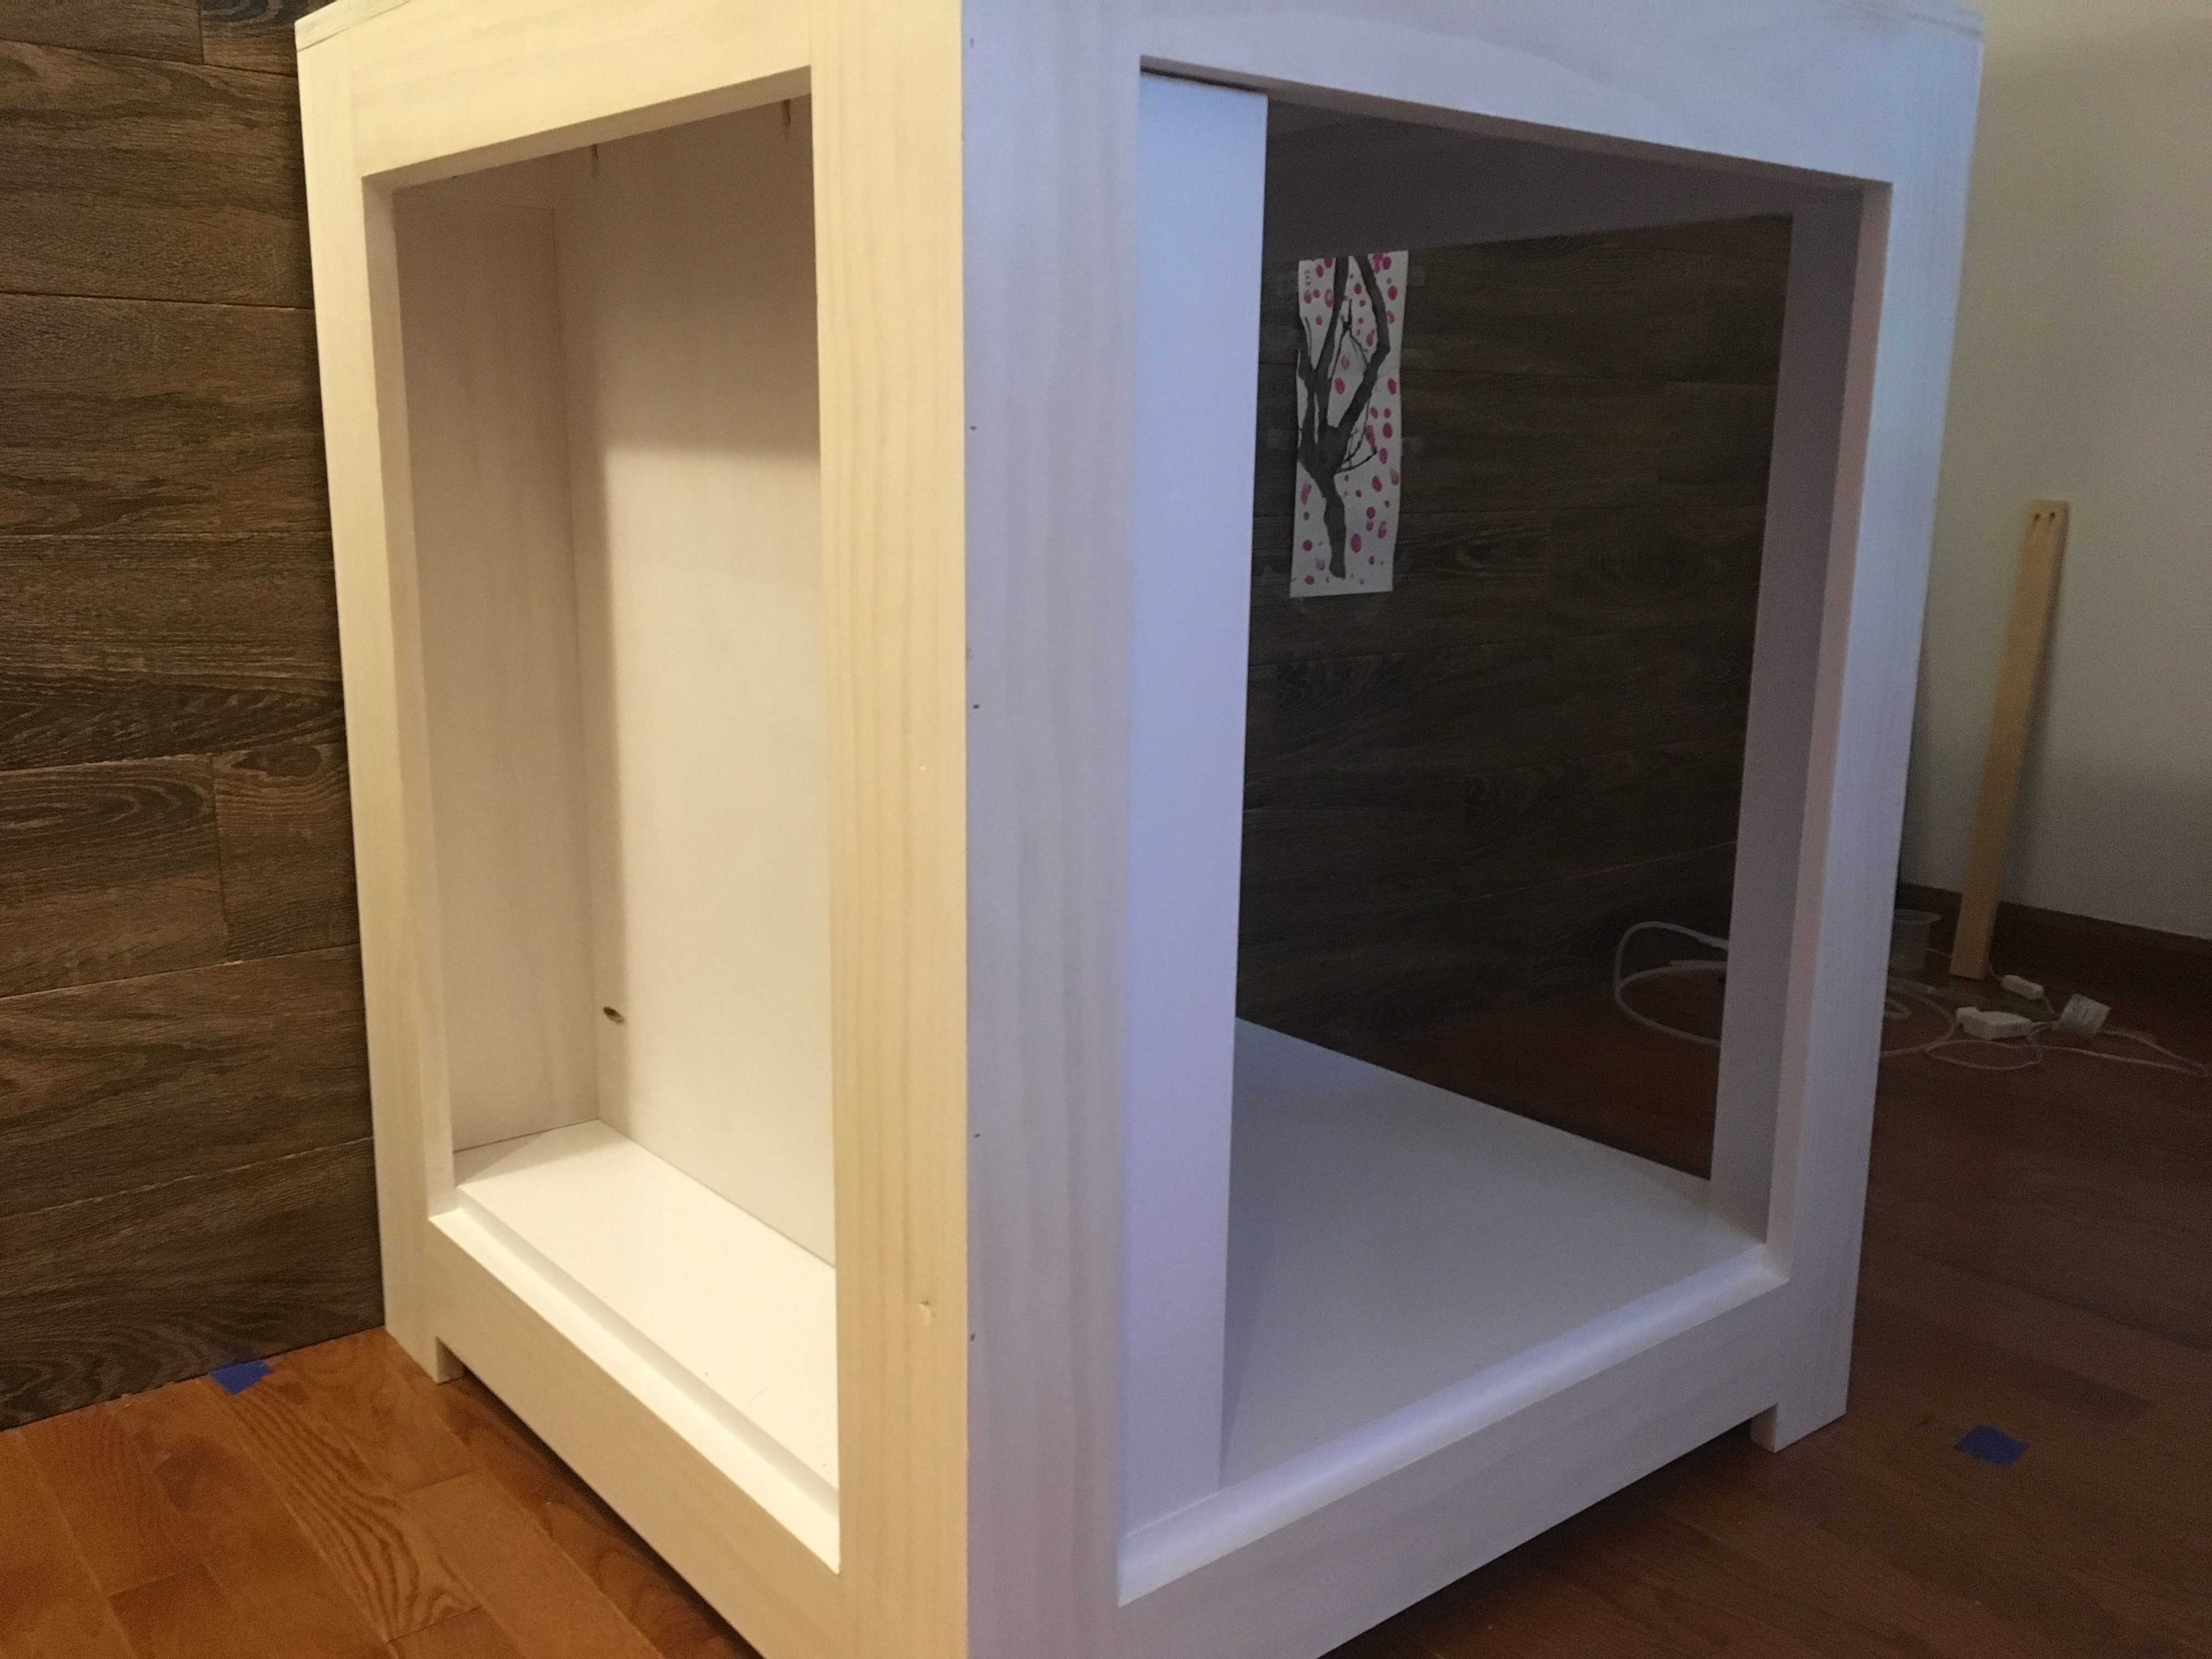
Here’s the stand without the doors. You can see on the left side there is a “dry” compartment to hold my electronics. On the right side is where the sump and all of the related components will go. As you can see, looooooots of space.
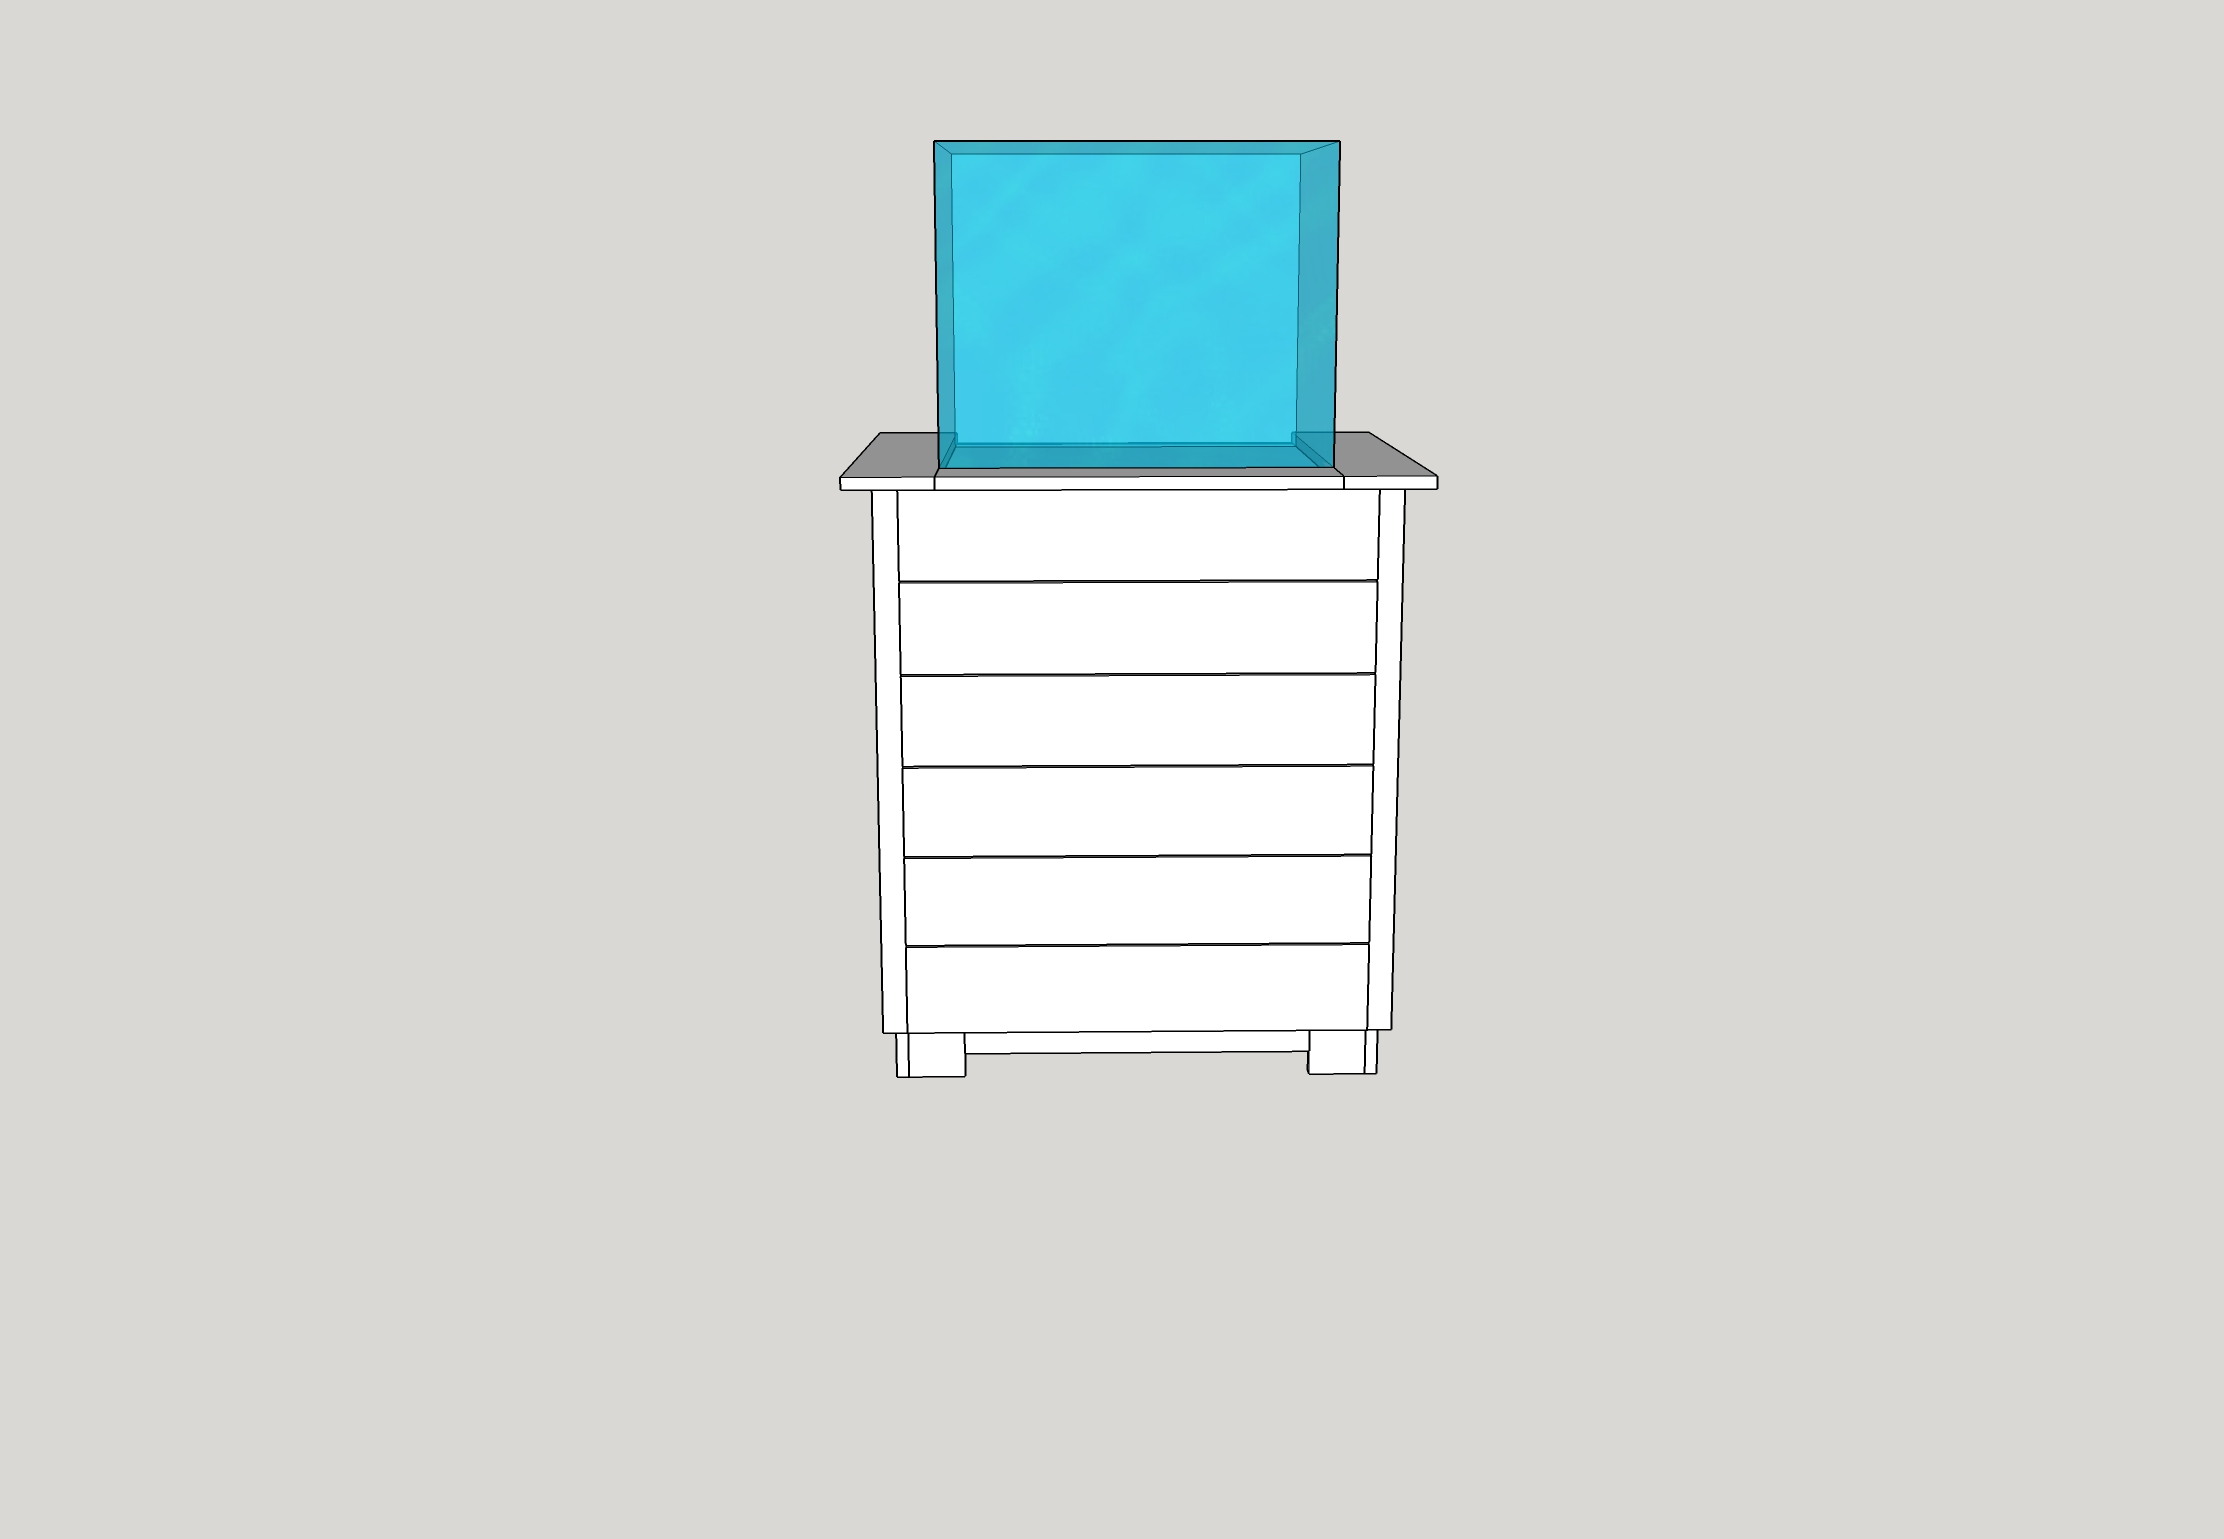
And finally, here is everything all together. Now…. to the shop!
Flood No More!
I have an amazingly supportive and understanding wife. She’s never said no to any of my aquarium projects. That said, I think the last time I flooded the basement making RO water pushed the limits. We have high CO2 in our water, so I need to degas it before running it through the DI stage. That means I need to fill up a bucket and run an air stone in it for 24 hours. It takes me about an hour to fill up this 5g bucket with my booster pump set to 85 PSI. I used to just set a timer on my phone and go down to the basement and shut the production off. That’s worked fine 95% of the time, but I’ve flooded the floor and my workbench at least 5 times. The last time I wound up with about 20 gallons on the floor. Whoops!
My booster pump has a pressure switch to shut down the pump and a solenoid to shut off the water flow. There’s really no reason I shouldn’t have this set up with a float valve to turn everything off automatically. Bulk Reef Supply makes a kit with everything you need to do this for just $25. (Click Here)
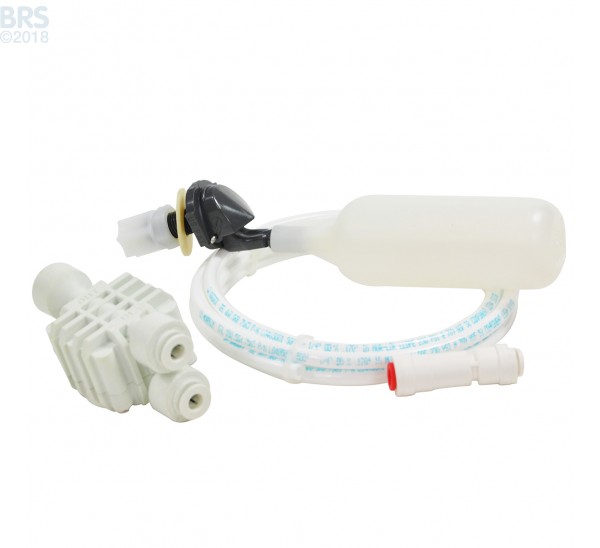
In the kit you get a fixed position float valve, some rigid 1/4″ tube, a check valve and an auto shut off valve. Installation took me all of 5 minutes. Let’s review each part and what they’re for…
The fixed position float valve is very similar to how your toilet works. It is just a simple hollow space that floats when the water reaches it. Once enough water is in the bucket, the valve at the back of it closes. There are some options out there for adjustable position float valves, but don’t buy them! You’re liable to forget to check if it is tight and the valve will never shut off.
The rigid tube is fairly self explanatory. They give you plenty. One section goes between the compression fitting at the back of the valve and the output side of the check valve. The rest goes either to your DI output or your RO output and hooks into the other end of the check valve.
The check valve is important. You don’t want water to flow back into your RO system and you need it to build up the needed pressure to shut the system down when the valve closes. Make sure you have the flow pointed into your bucket.
The final piece of the puzzle is an automatic shut off valve. This closes the drain line when no water is flowing through the system. If you didn’t use this, even though you aren’t making product water you would still be putting water down the drain. This simple device senses when no product water is moving through and also shuts off the drain line.
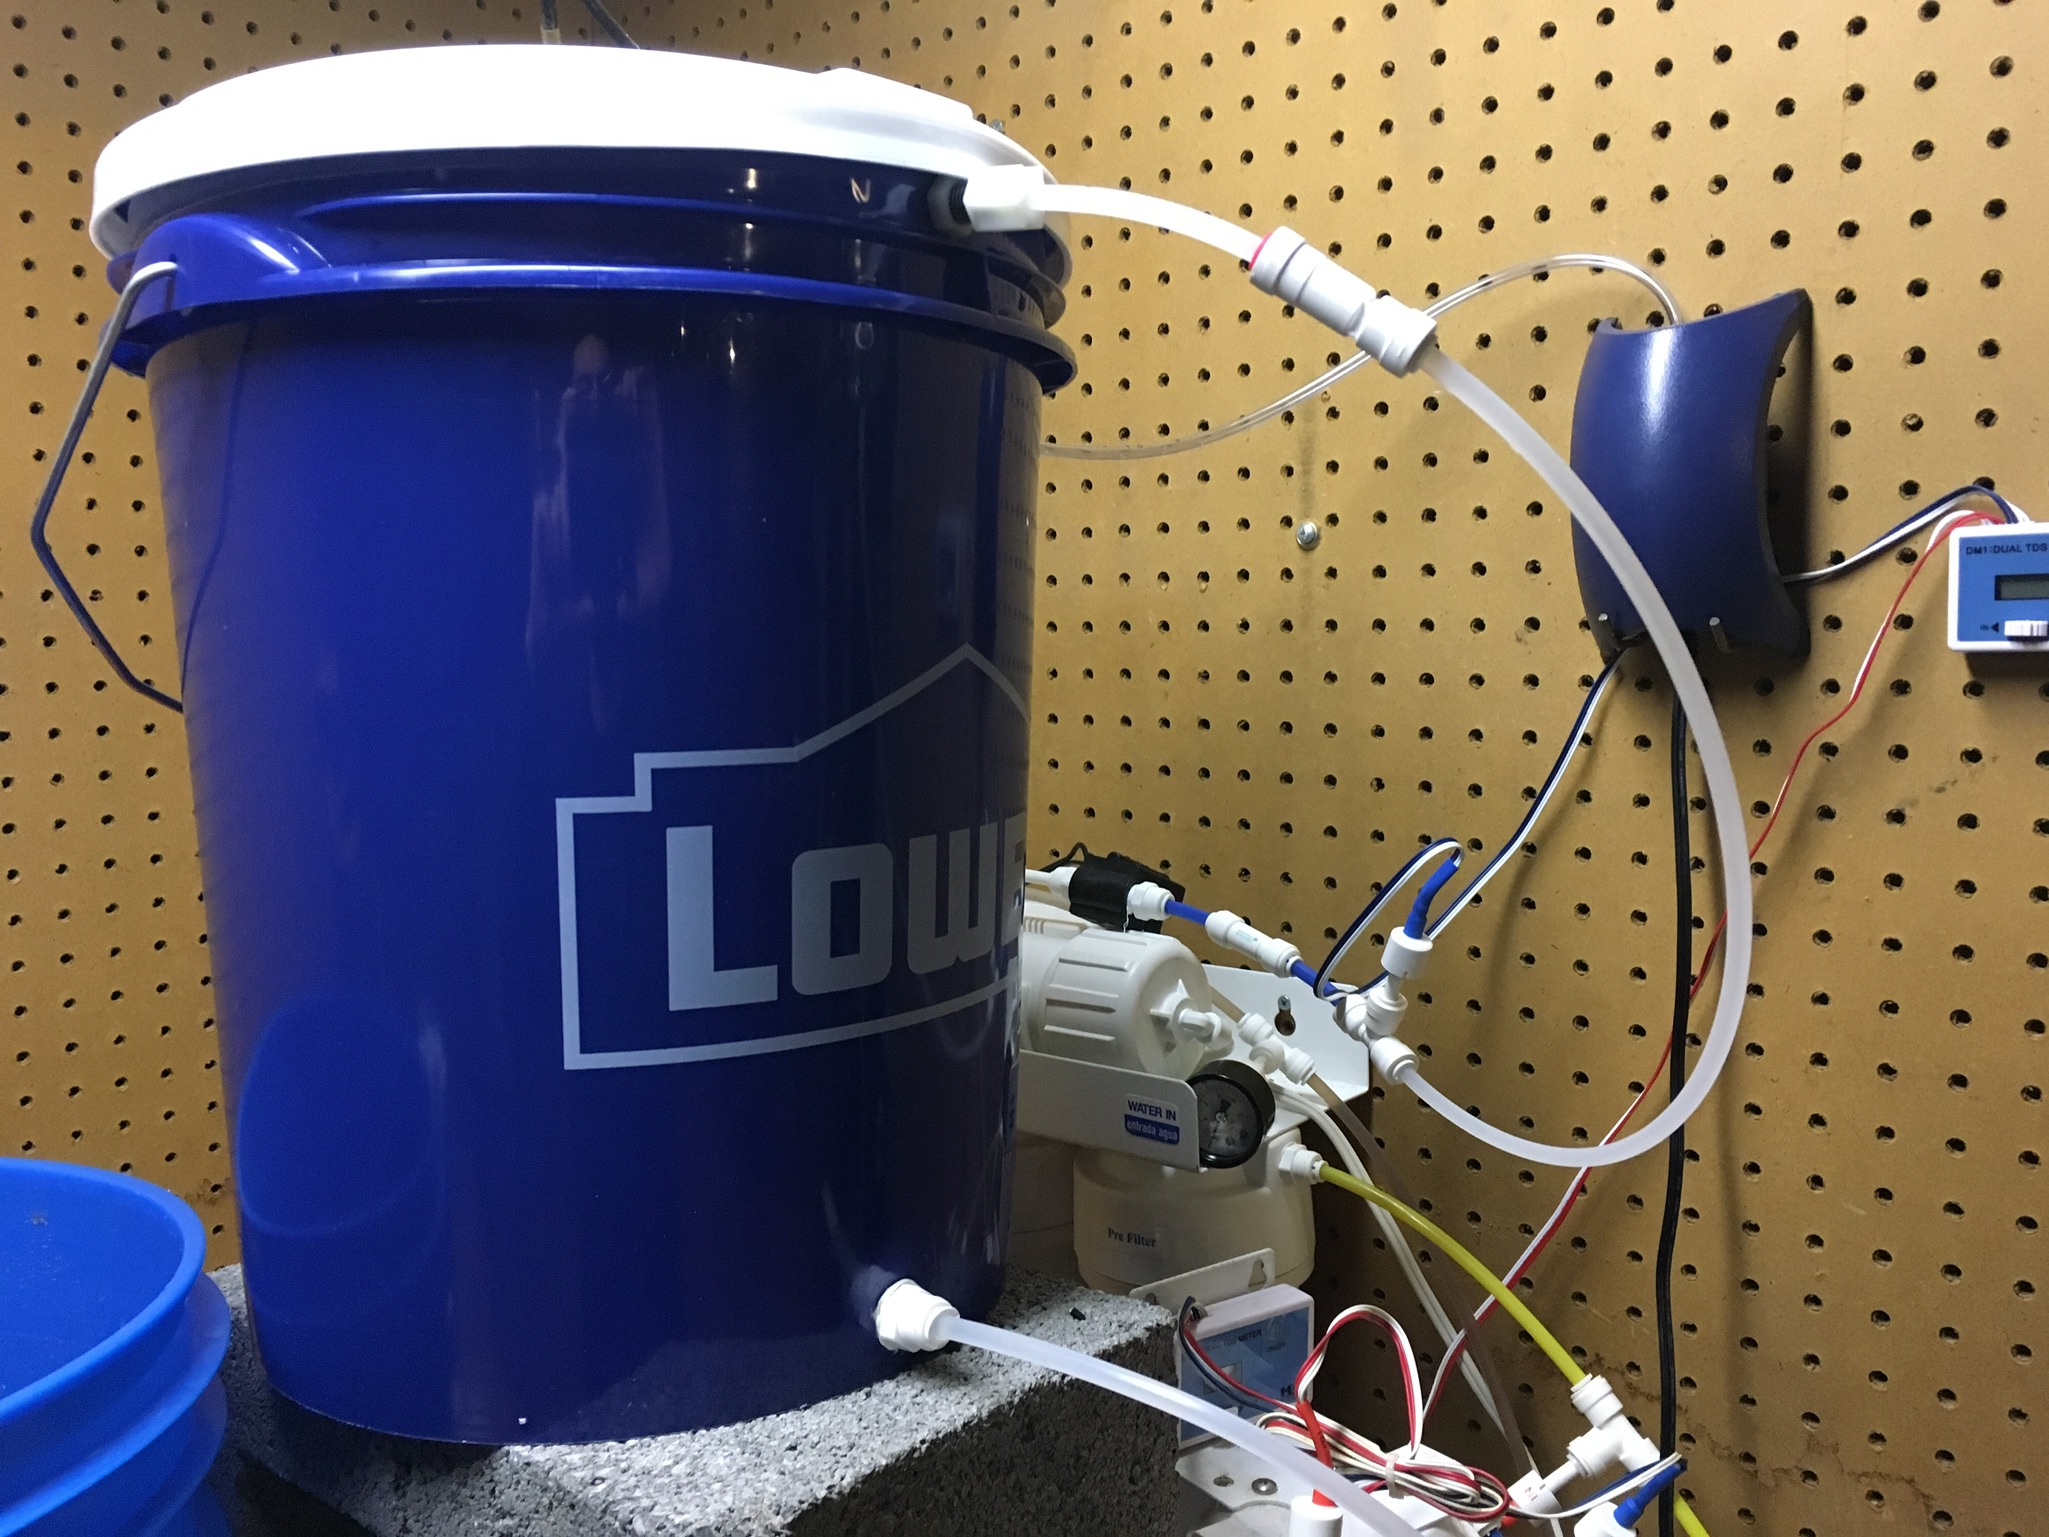
Here’s what my completed setup looks like. You can see the output of my RO (which is connected to my TDS meter) running up to the input of the check valve (the white side). Then from the check valve into the compression fitting on the valve. (The tube coming out of the bottom goes to my DI stage after this water is degassed)
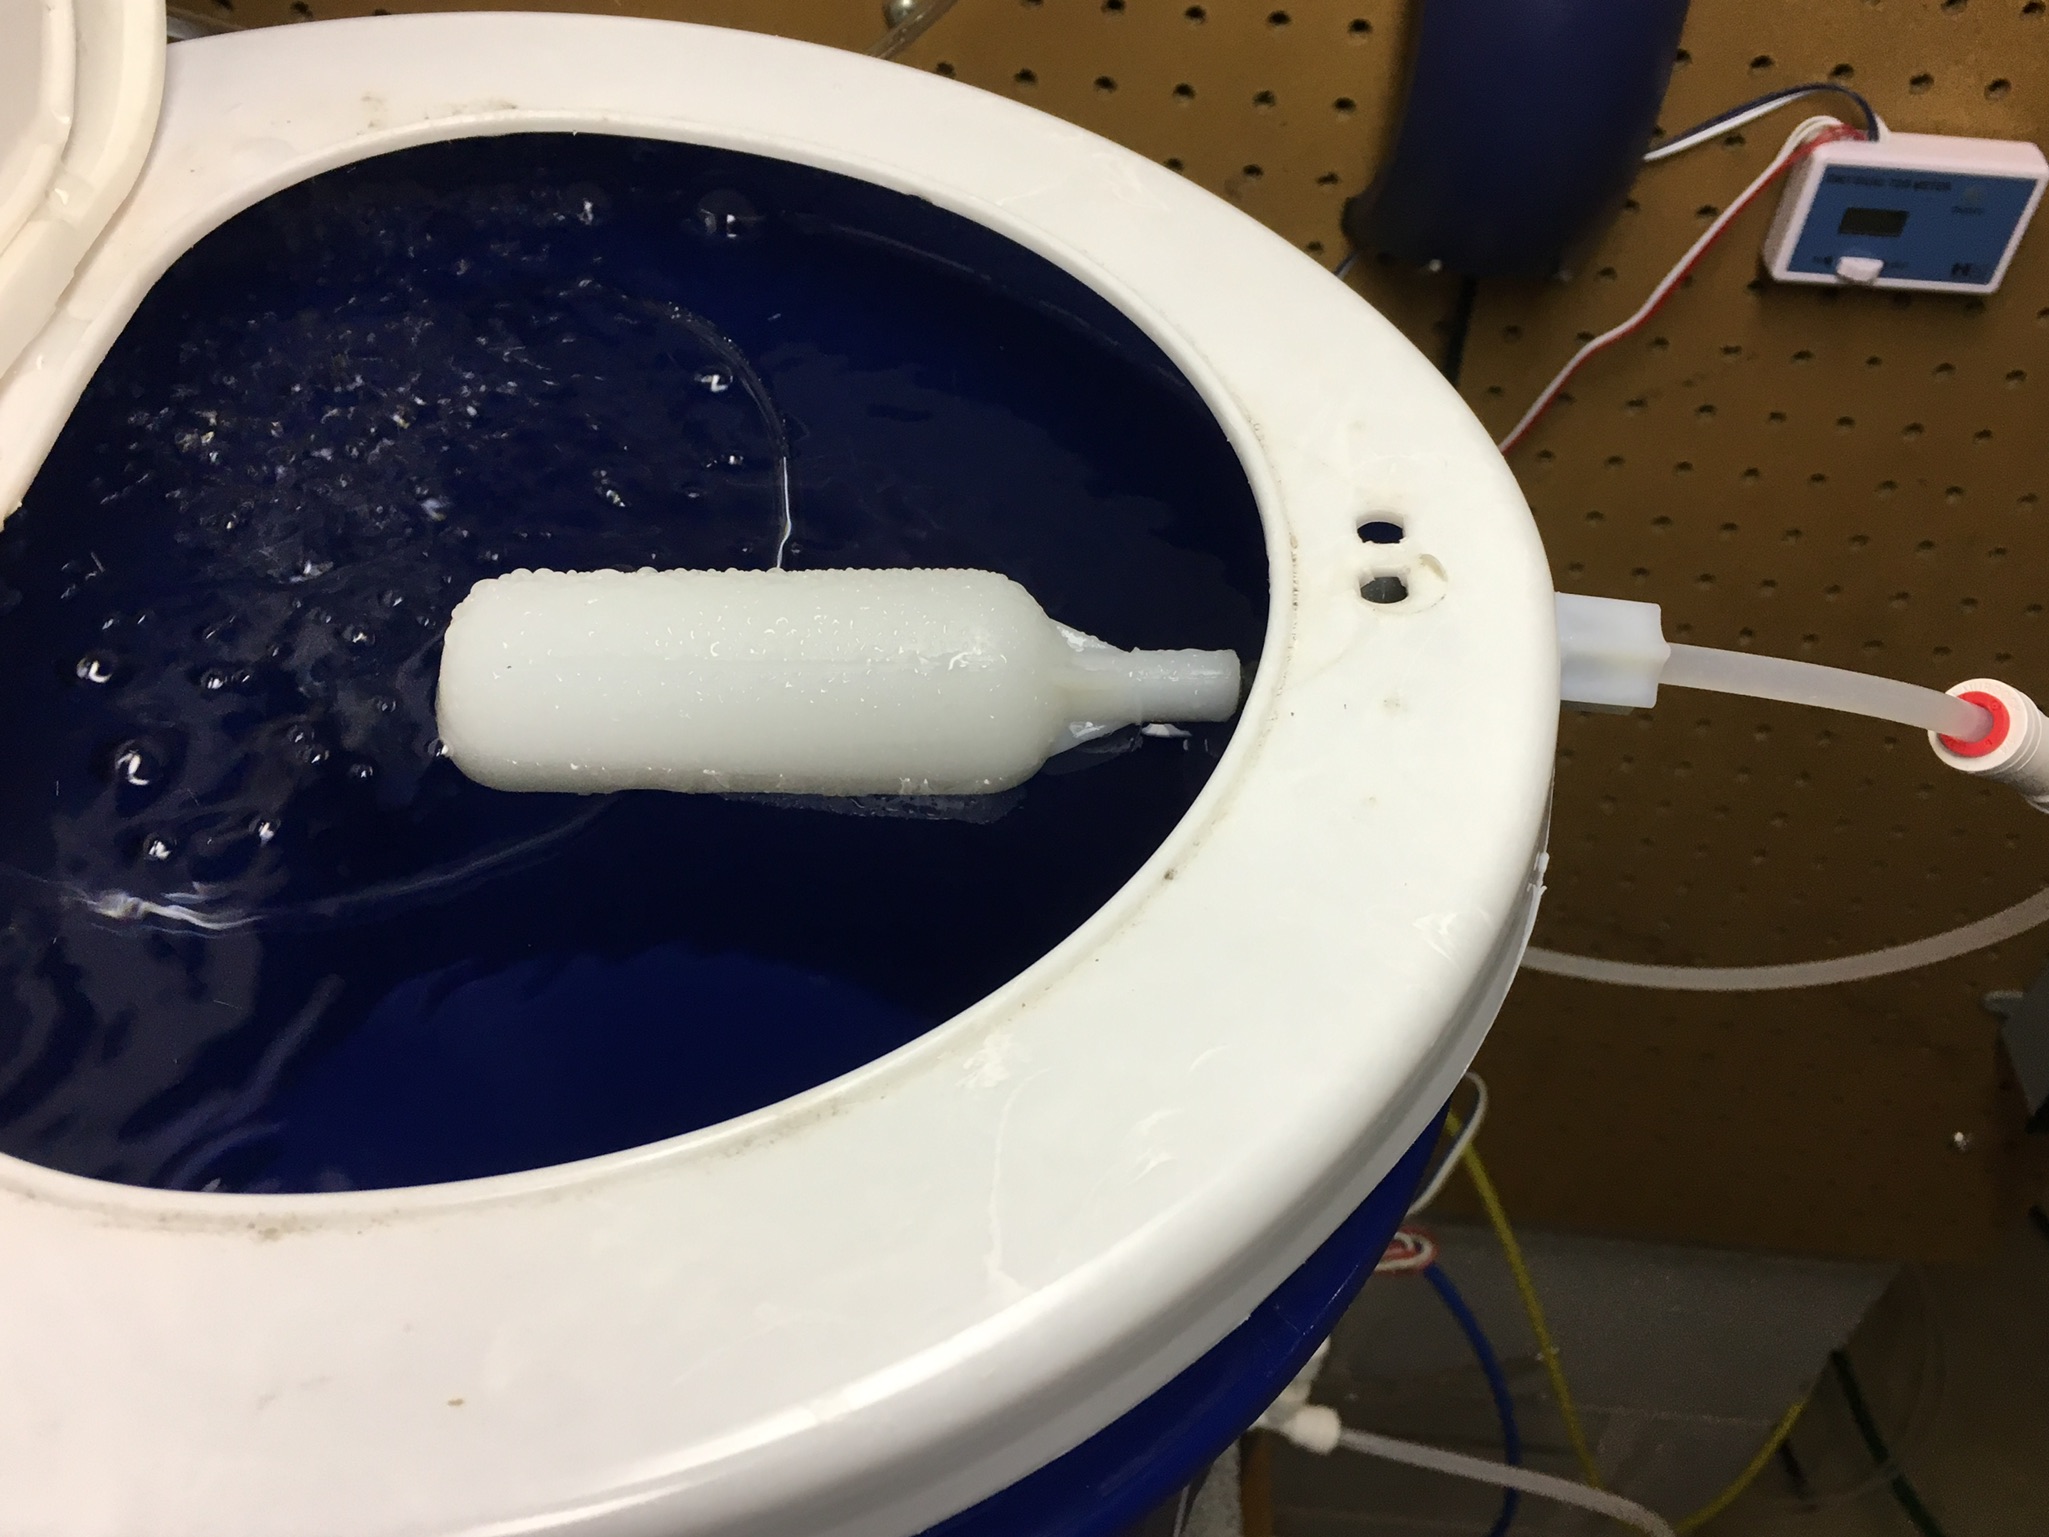
Inside the bucket is the float valve. I set it so I can mostly fill this bucket up.
And that’s it! Simple project with hopefully big and dry results.
Weird/New Way to Frag Zoas and Palys

I think we are all familiar with the standard way to frag zoas and palys. You cut them off a rock or cut a frag plug and glue them on another. Pretty simple, right? I usually wind up whacking a few polyps in the process and as a result I’ve tended to just go with “natural frags” by putting a piece of rubble next to a colony and waiting until it grows onto it. I came across a really cool thread on Reef2Reef.com where “GoFish” talks about a new and quite possibly brilliant approach. Just cut the top of the polyp off an glue it to a plug and you wind up with two polyps…. How could that work!?
Kessil A360WE UV Booster DIY

I really like the color on my Kessil A360WE, but I felt like my corals could use some more pop. Our corals fluoresce under blue and purple light, particularly down under 450nm wavelengths. Kessil does have some power down in this range, but not as much as I would like it to and I don’t want the tank to be so blue it looks like Windex.