Ok, let’s face it… I’m terrible at getting back here to keep things updated. It’s been just over a month since my last update and I’m proud to say that as of 3 days ago the stand (minus the doors) is finished and the tank is back up and running! Woot woot! I’ll come back and talk about the last bits of construction work in another post, but you’d rather see the finished product now, right?!
Here’s the (almost) finished product!

I love the way it came out! The color matches the built-in bookshelves and my desk, there is a TON of space under the stand and the separate space for electronics is working out great! The height is perfect for when I’m sitting at my desk, which is immediately in front of the tank. It is a little tall for me to reach the bottom of the tank, but I can just reach it if I stand on my toes and stretch.
After getting the tank filled with NSW (a process that took me almost a week because I have high CO2 and I need to degass my RO water before the DI stage) I wound up having to swap out my return pump after realizing it was probably putting out maybe 200 gallons per house. Lucky for me, so many years in the hobby means I have tons of spare equipment in the basement. There is a QuietOne 4000 in there now temporarily with flexible hose. I’ll hard plumb that at some point. The biggest issue right now is if I have to disconnect it the process is VERY unpleasant.
Anyhow, let’s move on to the electronics…
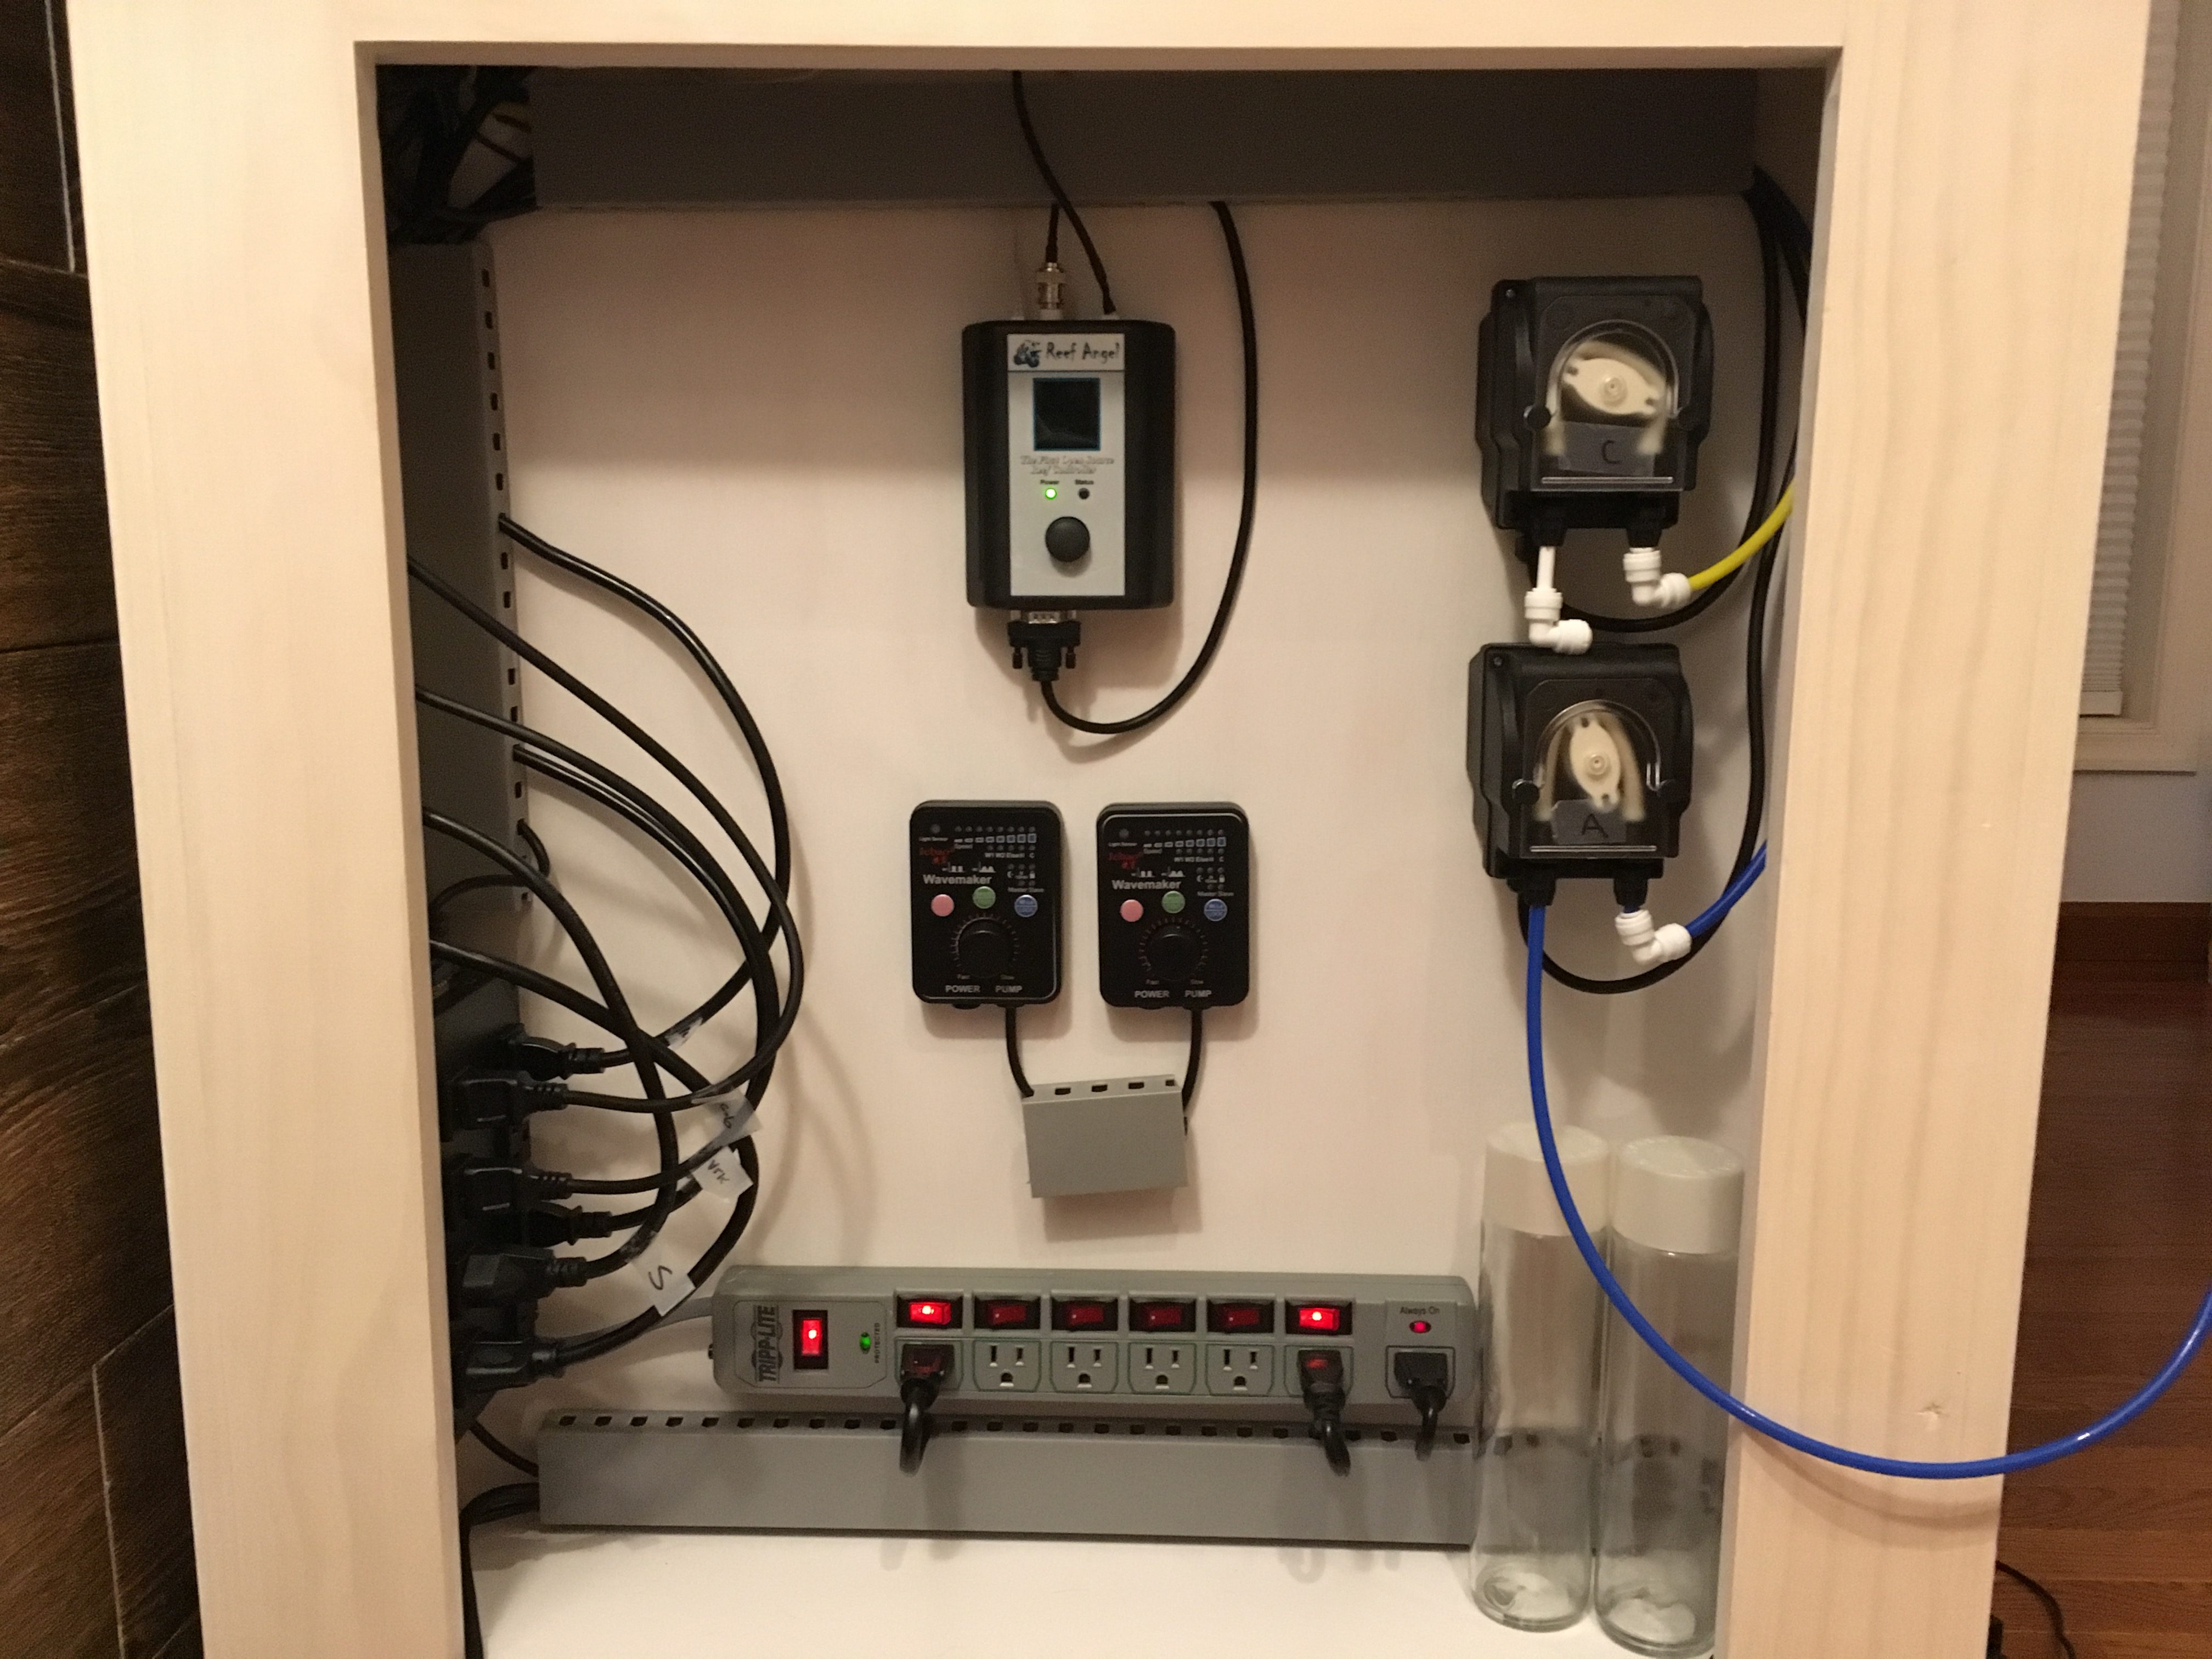
This is mostly boxed off from the wet side of the sump. I’m able to take this board out if I ever need to using just two screws. There’s a small opening at the top of about 1″ across the whole length. I’ll eventually cover it, but for now it is handy if I need to quickly drop a wire across. Currently my temperature probe runs up and over there because apparently my extension has gone bad.
I’d like to say I planned it, but as luck would have it there is just enough space for my Reef Angel’s power center to fit along the wall. It frees up a ton of space on the actual face of the electronics board so I can save it for something that I’d actually need to adjust.
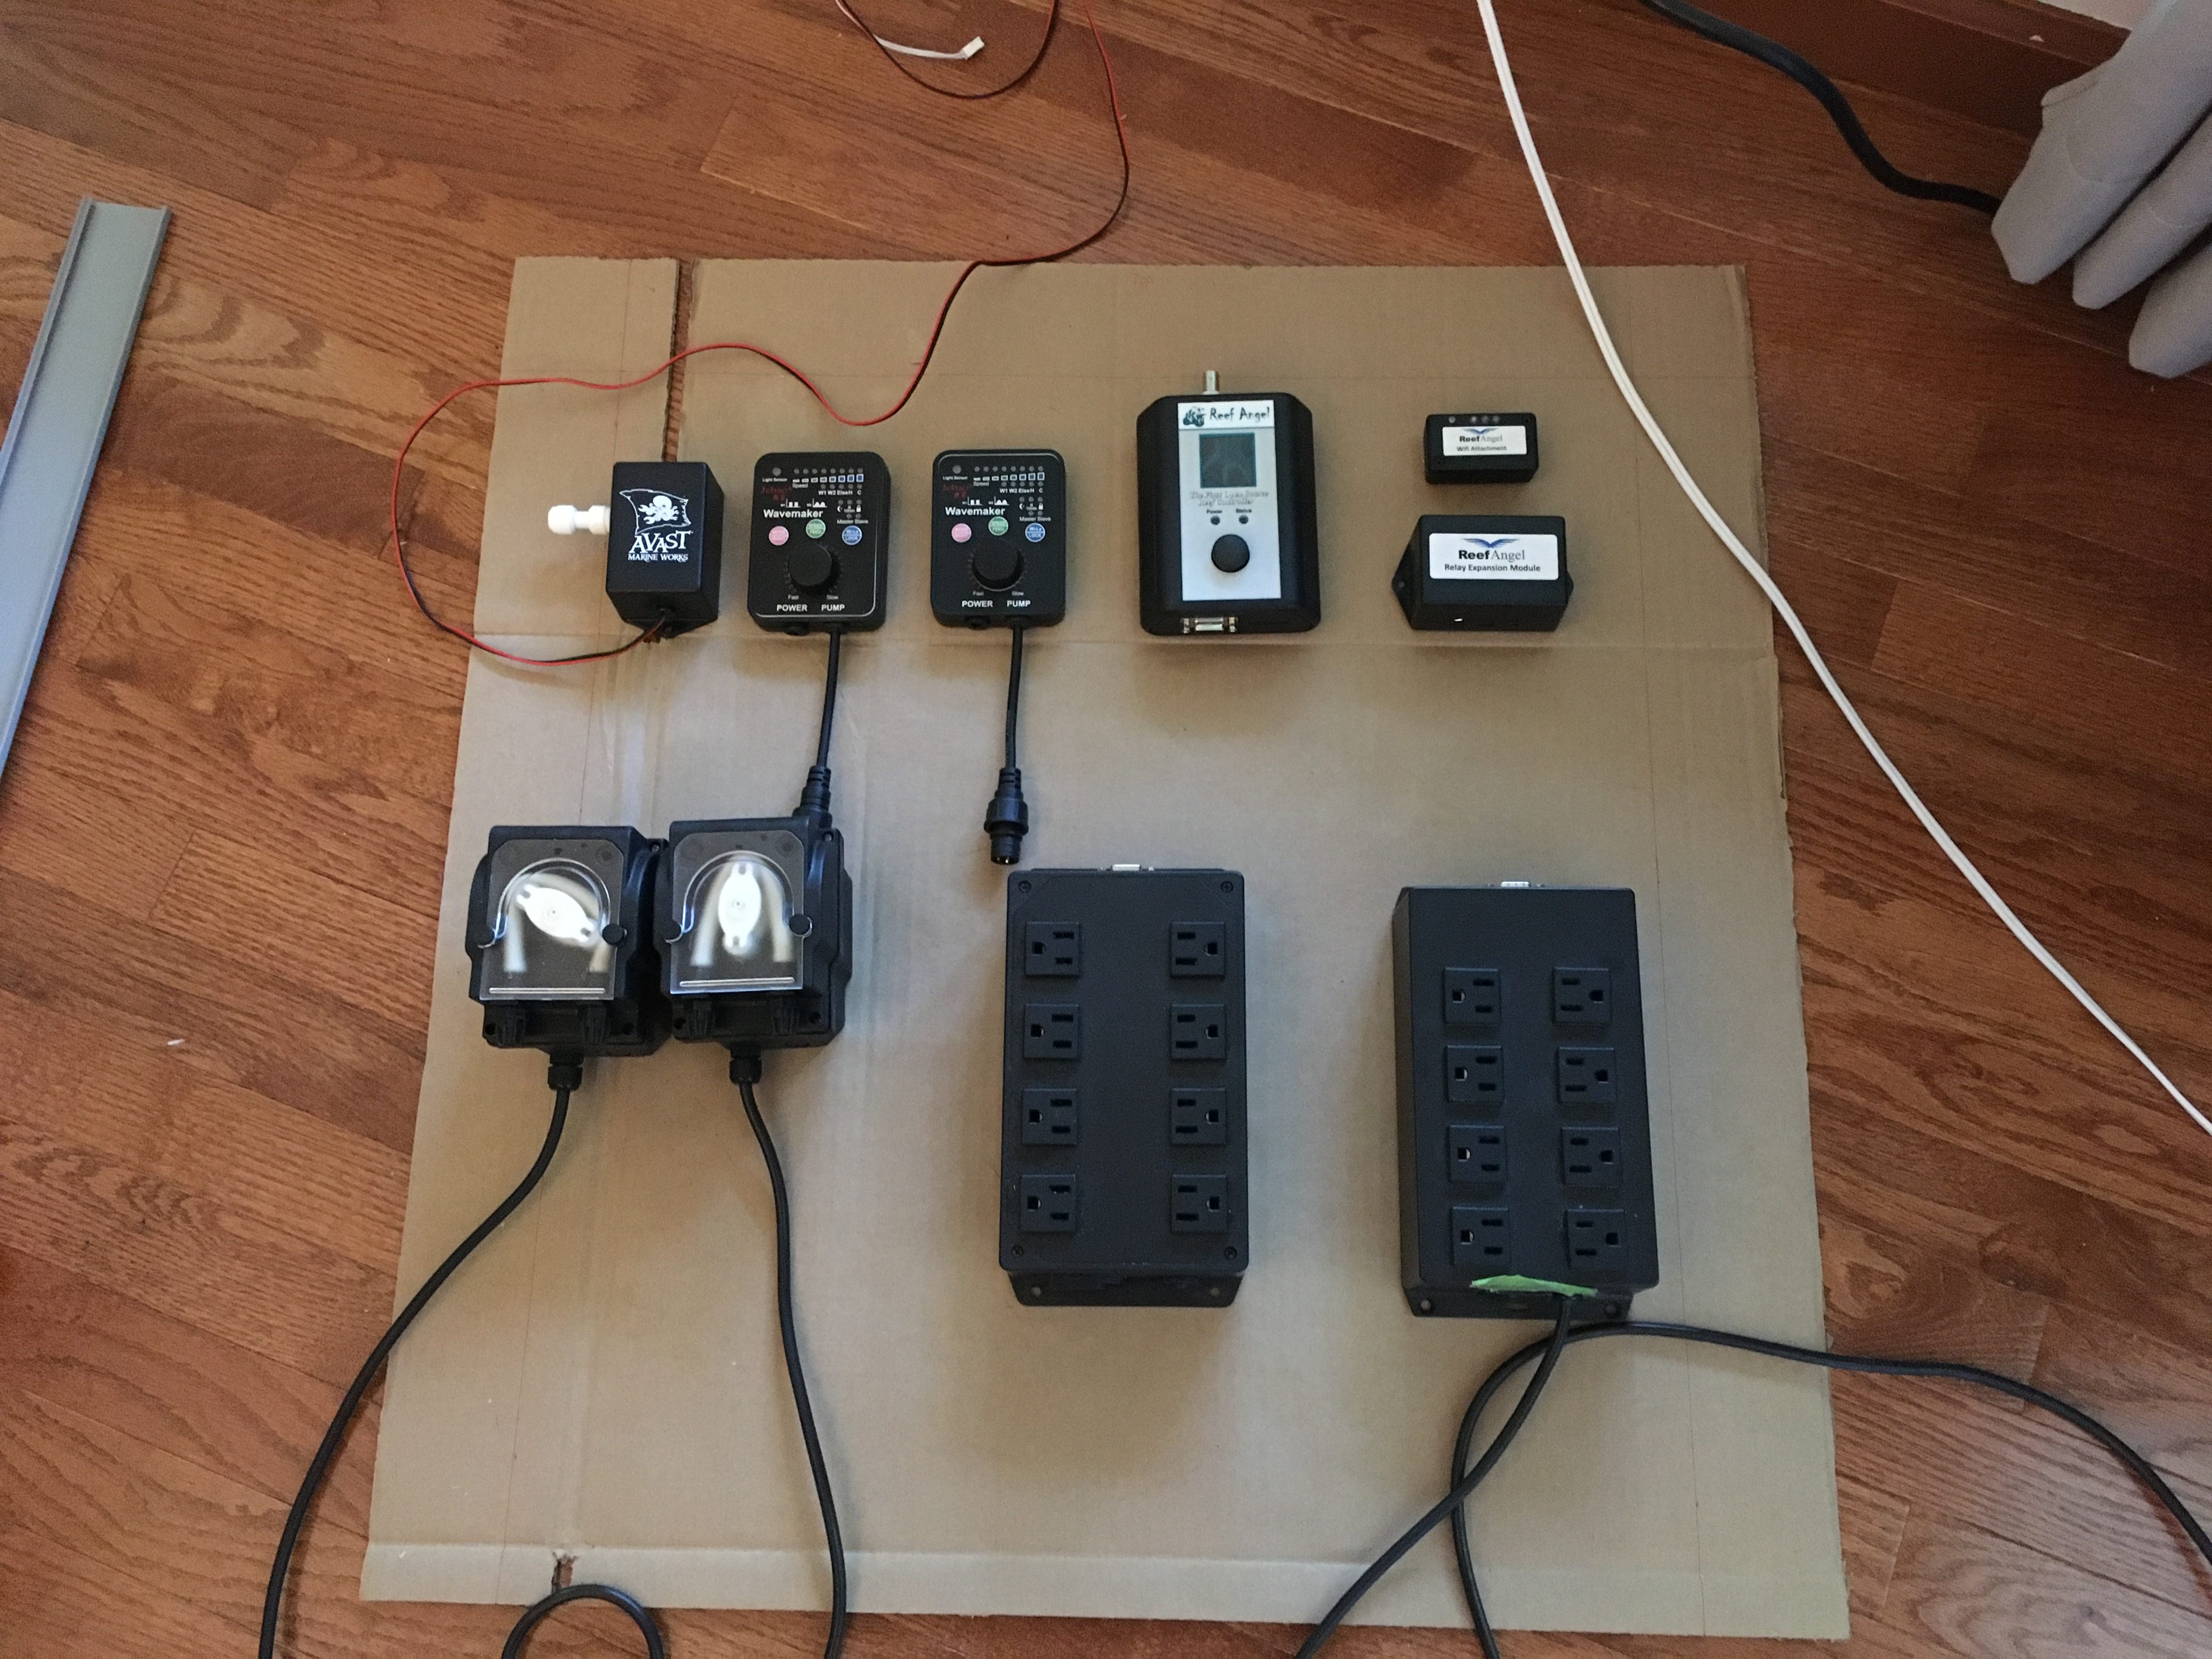
This layout isn’t perfect, but I think it came out cleanly. I initially was working on the layout using some cardboard cut to size with the edges of the stand marked off (see below). There was a lot I didn’t like about it. Overall though it just felt too blocky and there was very little room for anything new to be added. The major changes are: only using one power center and it is mounted on the left side and the Avast ATO sensor is mounted on the wet side. The ATO sensor is a totally sealed system and I never have to touch it so why take up space here?
On this build I opted to add a Tripp Lite power strip with switches for each individual outlet. There are plenty of devices that don’t need to be plugged into the Reef Angel and controlled, like the Radion and the sump light, so why take up the space? The power strip has a $25,000 warranty and it is an active surge protector. The Reef Angel plugs into the “always on” outlet for obvious reasons.
The last thing to mention are the two dosers. I put them on this side and opted to go with a pair of VOSS sparking water glass containers. They’re each about 1 liter and the fit perfectly in the corner of the electronics section. I don’t use much two-part so these should last a couple of weeks between refills. The dosers aren’t hooked up yet, so excuse the hanging connection there.
I ordered some waterproof and tear-proof labels that I’m going to print out to mark each of the outlets. That’ll make it a lot easier to figure out what is what when I need to hunt something down.
That’s all for now! Look for my out of order post coming up talking about the final bits of construction and finishing for the stand.