I have an amazingly supportive and understanding wife. She’s never said no to any of my aquarium projects. That said, I think the last time I flooded the basement making RO water pushed the limits. We have high CO2 in our water, so I need to degas it before running it through the DI stage. That means I need to fill up a bucket and run an air stone in it for 24 hours. It takes me about an hour to fill up this 5g bucket with my booster pump set to 85 PSI. I used to just set a timer on my phone and go down to the basement and shut the production off. That’s worked fine 95% of the time, but I’ve flooded the floor and my workbench at least 5 times. The last time I wound up with about 20 gallons on the floor. Whoops!
My booster pump has a pressure switch to shut down the pump and a solenoid to shut off the water flow. There’s really no reason I shouldn’t have this set up with a float valve to turn everything off automatically. Bulk Reef Supply makes a kit with everything you need to do this for just $25. (Click Here)
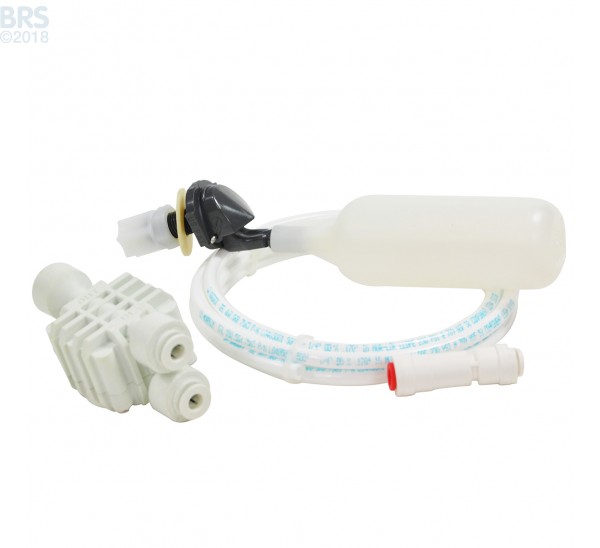
In the kit you get a fixed position float valve, some rigid 1/4″ tube, a check valve and an auto shut off valve. Installation took me all of 5 minutes. Let’s review each part and what they’re for…
The fixed position float valve is very similar to how your toilet works. It is just a simple hollow space that floats when the water reaches it. Once enough water is in the bucket, the valve at the back of it closes. There are some options out there for adjustable position float valves, but don’t buy them! You’re liable to forget to check if it is tight and the valve will never shut off.
The rigid tube is fairly self explanatory. They give you plenty. One section goes between the compression fitting at the back of the valve and the output side of the check valve. The rest goes either to your DI output or your RO output and hooks into the other end of the check valve.
The check valve is important. You don’t want water to flow back into your RO system and you need it to build up the needed pressure to shut the system down when the valve closes. Make sure you have the flow pointed into your bucket.
The final piece of the puzzle is an automatic shut off valve. This closes the drain line when no water is flowing through the system. If you didn’t use this, even though you aren’t making product water you would still be putting water down the drain. This simple device senses when no product water is moving through and also shuts off the drain line.
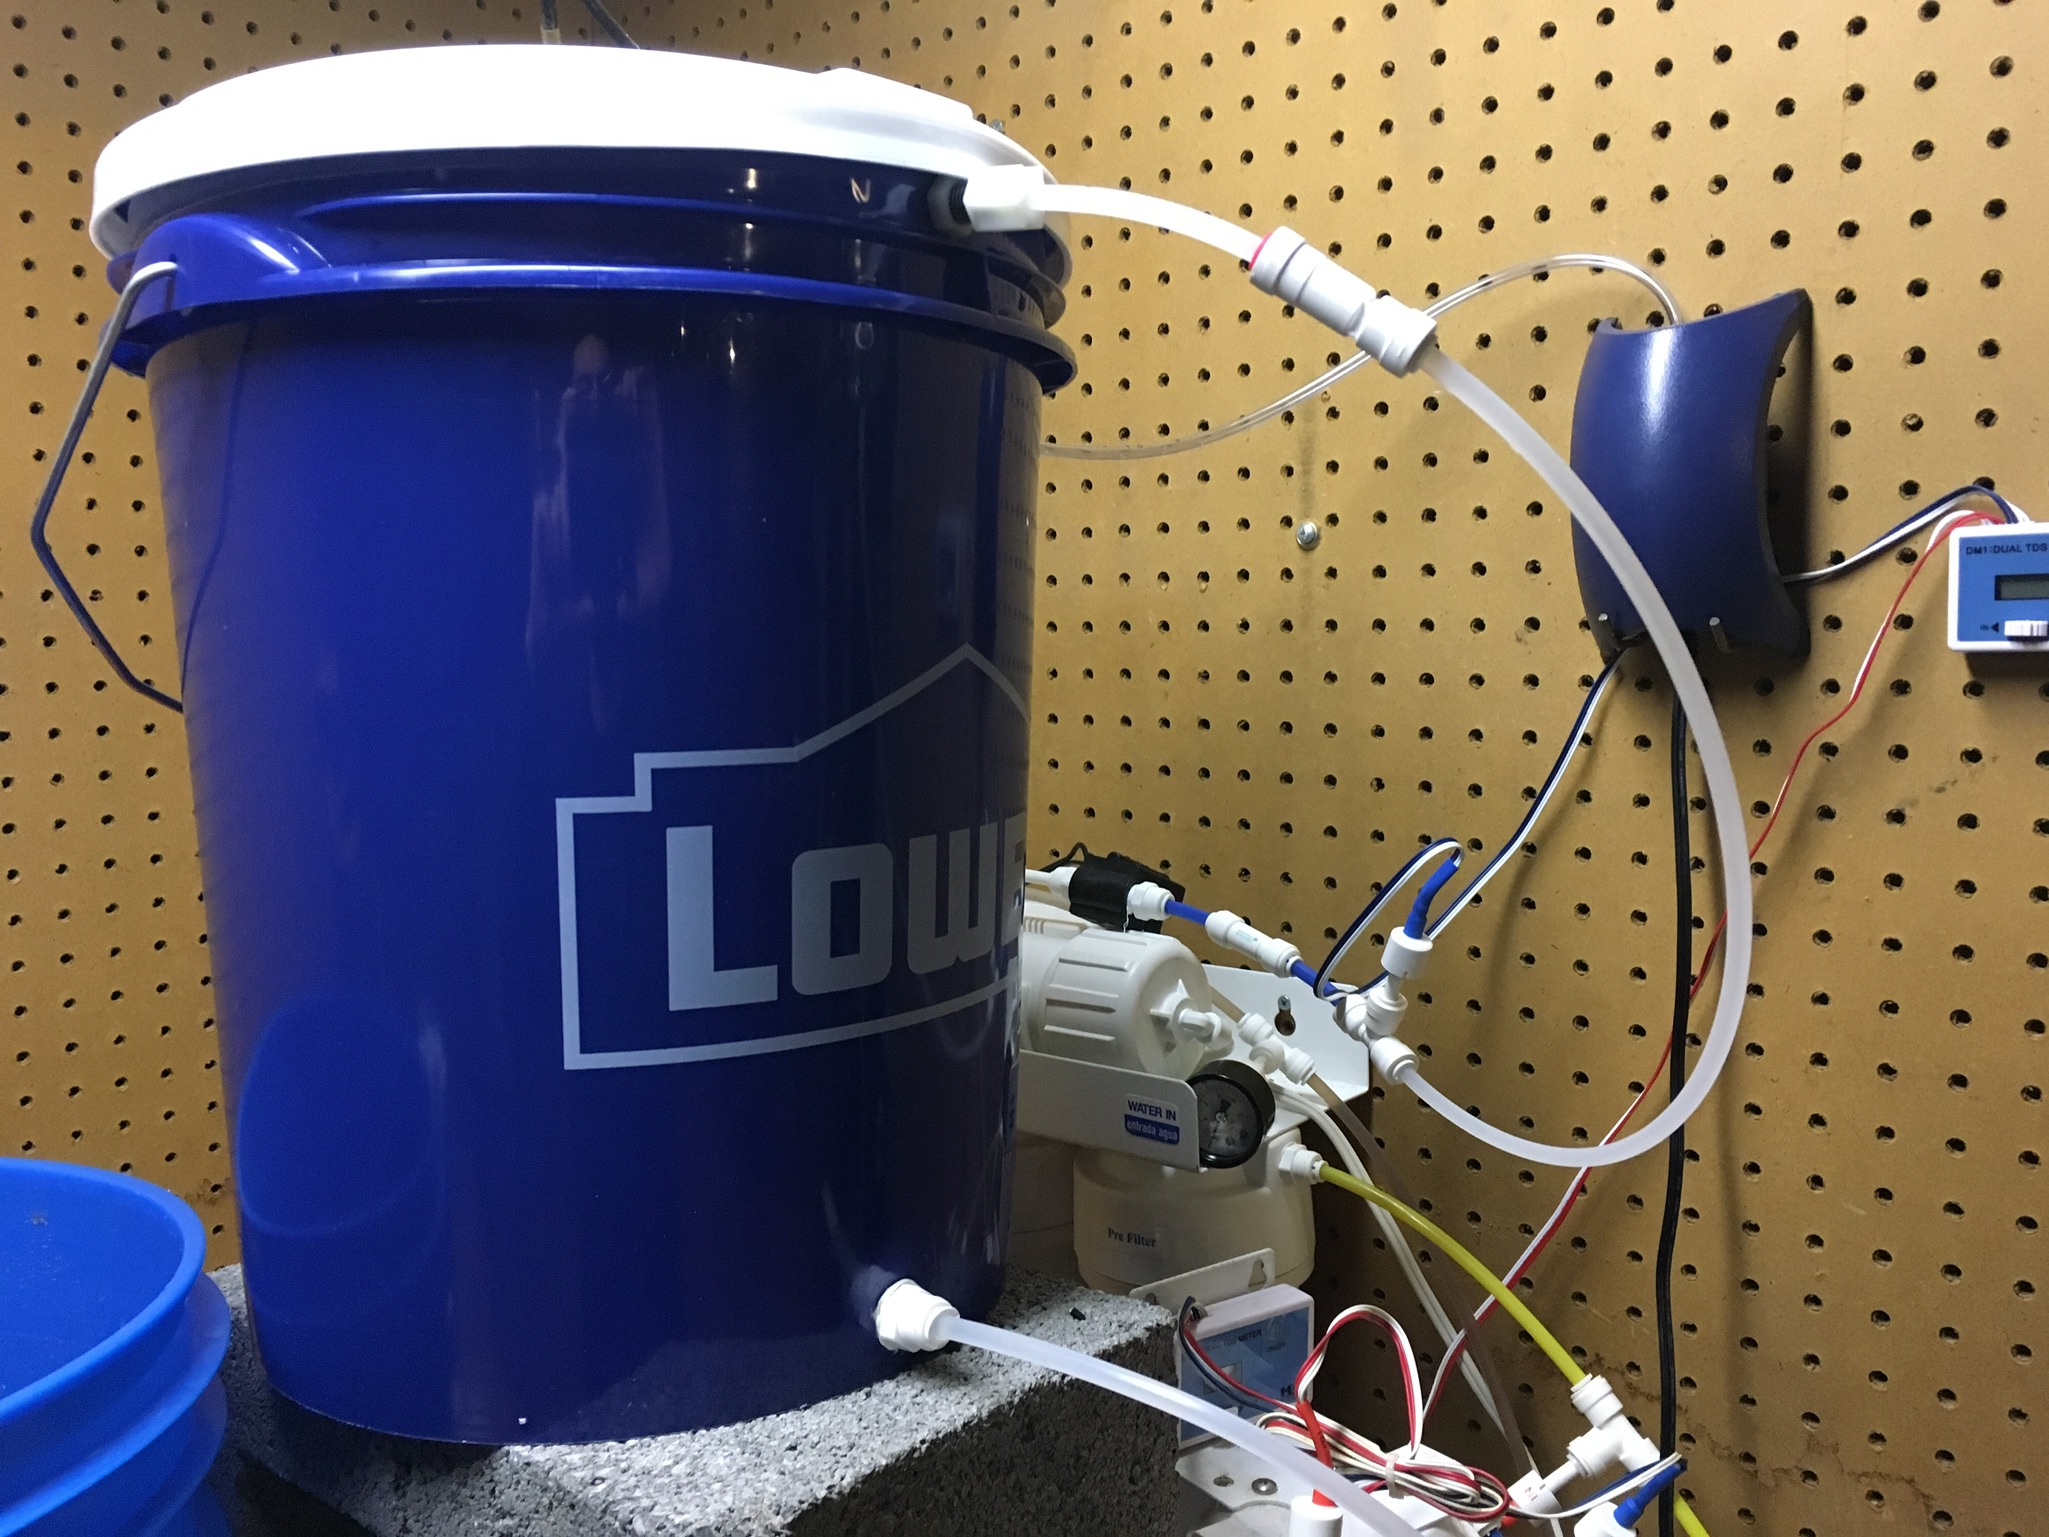
Here’s what my completed setup looks like. You can see the output of my RO (which is connected to my TDS meter) running up to the input of the check valve (the white side). Then from the check valve into the compression fitting on the valve. (The tube coming out of the bottom goes to my DI stage after this water is degassed)
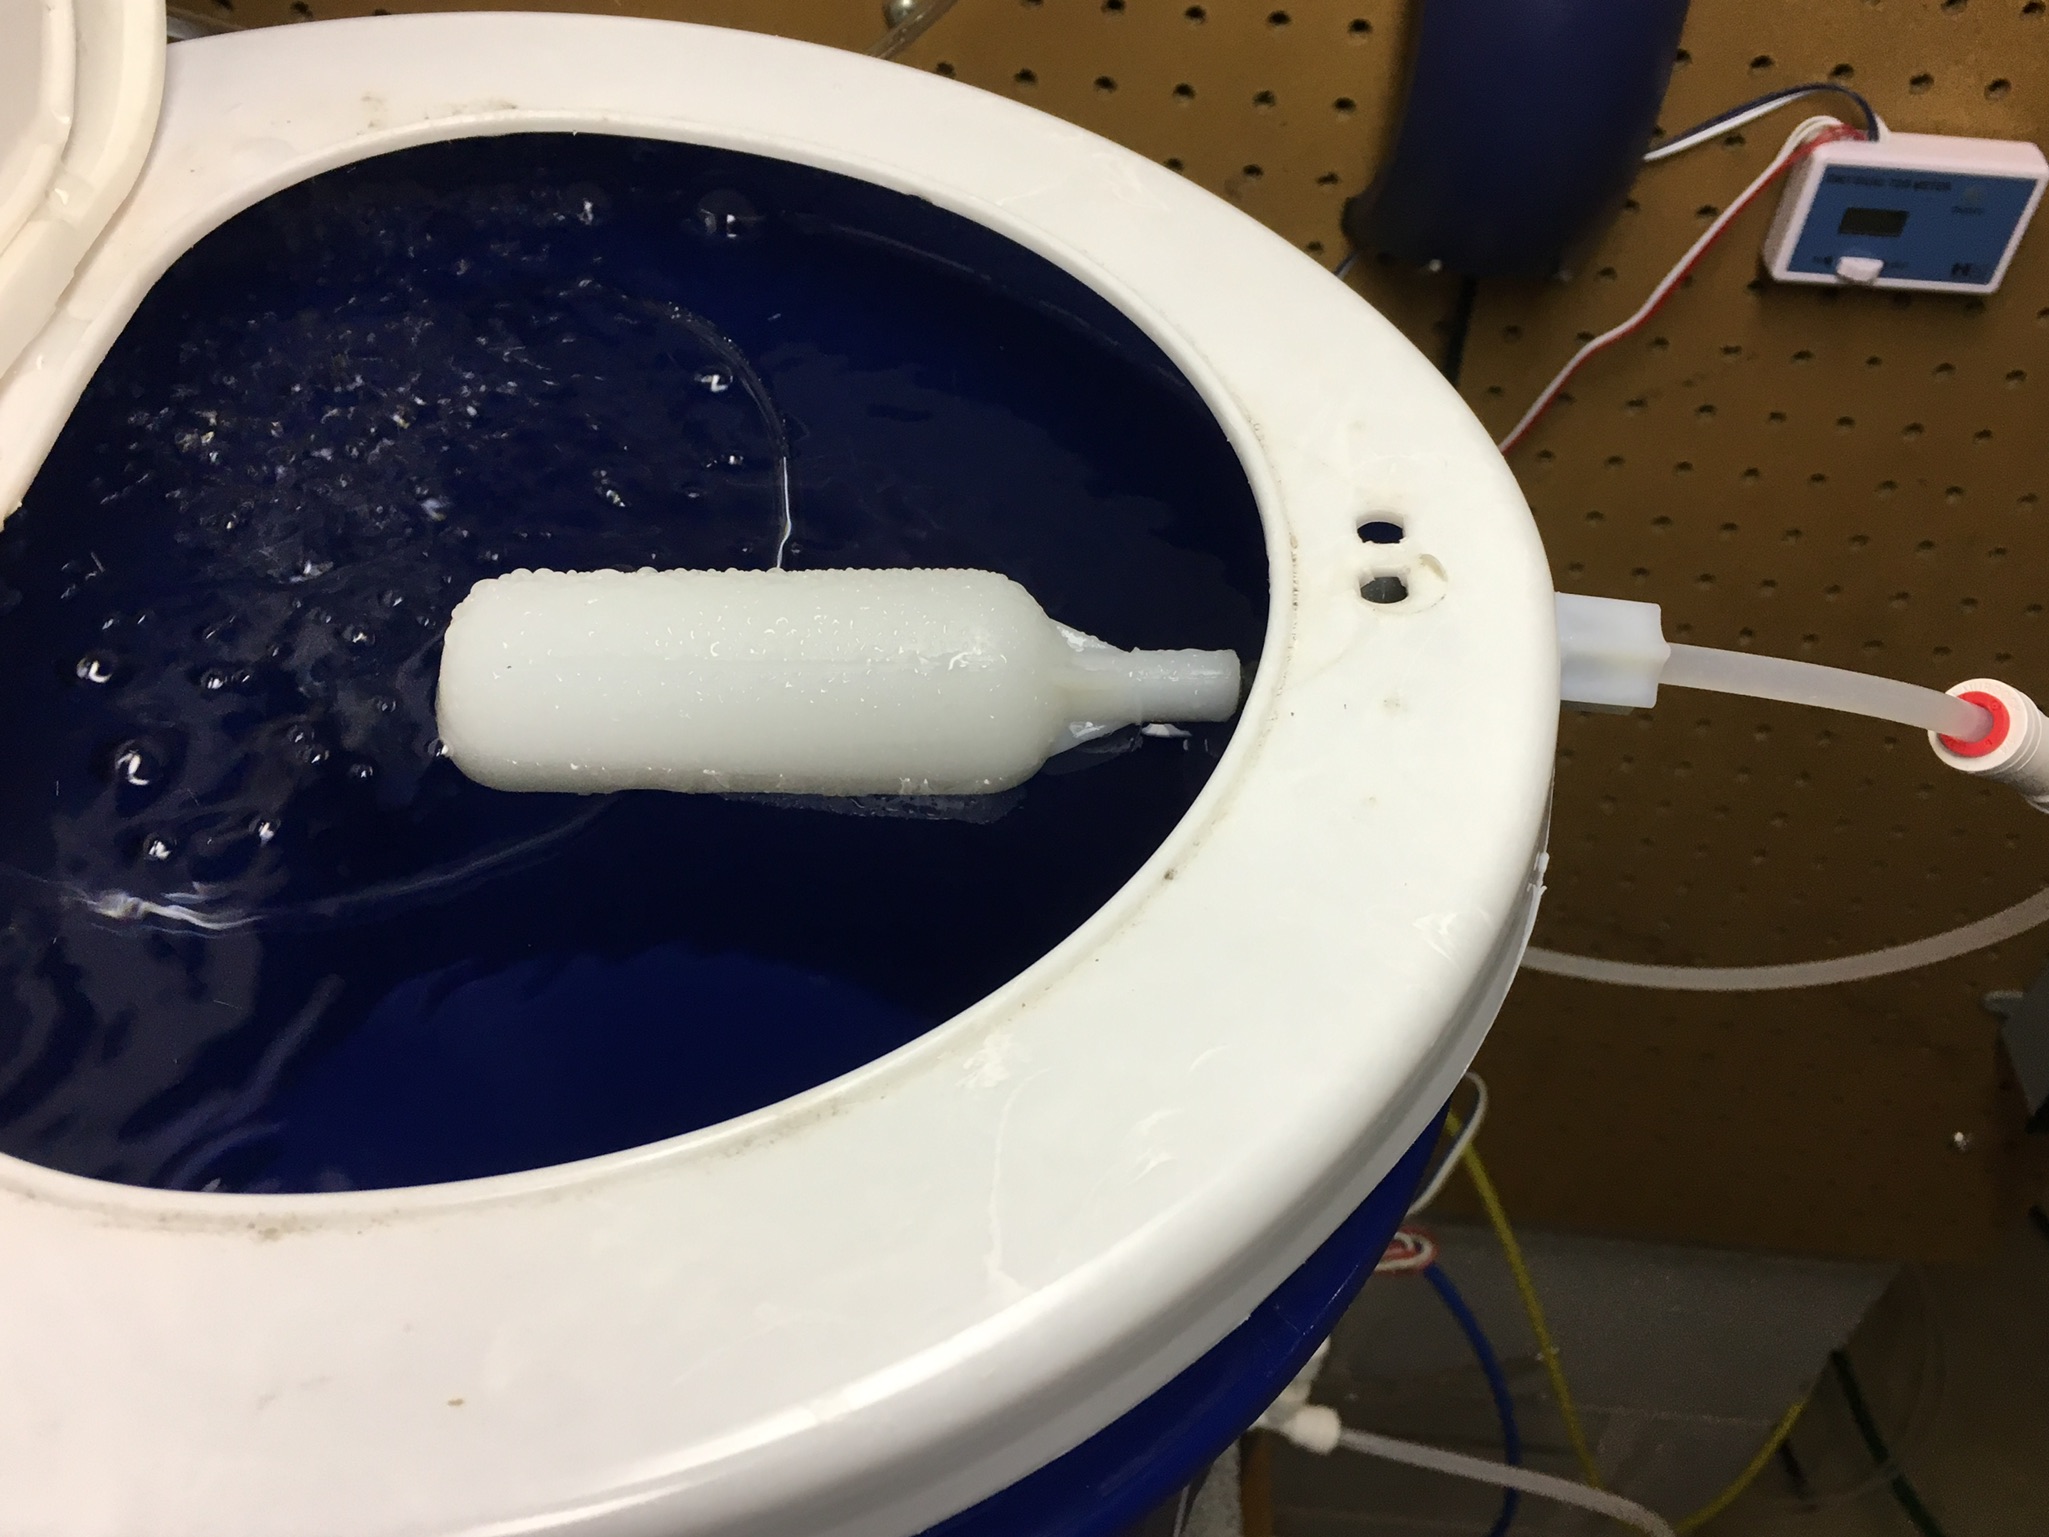
Inside the bucket is the float valve. I set it so I can mostly fill this bucket up.
And that’s it! Simple project with hopefully big and dry results.
Hi, I came across your website when researching how to eliminate CO2 for an RODI system. Do you degas in the 5 gallon bucket and then use gravity to feed it through the DI? Do you have another larger container that you use to store the water after going through DI?
I’m looking to do something similar. I live in Pittsburgh and have well water, so with 440TDS and what I’m assuming is CO2, I can only make around 70 gallons before the DI resin is depleted. I was looking at adding 2 more stages for seperate cations and anions but this seems like it will be more cost effective in the long run.
Yep, you’ve got it. I fill a 5g bucket with RO water first. I run my air stone in there for at least 24 hours (usually a lot longer just because I make water as soon as I use it). Then I gravity feed it through DI into a second 5g bucket that’s on the floor. I’m on the other side of PA from you, also pulling from a well. What you’re describing sounds like excess CO2. You could also do a bubble test to confirm….
Take some water from the tap (preferably without an aerator) and measure the pH. Put an air stone in it and run it outside for 30 minutes. Remeasure the pH. If it went up, you have excess CO2.
I actually came across another thread of yours where you made a degassing chamber. Did you make that before or after this? I made one similar, but used 4” pipe. I was thinking of putting a second line an inch or two from the top to drain into my laundry room sink to prevent it from flooding.
My other thought was to implement the auto shutoff on the brute container and shut off the boost pump, it needs to see a back pressure, which it wouldn’t see with this. I saw there is an optical shutoff on BRS for $70, and I was thinking of installing that on the top of the degasser, to shut off the rodi unit, and then build the pressure in the auto pump shut off. Does that sound like it would work? I’d really like to have it automated to keep a full reservoir of water, but with the degasser im not sure if that’s possible.
That old post on R2R was where I first started with degassing. It worked well, until the DI chamber wasn’t keeping up with the RO inflow and it overflowed. The nice thing about that design is that it was “on-demand” versus my current design which takes 24 hours. It didn’t eliminate all of the CO2, but it worked well enough in a pinch when I needed water fast. Your idea for a drain is a good one, but it means you’re dumping RO water down the drain.
You could use a float valve to shut off the pump and stop the process. One issue to consider is that an RO system takes time to bring the TDS levels down from when it first starts. Ideally, you would want to fill the entire bin each time rather than have it come on and off to replace a few cups of water. You could use two floats to only refill when the bottom float drops. There’s also a simpler way to do this with pipes, but I can’t recall what it is called off the top of my head.
I think you’ve inspired me to write a post about my degassing setup for the site. Thanks! 🙂
Cool, I’m looking forward to it! One reason I went with the 4” pipe was that it would have a larger capacity and more surface area for the gas exchange to happen. I’ll have it about 4’ above my di chambers, which are upflow, so I’m hoping that it will have a decent head pressure and flow fast enough to keep up. One of the other members who posted on that original thread was using a 4” and said he didn’t have problems with it overflowing, so the extra drain line would be for emergencies. I suppose I could save the RO water, but it’s really not costing much to waste a little if I had to. My main objective is saving money on DI cause I go through it in about 50-60 gallons, and to save some space without having another large brute container for degassing.
I still have to hook it up and try it, so we will see how the design works. You are right, in that it’s better to make large batches at a time because of the TDS creep, so maybe it’s best doing it like that.